How to configure and use the UPI links?
Step-by-Step Process to set and send UPI links
Login to the BytePhase portal then click on a business logo
- Then Click on Business Settings ->Business Information
- Then click on the UPI link tab
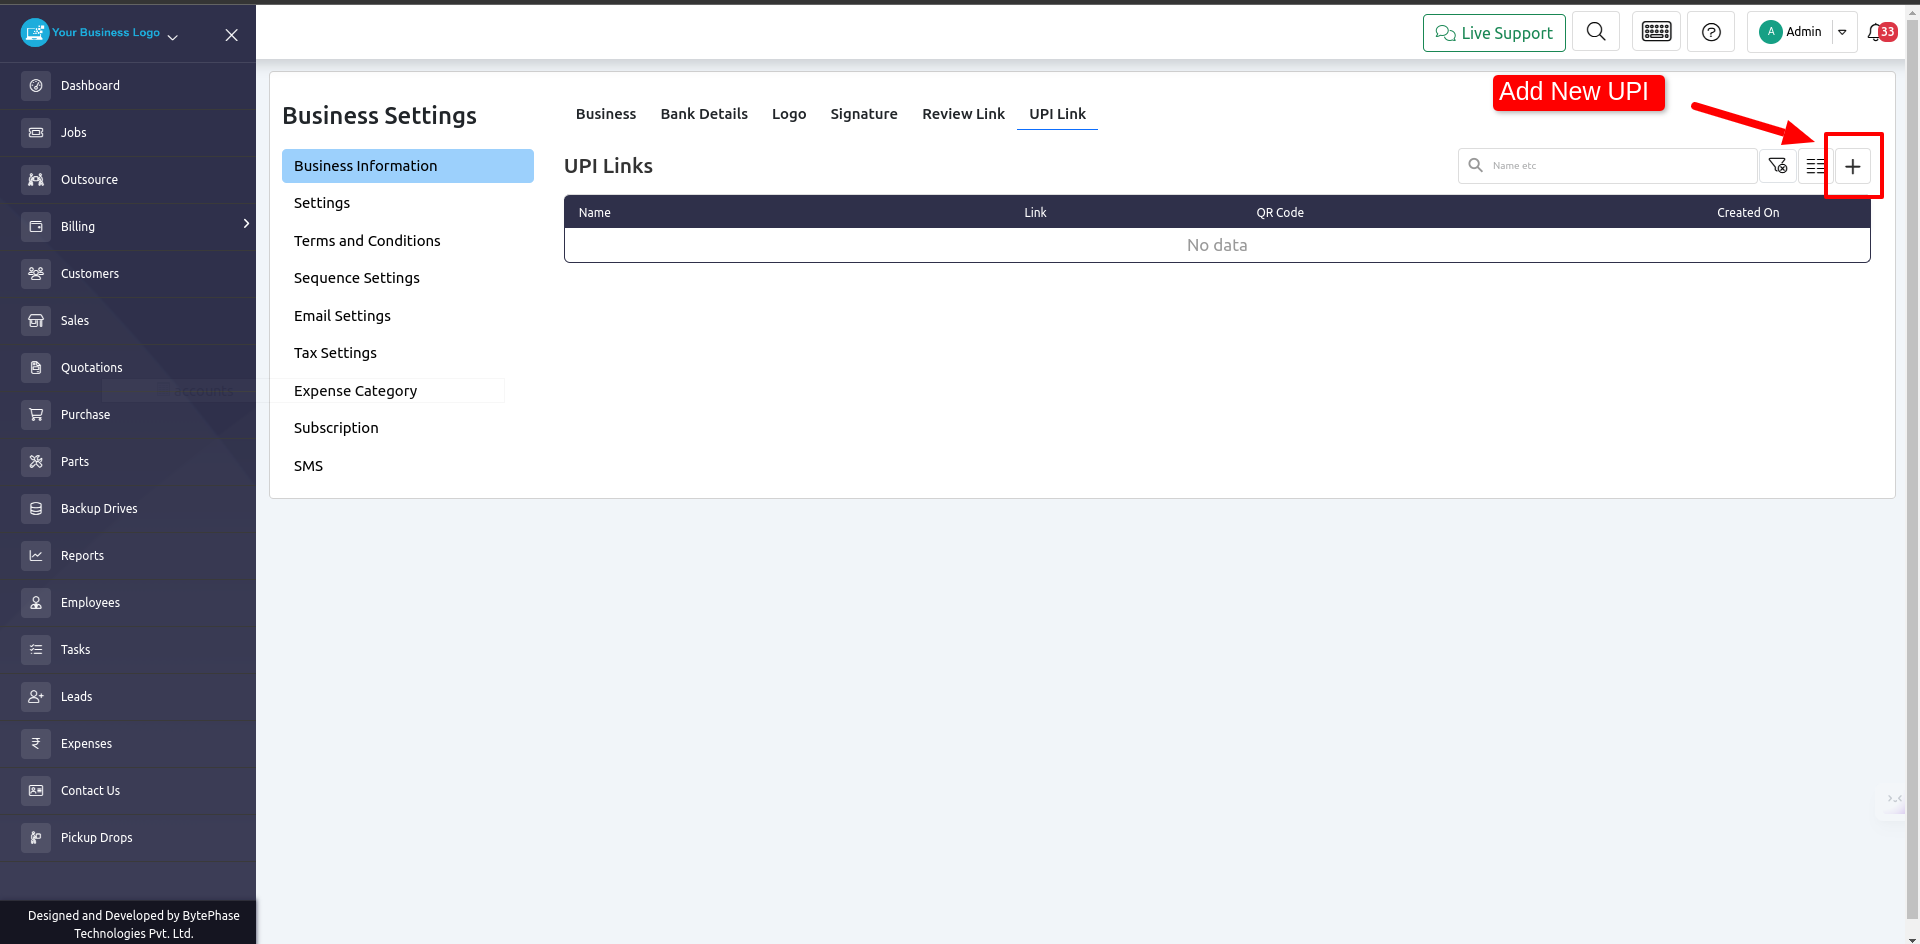
- Click on the [+] button to add a new UPI link
- Afterward, a popup appears on which you have to enter the bank name or anything to identify the UPI link
- Copy your UPI link and paste it.
- There will be one select box where you can choose your barcode that is cropped perfectly
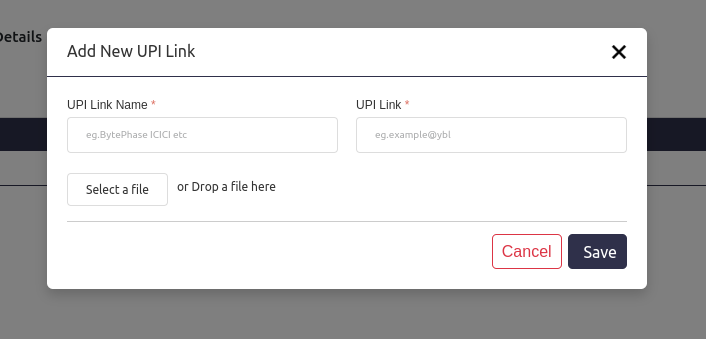
- When it’s finished, you’ll see one row with your barcode and your UPI link
- Over there, you have the option of deleting that UPL link
- You have the power od add multiple UPI links there
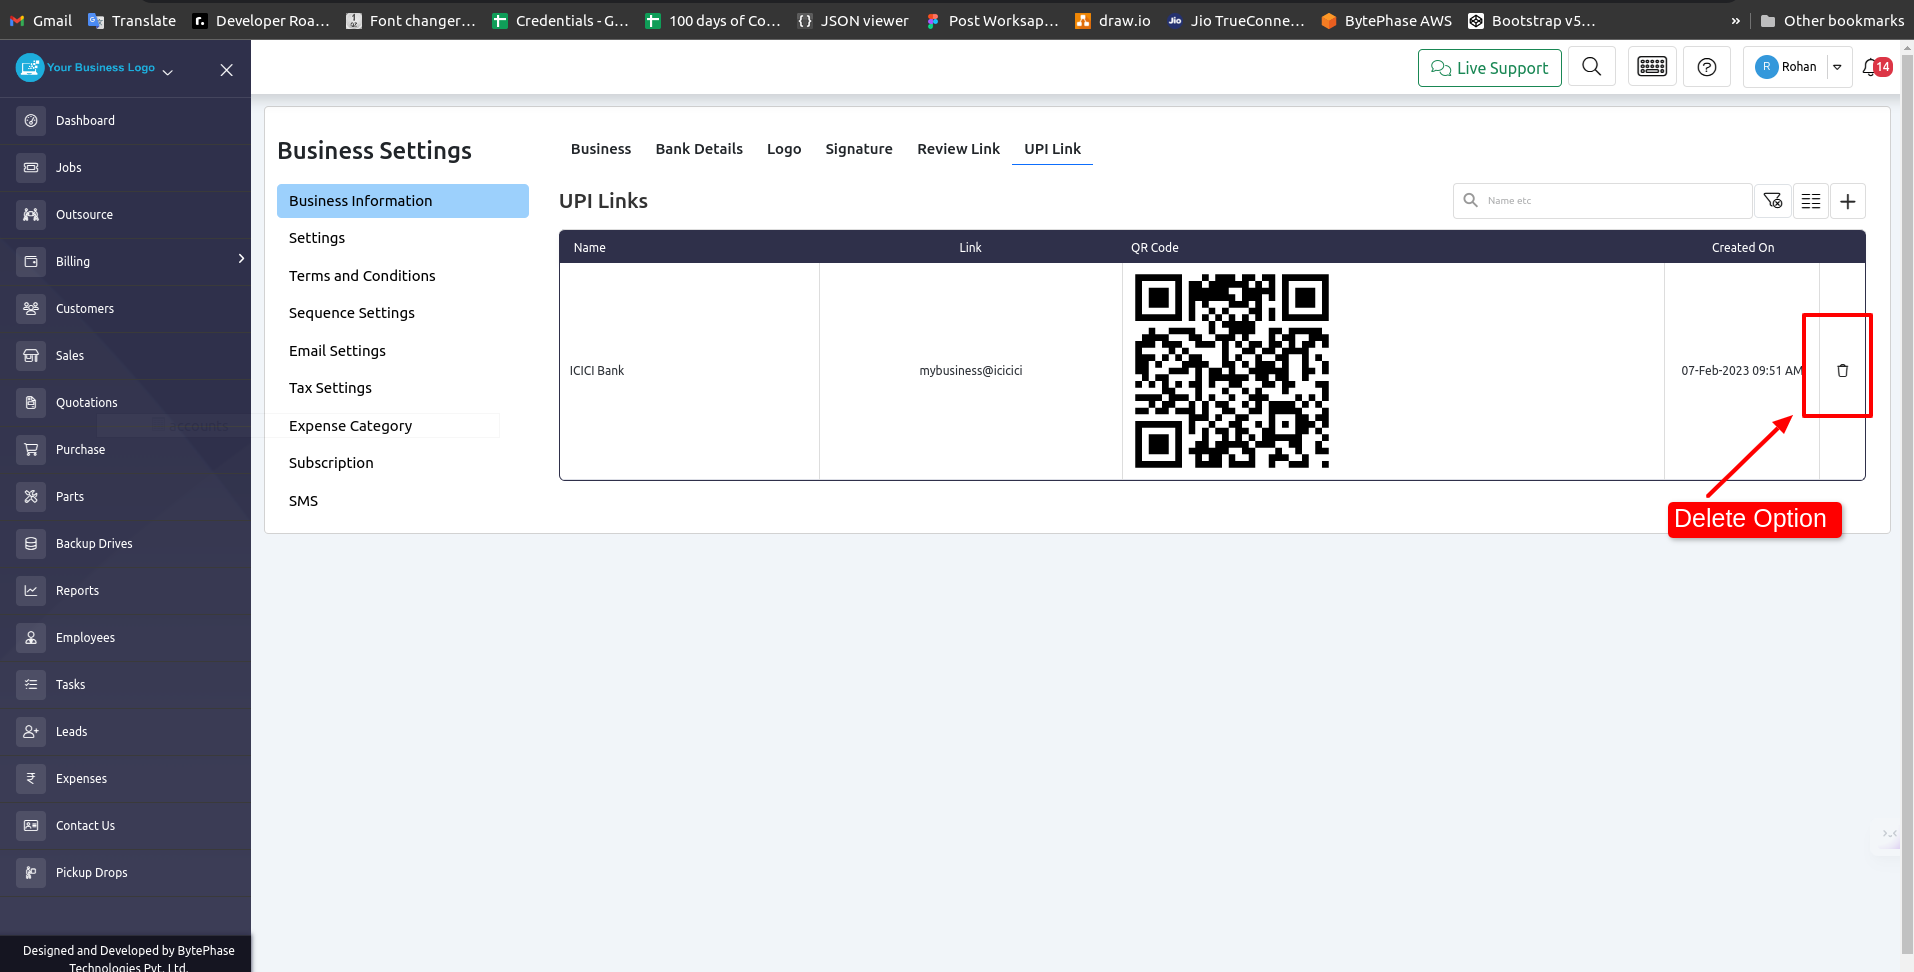
- Now you have Configure UPI link perfect
Now Let’s See How to use that Link
- When you click on the job-action button in your job tab, you will see one option:
- Send UPI link
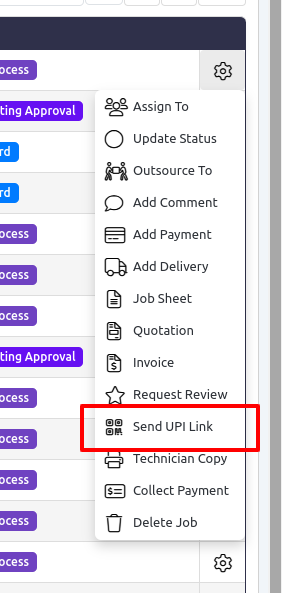
-
- You will see one pop-up when you click on that button
- Select the UPI link from the dropdown on that popup
- Send that link via SMS, email, push notification, and WhatsApp with a comment on it
- Cunningly, you have these send UPI links options on both jobs and sales
- We have successfully configured and learned how to use that UPI link
Great job! ???
You’ve successfully set up and mastered using the UPI link with Bytephase.
Now, handling payments and transactions becomes a breeze with its secure and convenient features.
Explore the various possibilities this integration offers for your business needs.
If you require any assistance, don’t hesitate to reach out to the dedicated Bytephase support team. Embrace the efficiency and ease of the UPI link within Bytephase


