
How to Set Business Working Hours in BytePhase CRM

Introduction
Manage customer interactions, bookings, and check-ins with precision
Setting accurate Business Working Hours in BytePhase CRM is an important step for any service-based business. Your configured working hours directly control when customers can interact with your services—whether it’s booking a schedule pickup, creating a job ticket, or completing a self check-in.
In this guide, we’ll walk you through why business hours matter and how to set them up inside BytePhase CRM, and where they fit into the rest of your repair shop management software setup.
Step-by-Step: How to Set Business Working Hours in BytePhase CRM
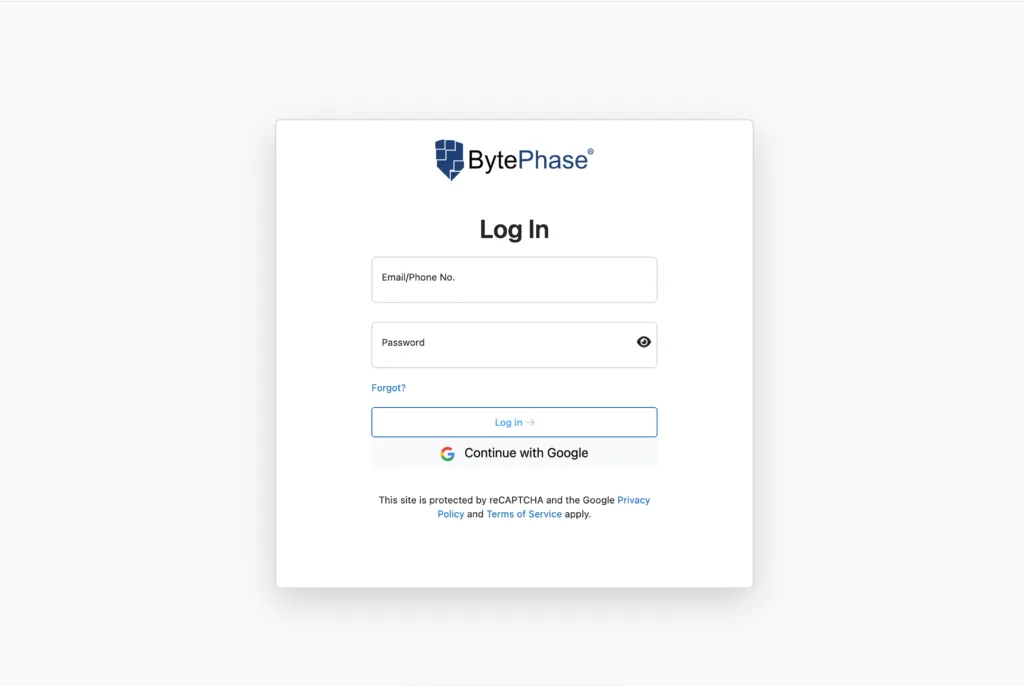
Step 1: Log in to BytePhase Portal
- Start by visiting the BytePhase login page and signing in with your registered email or phone number and password.
Step 2: Navigate to Business Settings
- Click your user profile icon at the top right of the dashboard, then choose “Business Settings” from the dropdown menu.
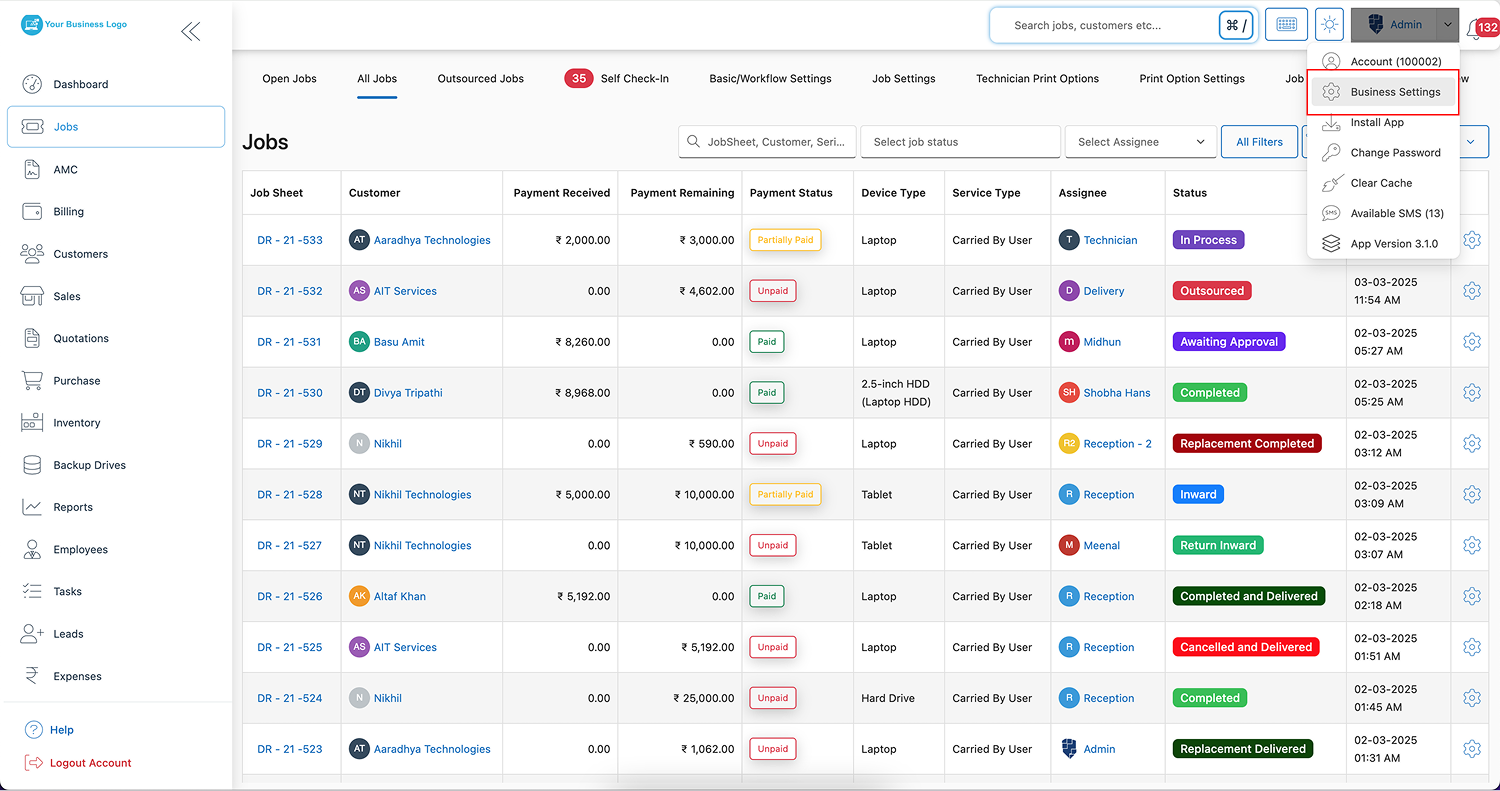
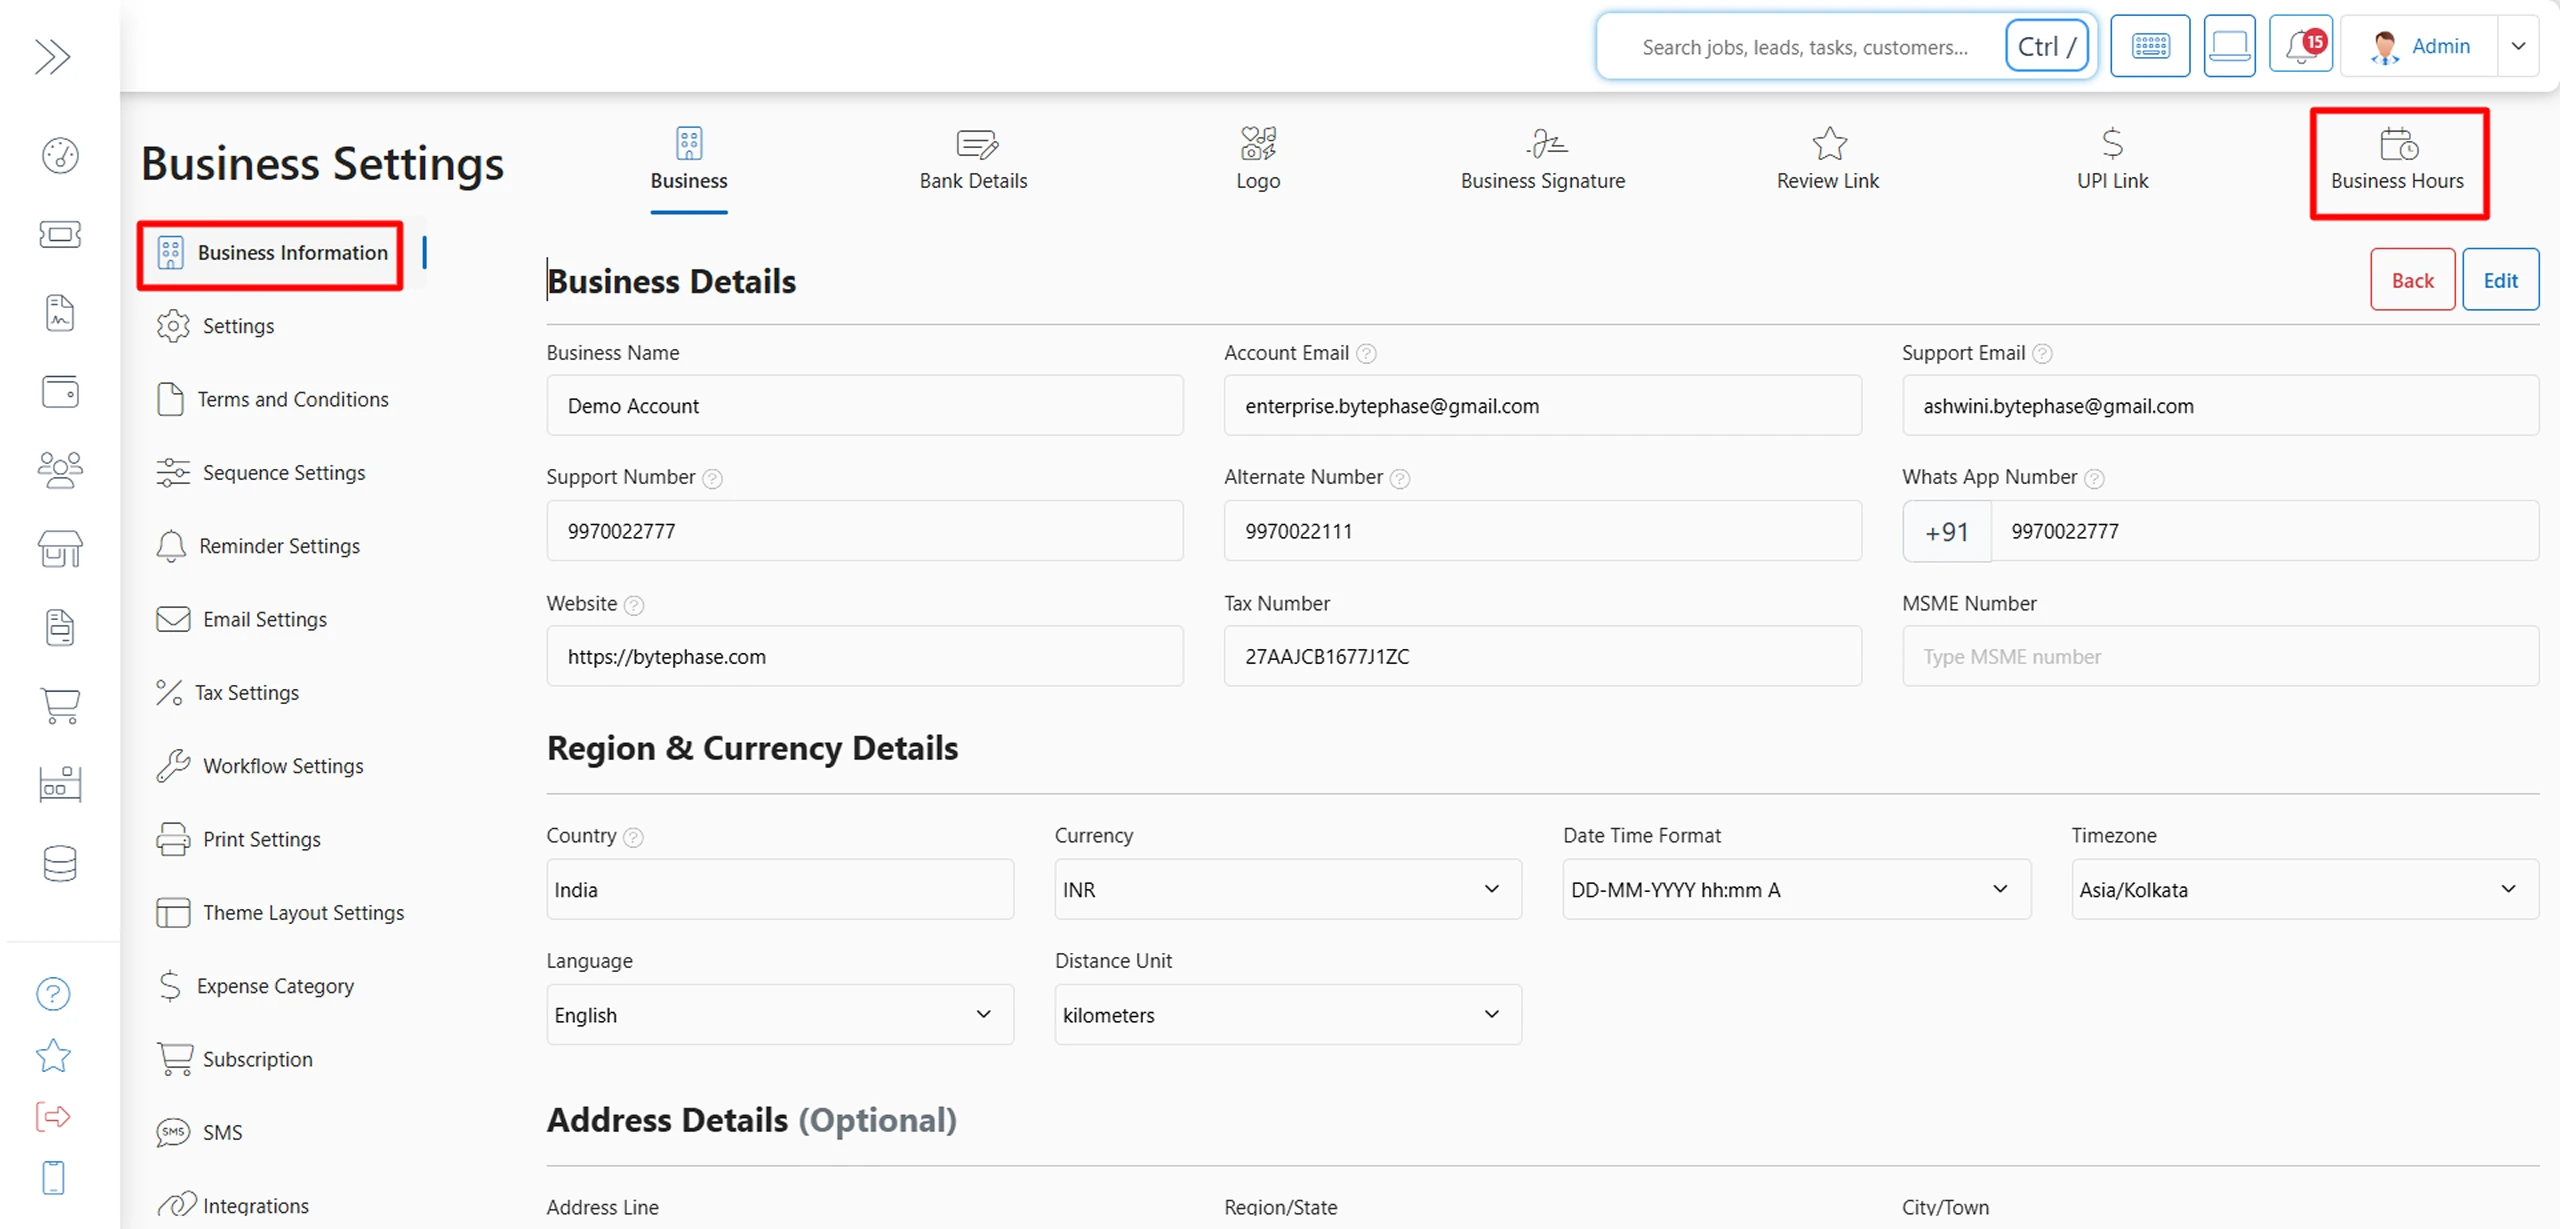
Step 3: Go to Business Hours
- On the left-hand menu, click “Business Information,” then select “Business Hours” from the available sections.
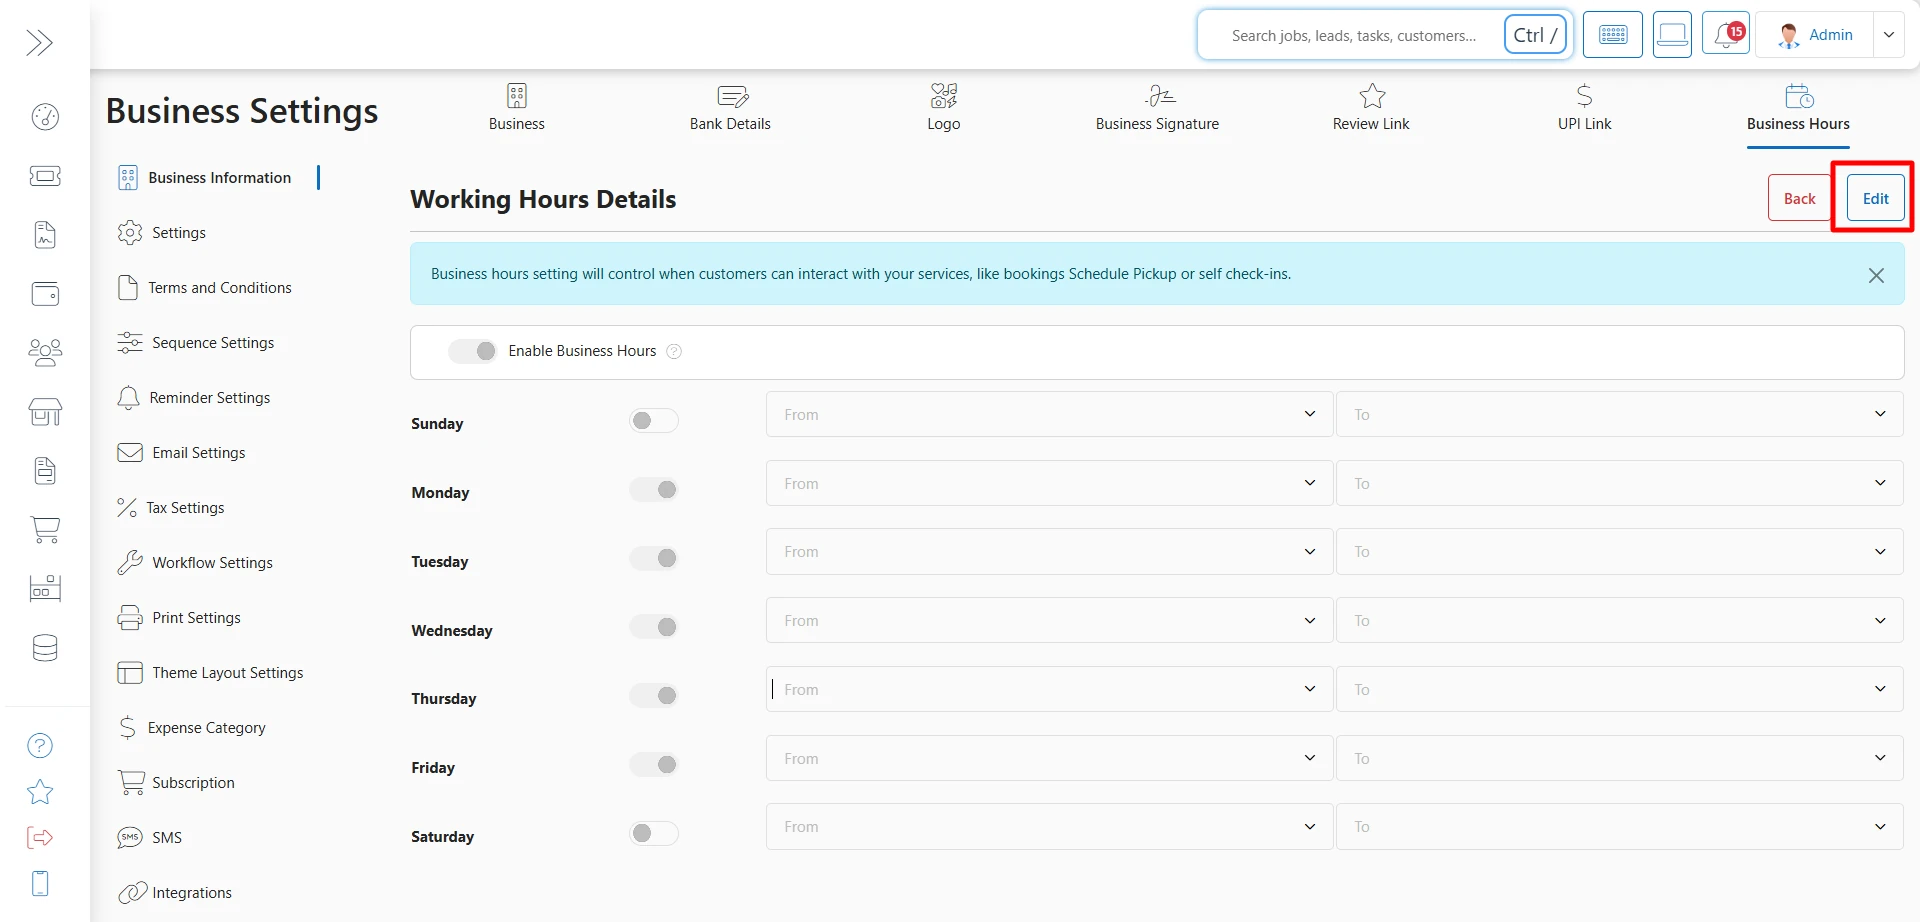
Step 4: Set Your Daily Working Hours
- Click Edit and select a start time and end time for each day. For example: Monday – Saturday, 10:00 AM to 7:00 PM; Sunday, Closed.
- If your timings change day-to-day, simply set custom hours for each individual day instead of applying one schedule to the whole week.
Step 5: Save Changes
- After entering all details, click Save to apply your working hours to your BytePhase CRM account.
Final Thoughts
Managing your business becomes easier when your CRM settings match your real-world working hours. BytePhase CRM gives you full flexibility to set custom hours for each day and maintain a clean record of operations.
If you run into any difficulty while updating working hours, reach out to BytePhase support through the Help & Support section. Haven’t set up your account yet? Start your 15-day free trial.