
How to Integrate Google Calendar in BytePhase CRM
Introduction
Managing appointments, job schedules, and follow-ups efficiently is essential to any repair shop management software aiming to deliver excellent customer service. With Google Calendar connected to BytePhase, you can sync your schedules, track jobs, and stay organized effortlessly — all in one place.
Whether you’re managing multiple technicians or scheduling daily repairs, this integration helps ensure no appointment is missed and every task stays on track.
This guide walks you through connecting your Google Calendar on the new Calendar page in BytePhase, finding your Calendar ID, and (optionally) letting BytePhase create and update events for you.
Why Integrate Google Calendar with BytePhase CRM?
Integrating Google Calendar with BytePhase CRM brings automation and visibility into your daily operations.
The BytePhase Calendar already shows your system events — Jobs, Tasks, Pickup & Drops, AMC renewals and services, warranty and software expiries. Once you connect Google Calendar, each employee can also:
- See their personal Google Calendar events alongside (or instead of) system events,
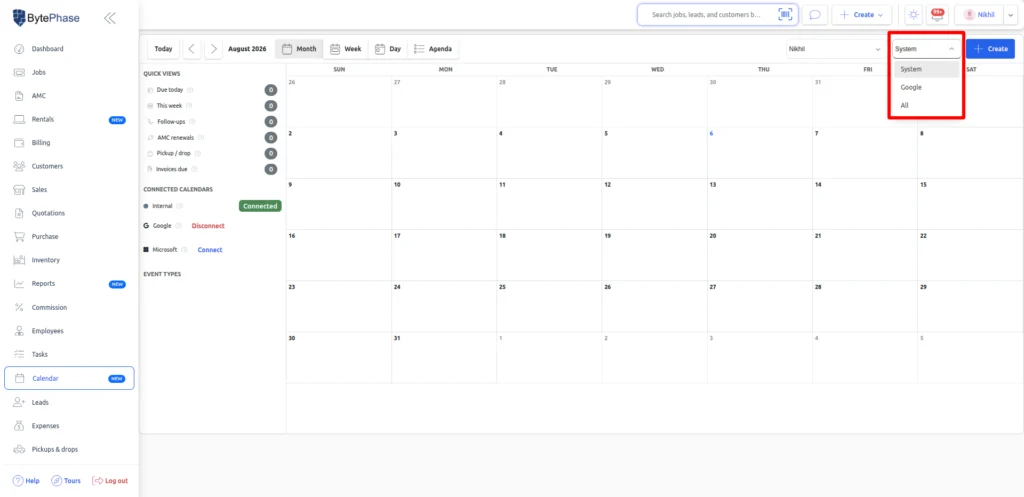
- Switch the calendar source between System, Google, and All with one dropdown,
- Create events from BytePhase that land directly in Google Calendar.
How the Google Calendar Integration Works
The connection is simple: you paste your Google Calendar ID once, and BytePhase starts reading your events. Here’s the whole flow at a glance:
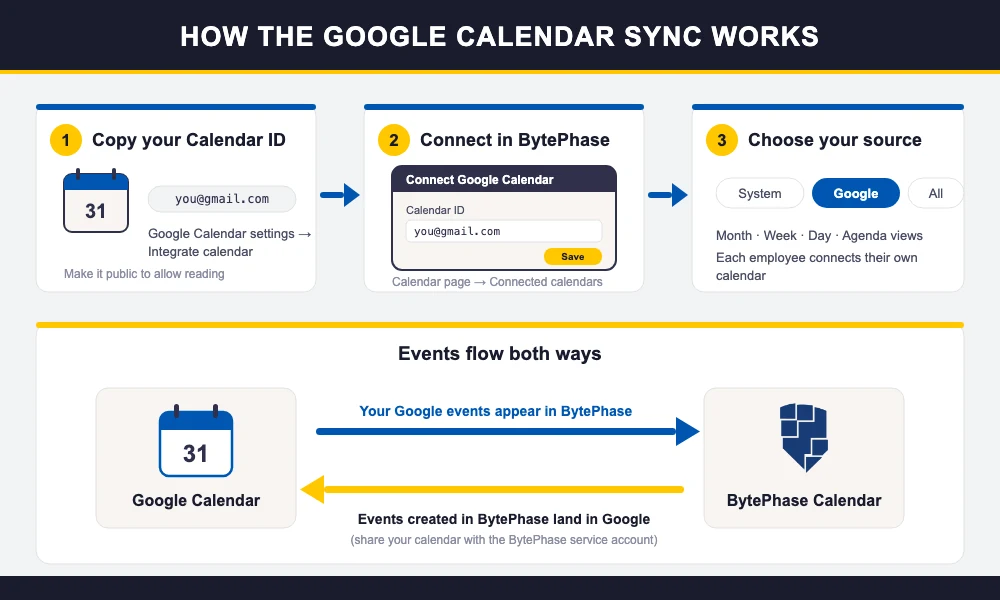
- Each employee connects their own Google Calendar — the integration is per user, not per shop.
- With the source set to Google, the Calendar shows your Google events; set it to All to see system and Google events together.
- Reading events needs your calendar to be publicly readable (covered in the steps below).
- Creating and updating events from BytePhase is optional — it needs one extra sharing step, covered at the end.
Step-by-Step: How to Connect Google Calendar
Step 1: Open the Calendar Page
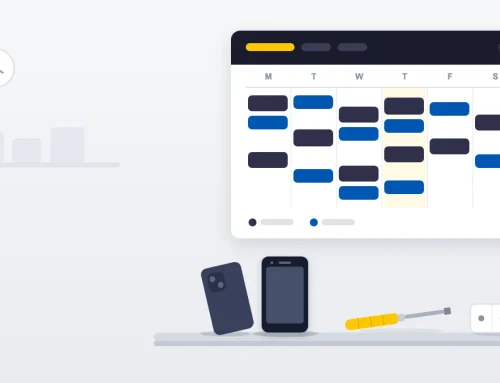
In BytePhase, click Calendar in the left sidebar. This opens the BytePhase Calendar with Month, Week, Day, and Agenda views of your jobs, tasks, and other events.
On the left side of the page you’ll find the Connected calendars panel, listing Internal, Google, and Microsoft.
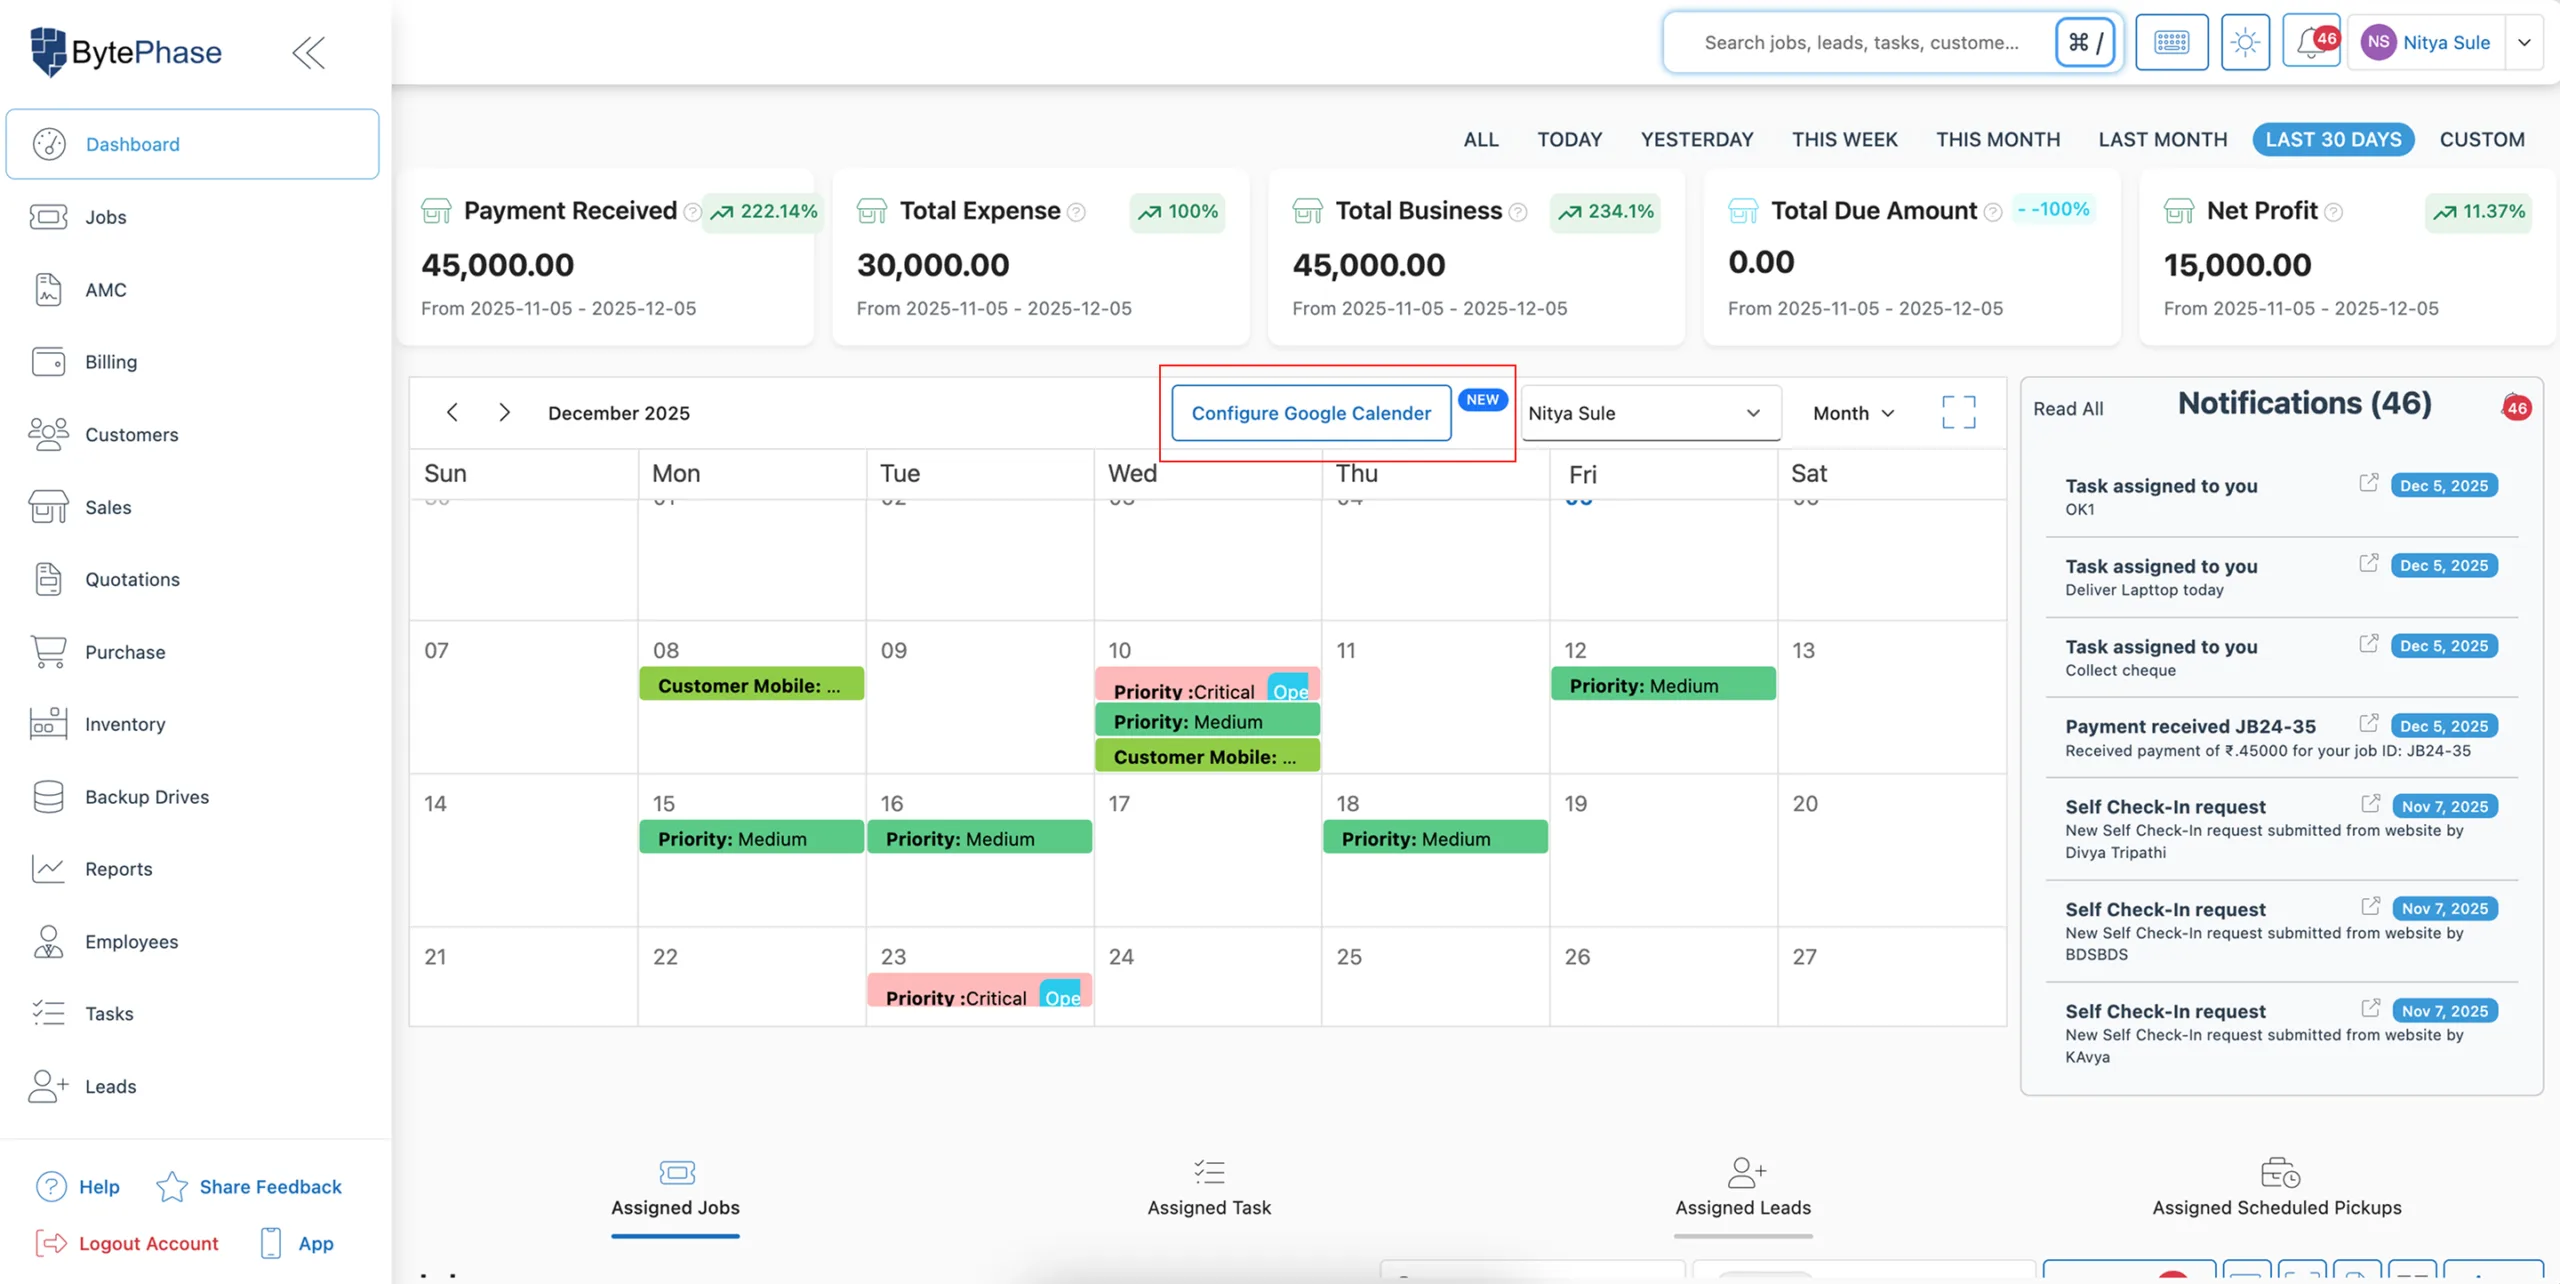
Step 2: Click Connect Next to Google
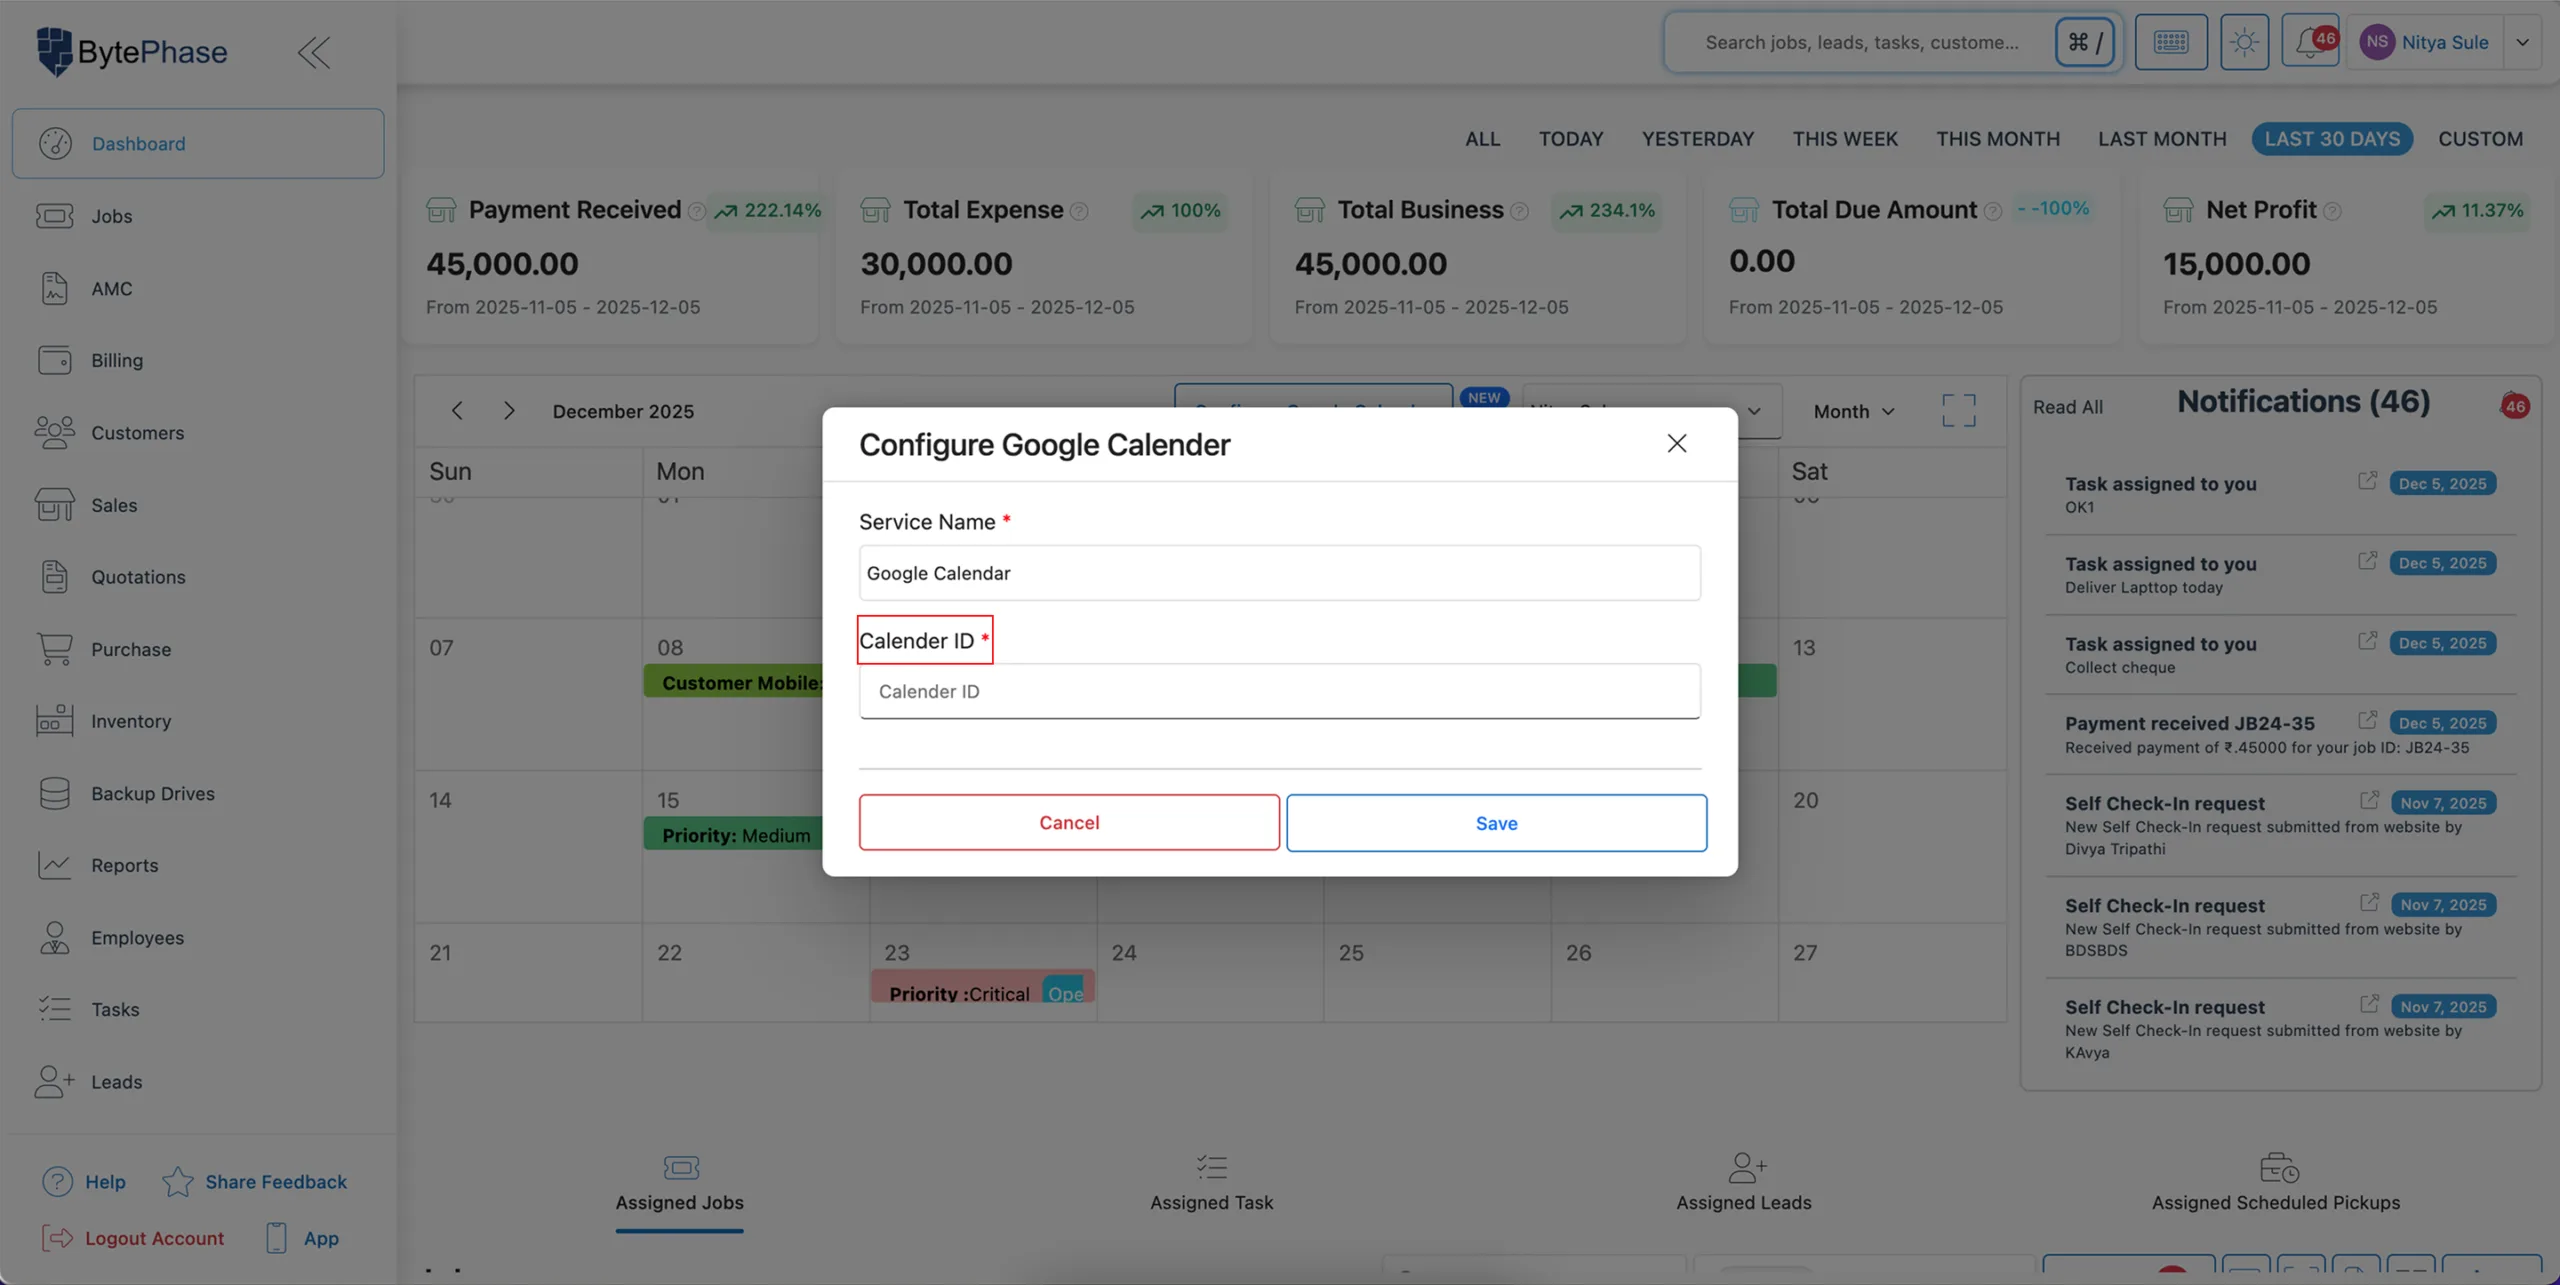
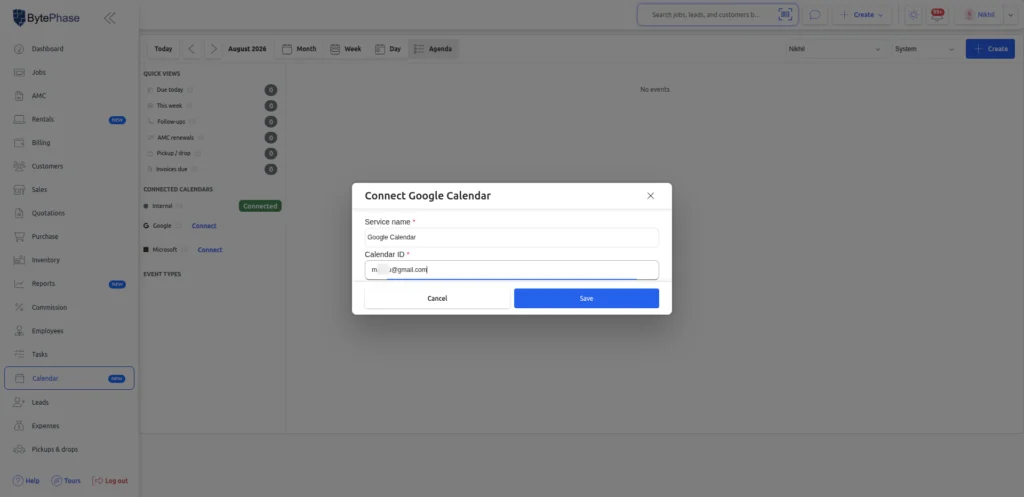
In the Connected calendars panel, click Connect next to Google. The Connect Google Calendar popup opens with two fields:
- Service name — already set to Google Calendar,
- Calendar ID — this is what BytePhase needs to sync your events.
Don’t know your Calendar ID yet? Find it in a minute with the steps below.
How to Find Your Google Calendar ID
1. Open Google Calendar
Go to Google Calendar on your desktop or mobile browser and sign in with your Google account.
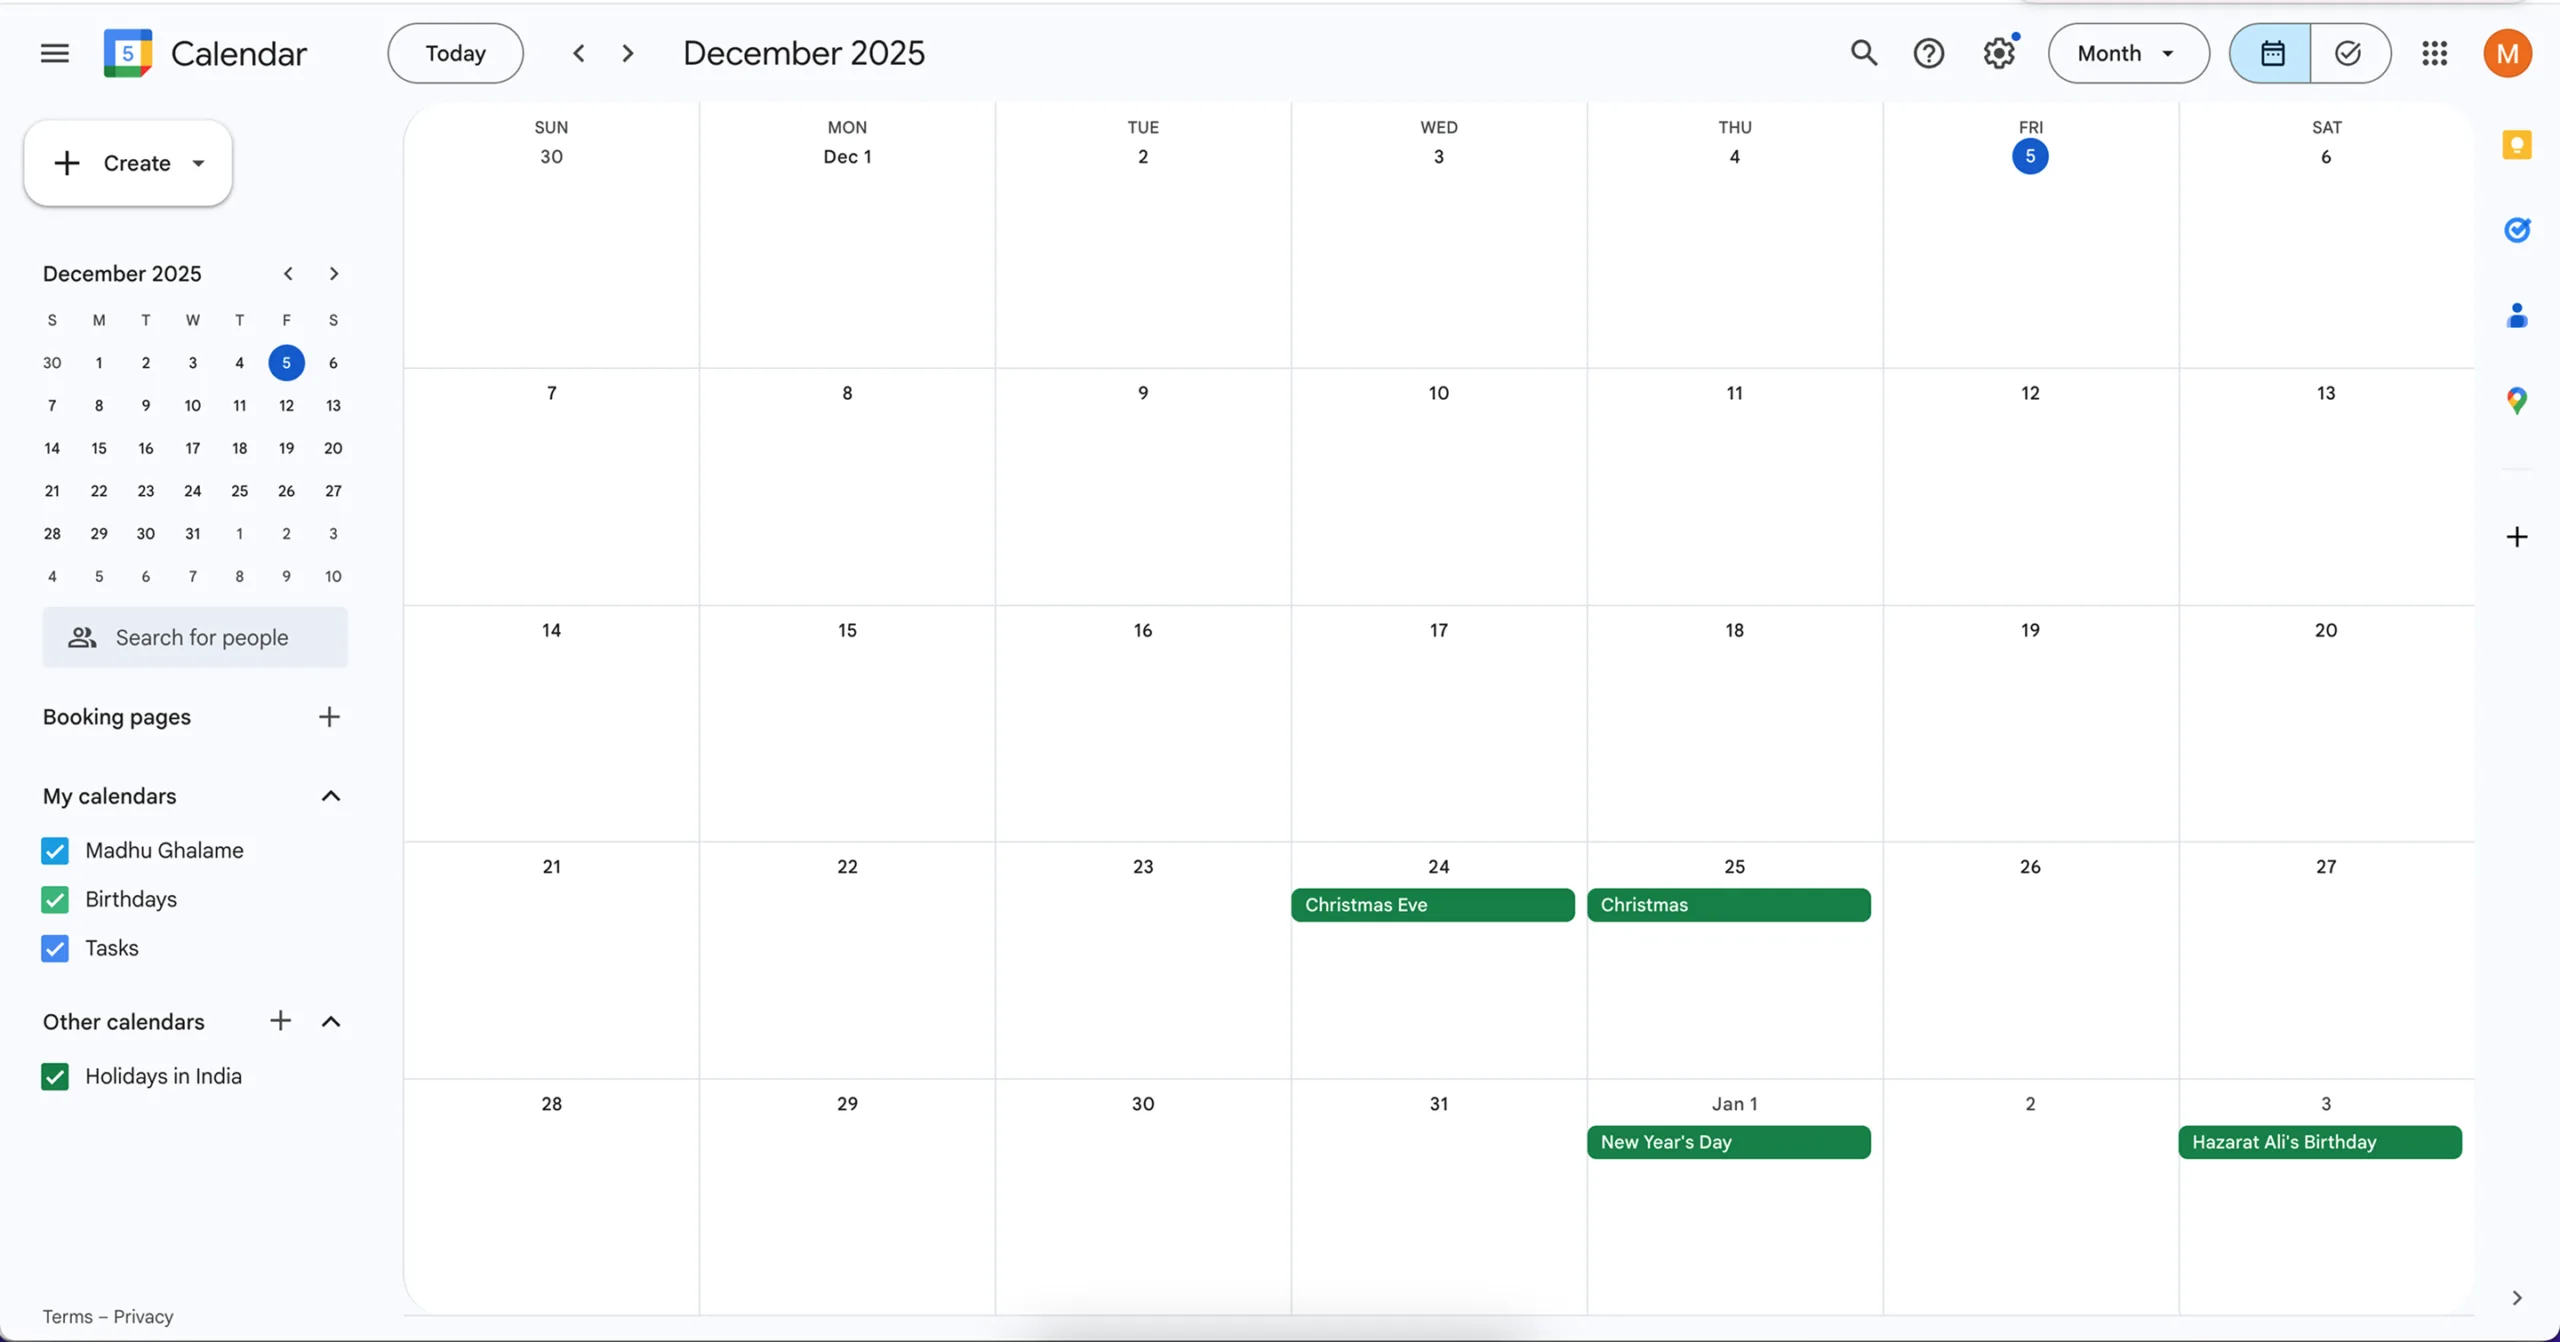
2. Select the Calendar You Want to Integrate
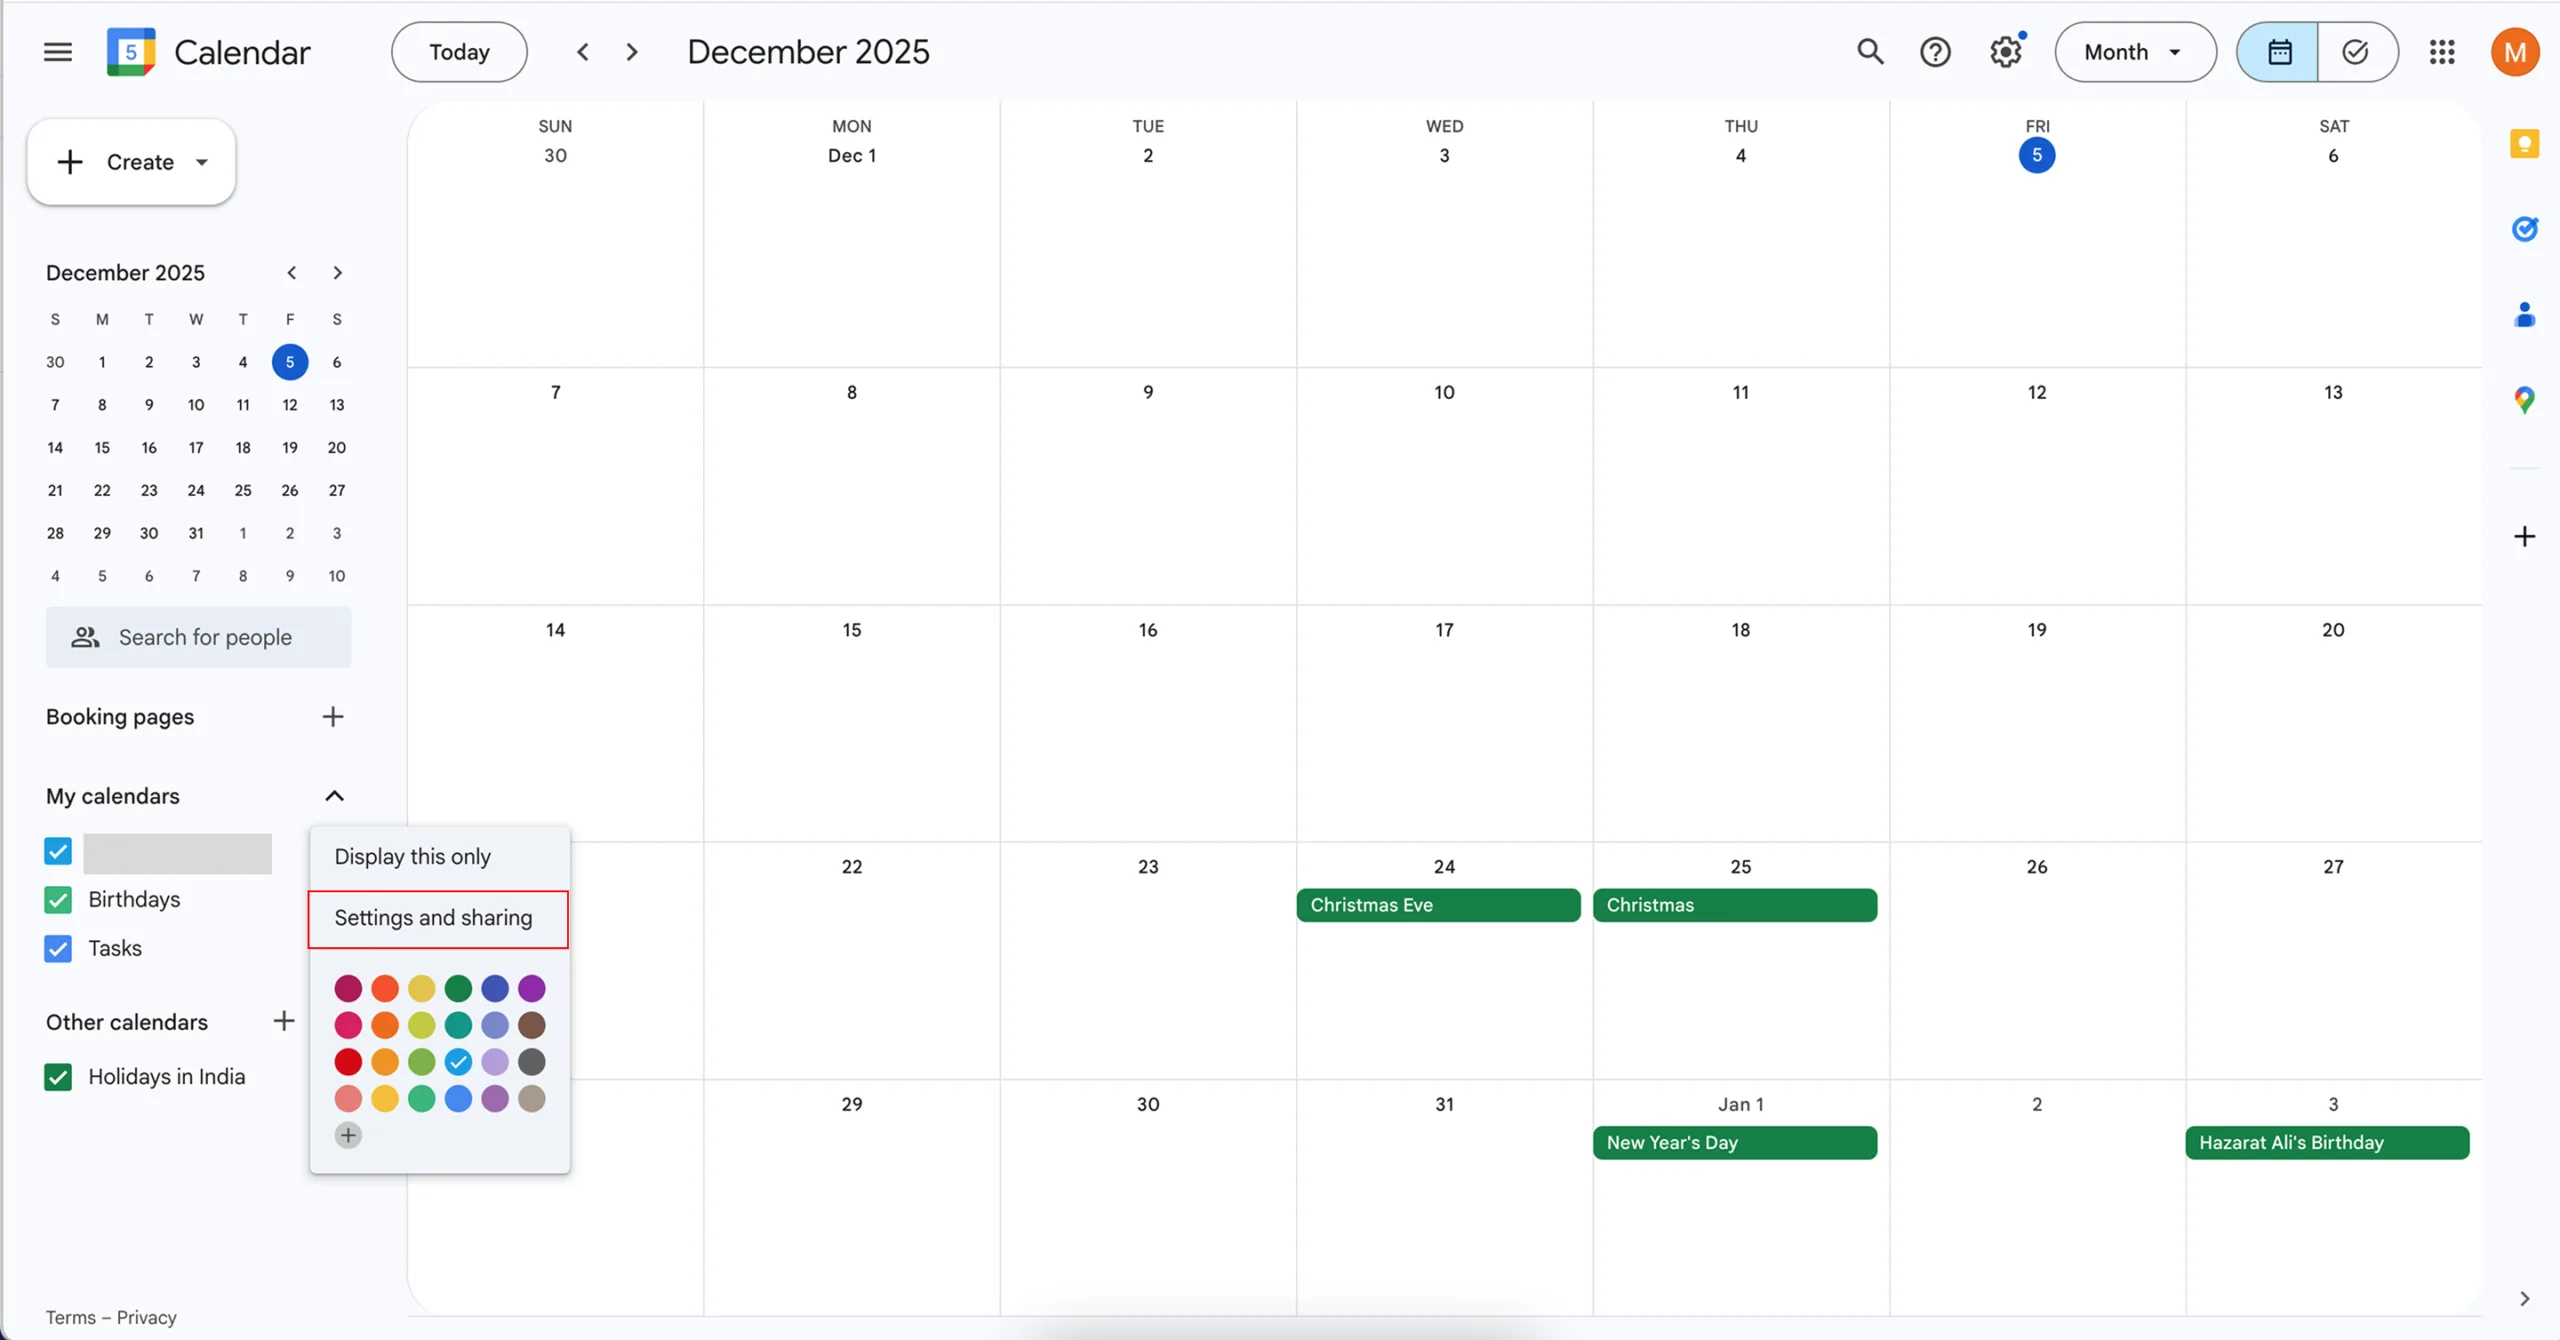
On the left sidebar, look for My Calendars. Hover over the calendar you want to use and click the ⋮ (three dots) menu.
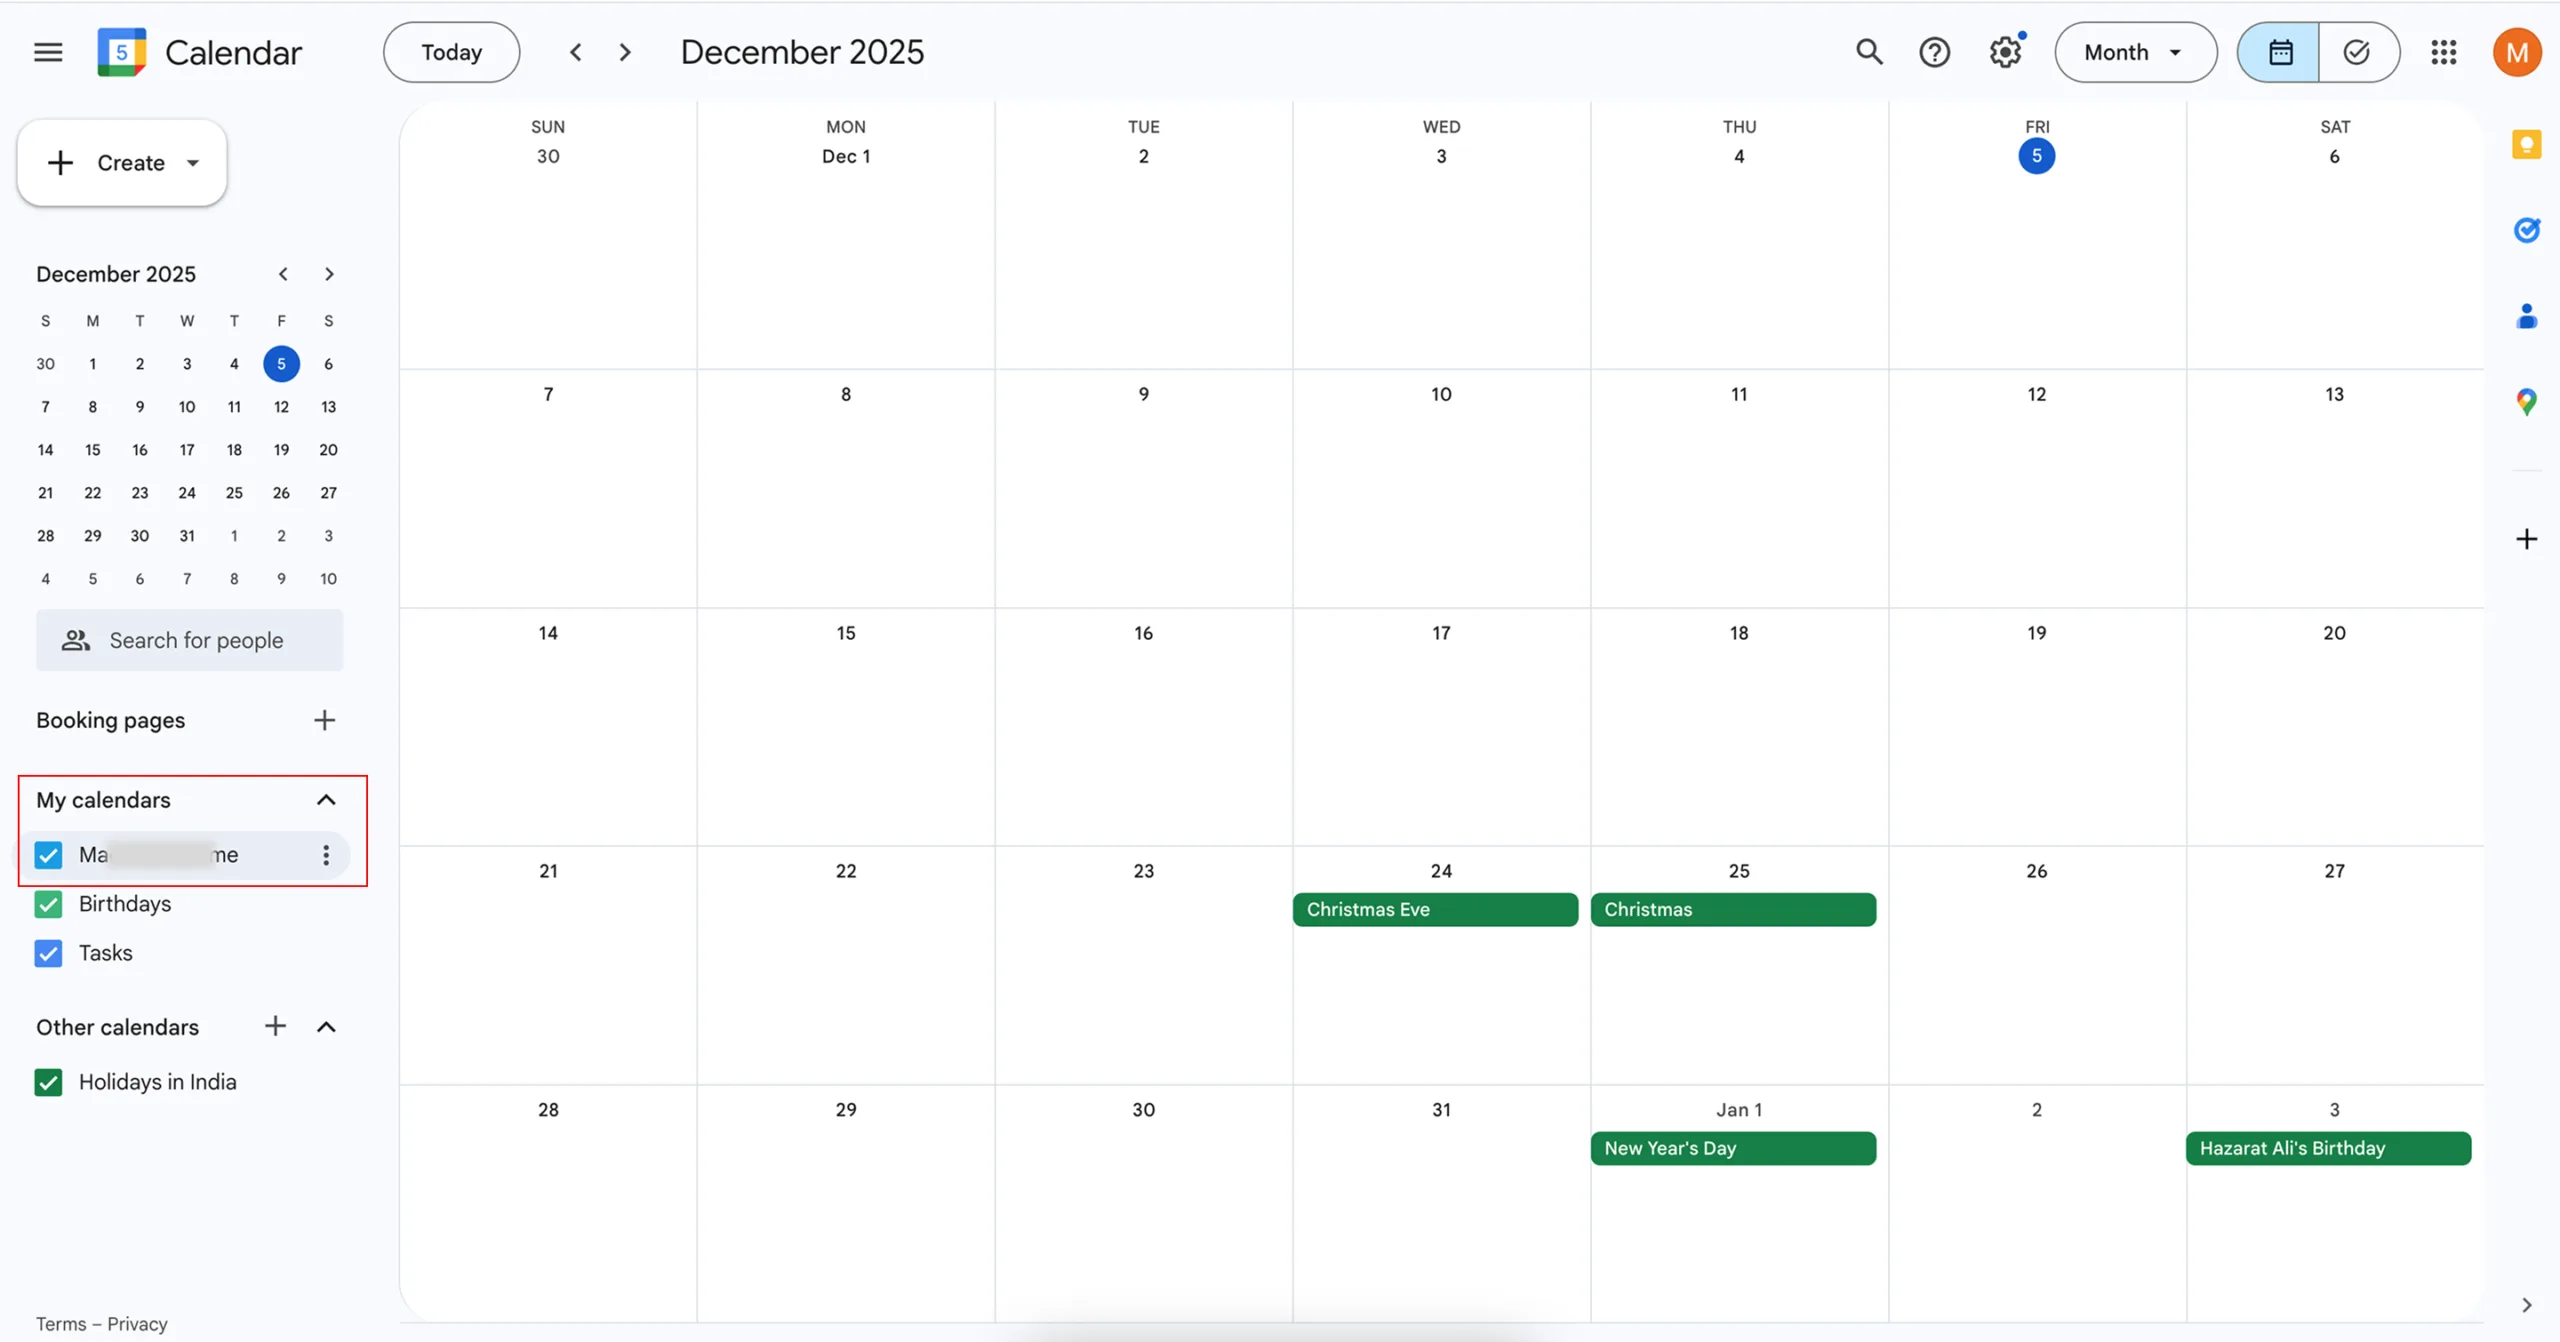
3. Open Settings and Sharing
Click Settings and sharing from the dropdown options.
4. Enable Public Access
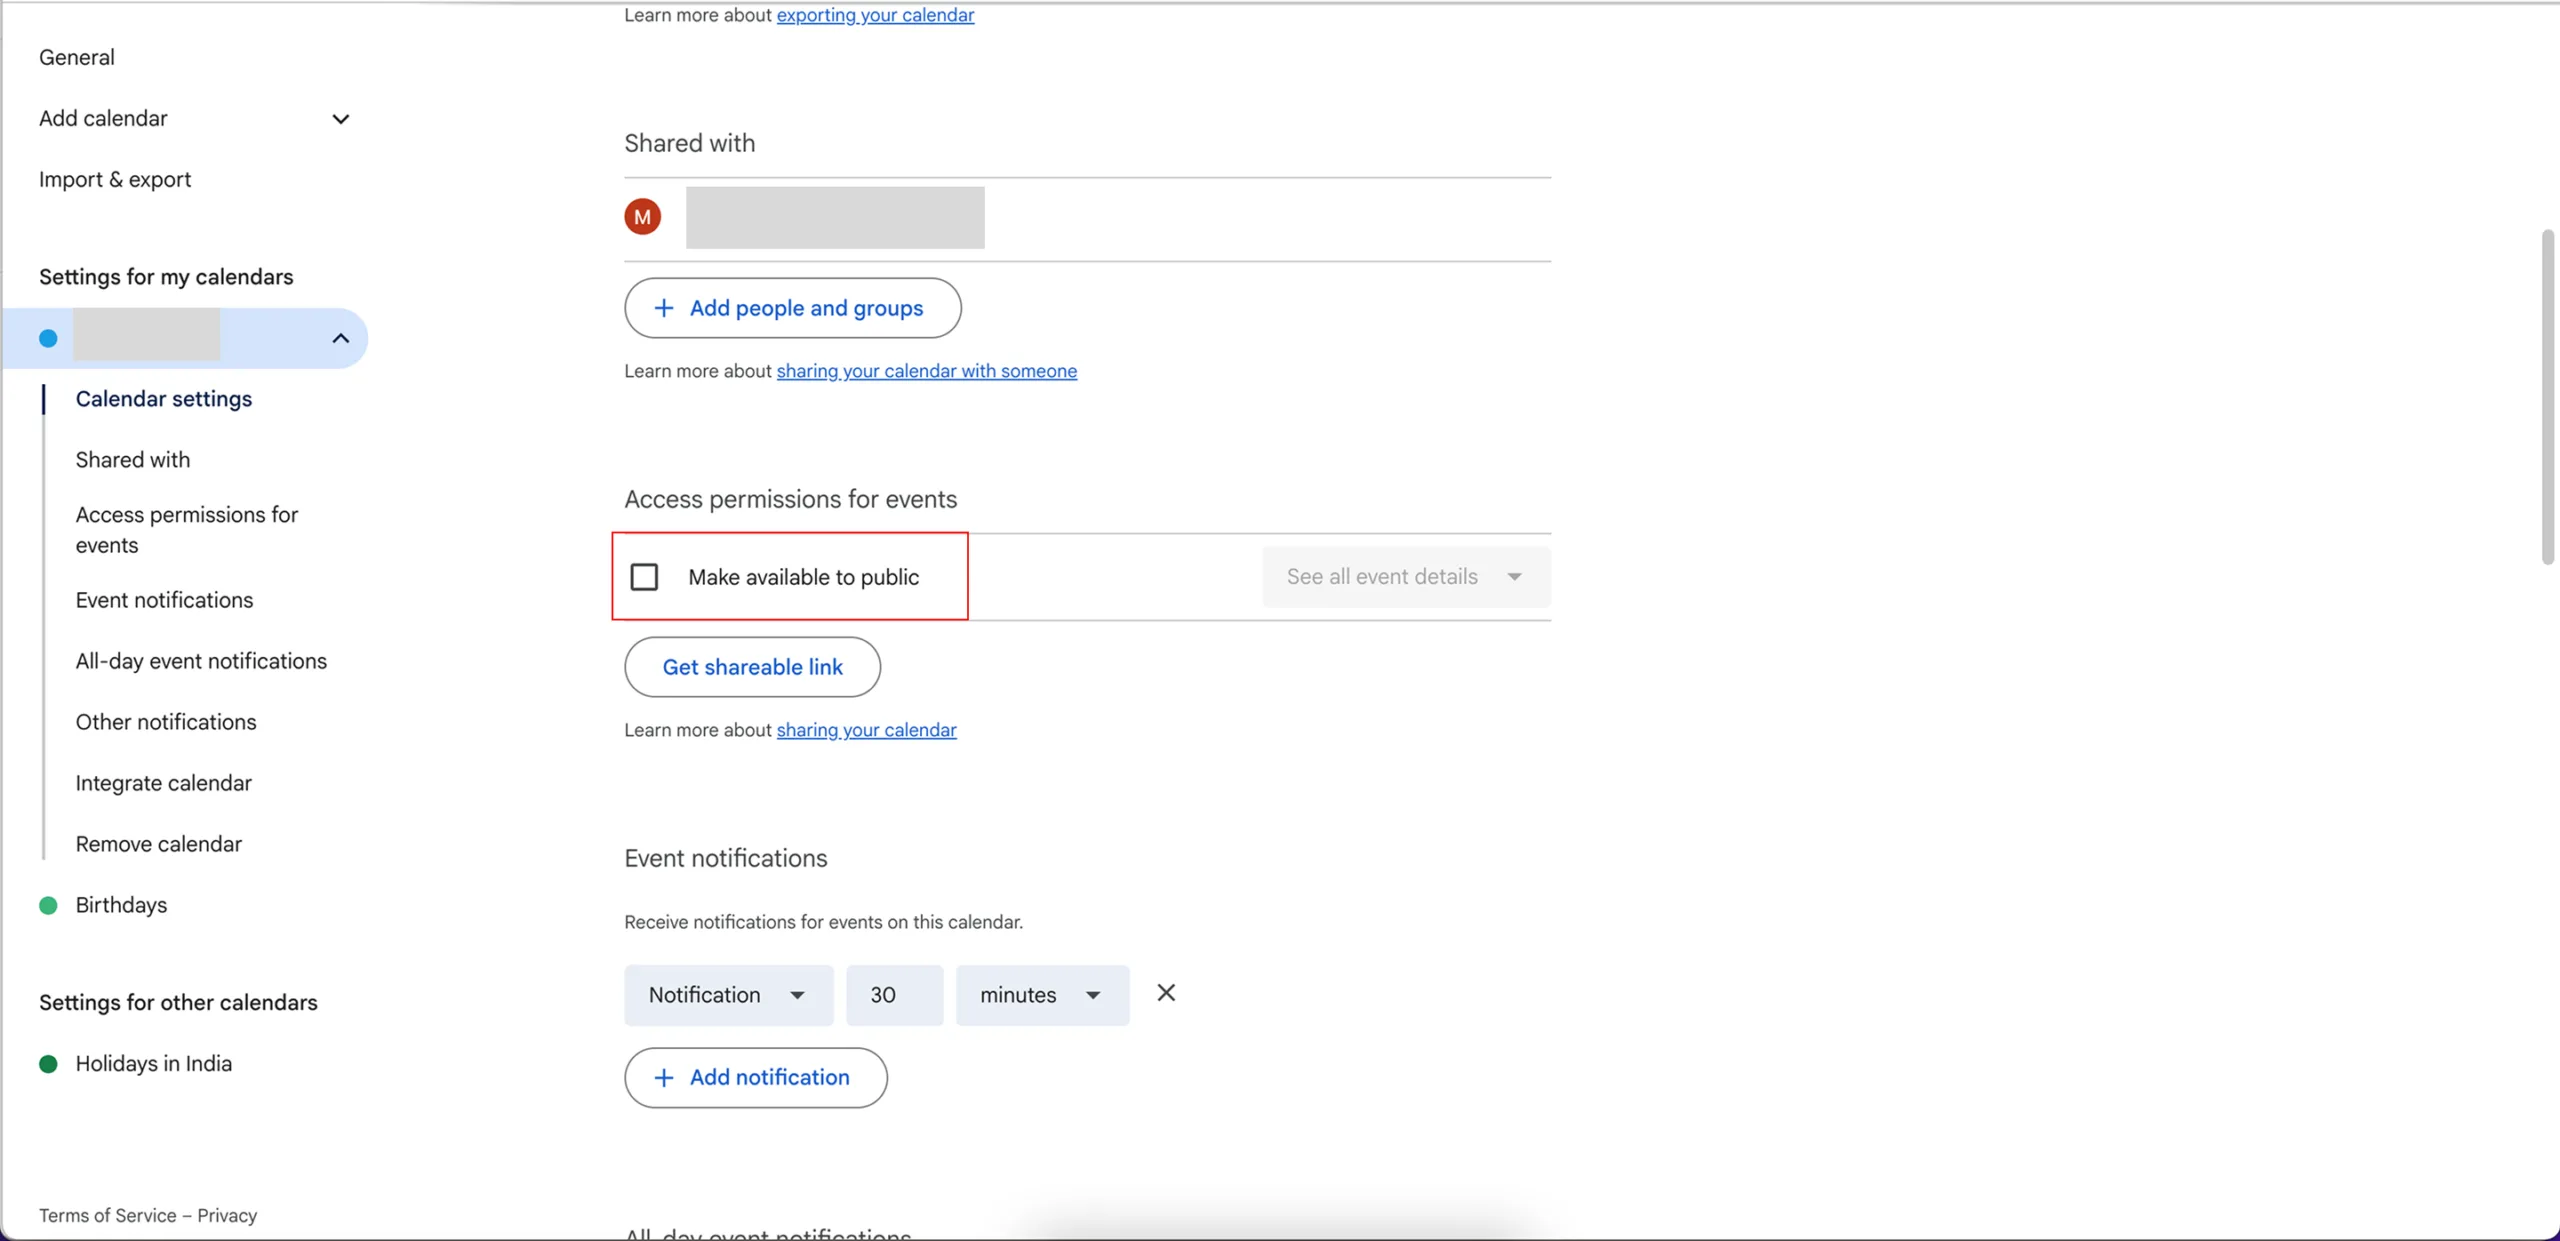
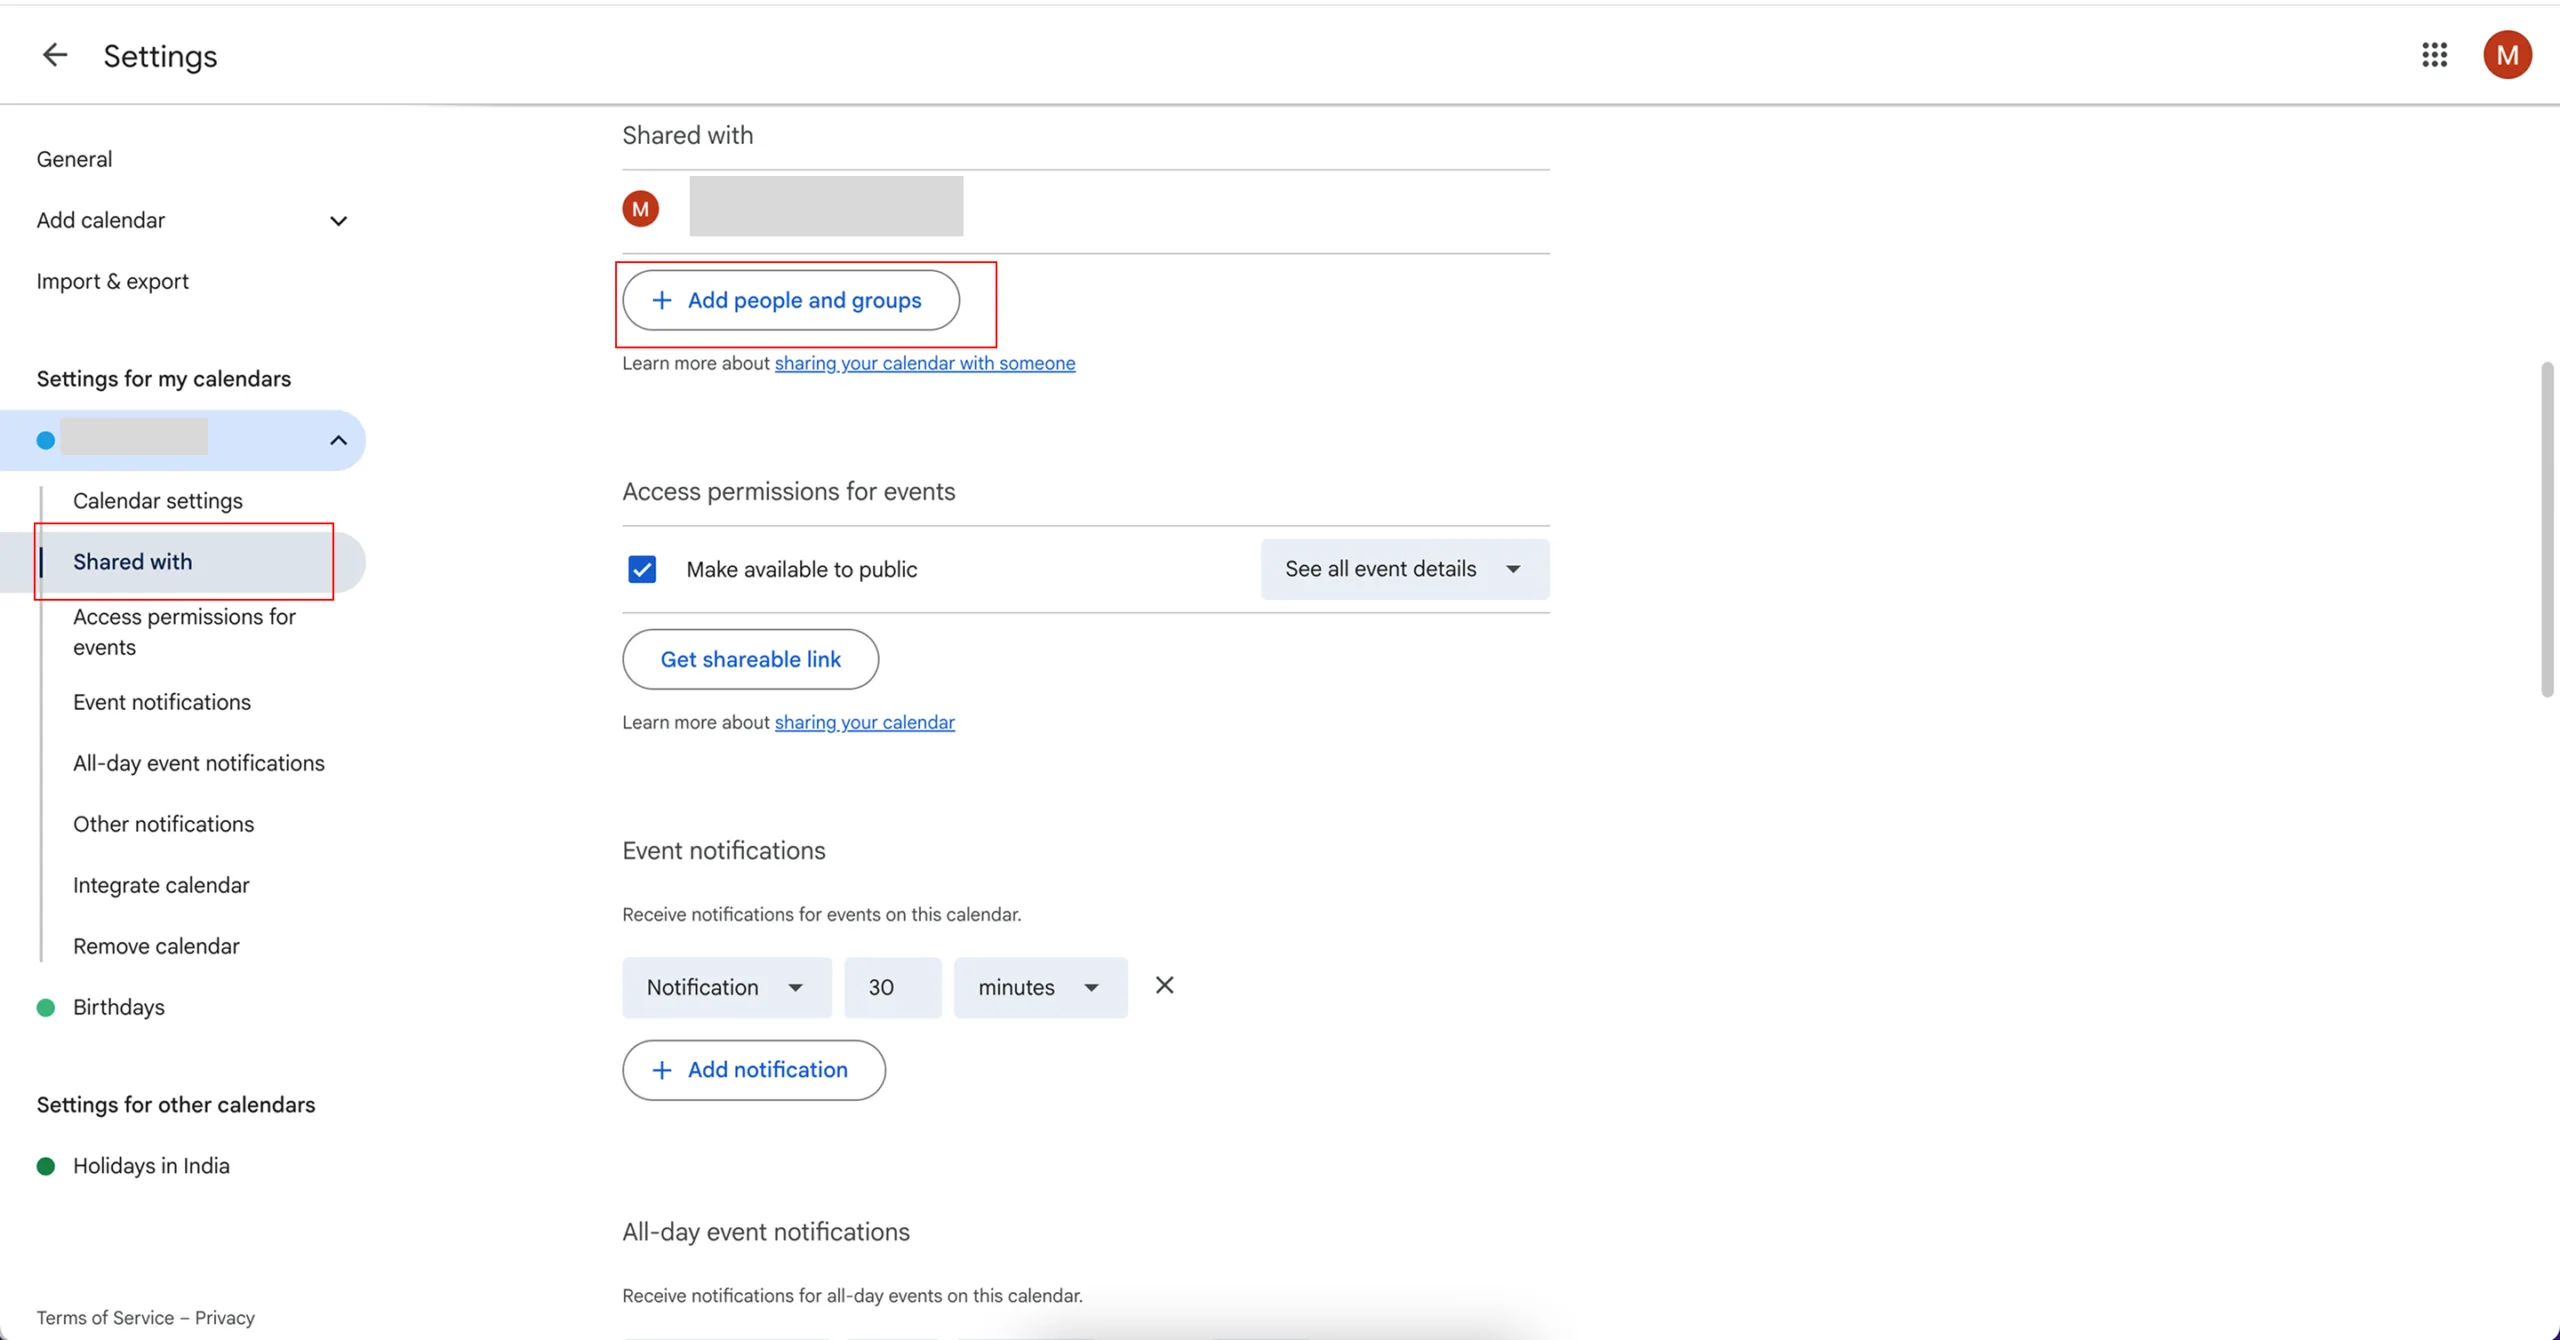
Under Access permissions for events, tick the checkbox “Make available to public”.
Note: this step is necessary so BytePhase can retrieve your event details.
5. Choose “See All Event Details”
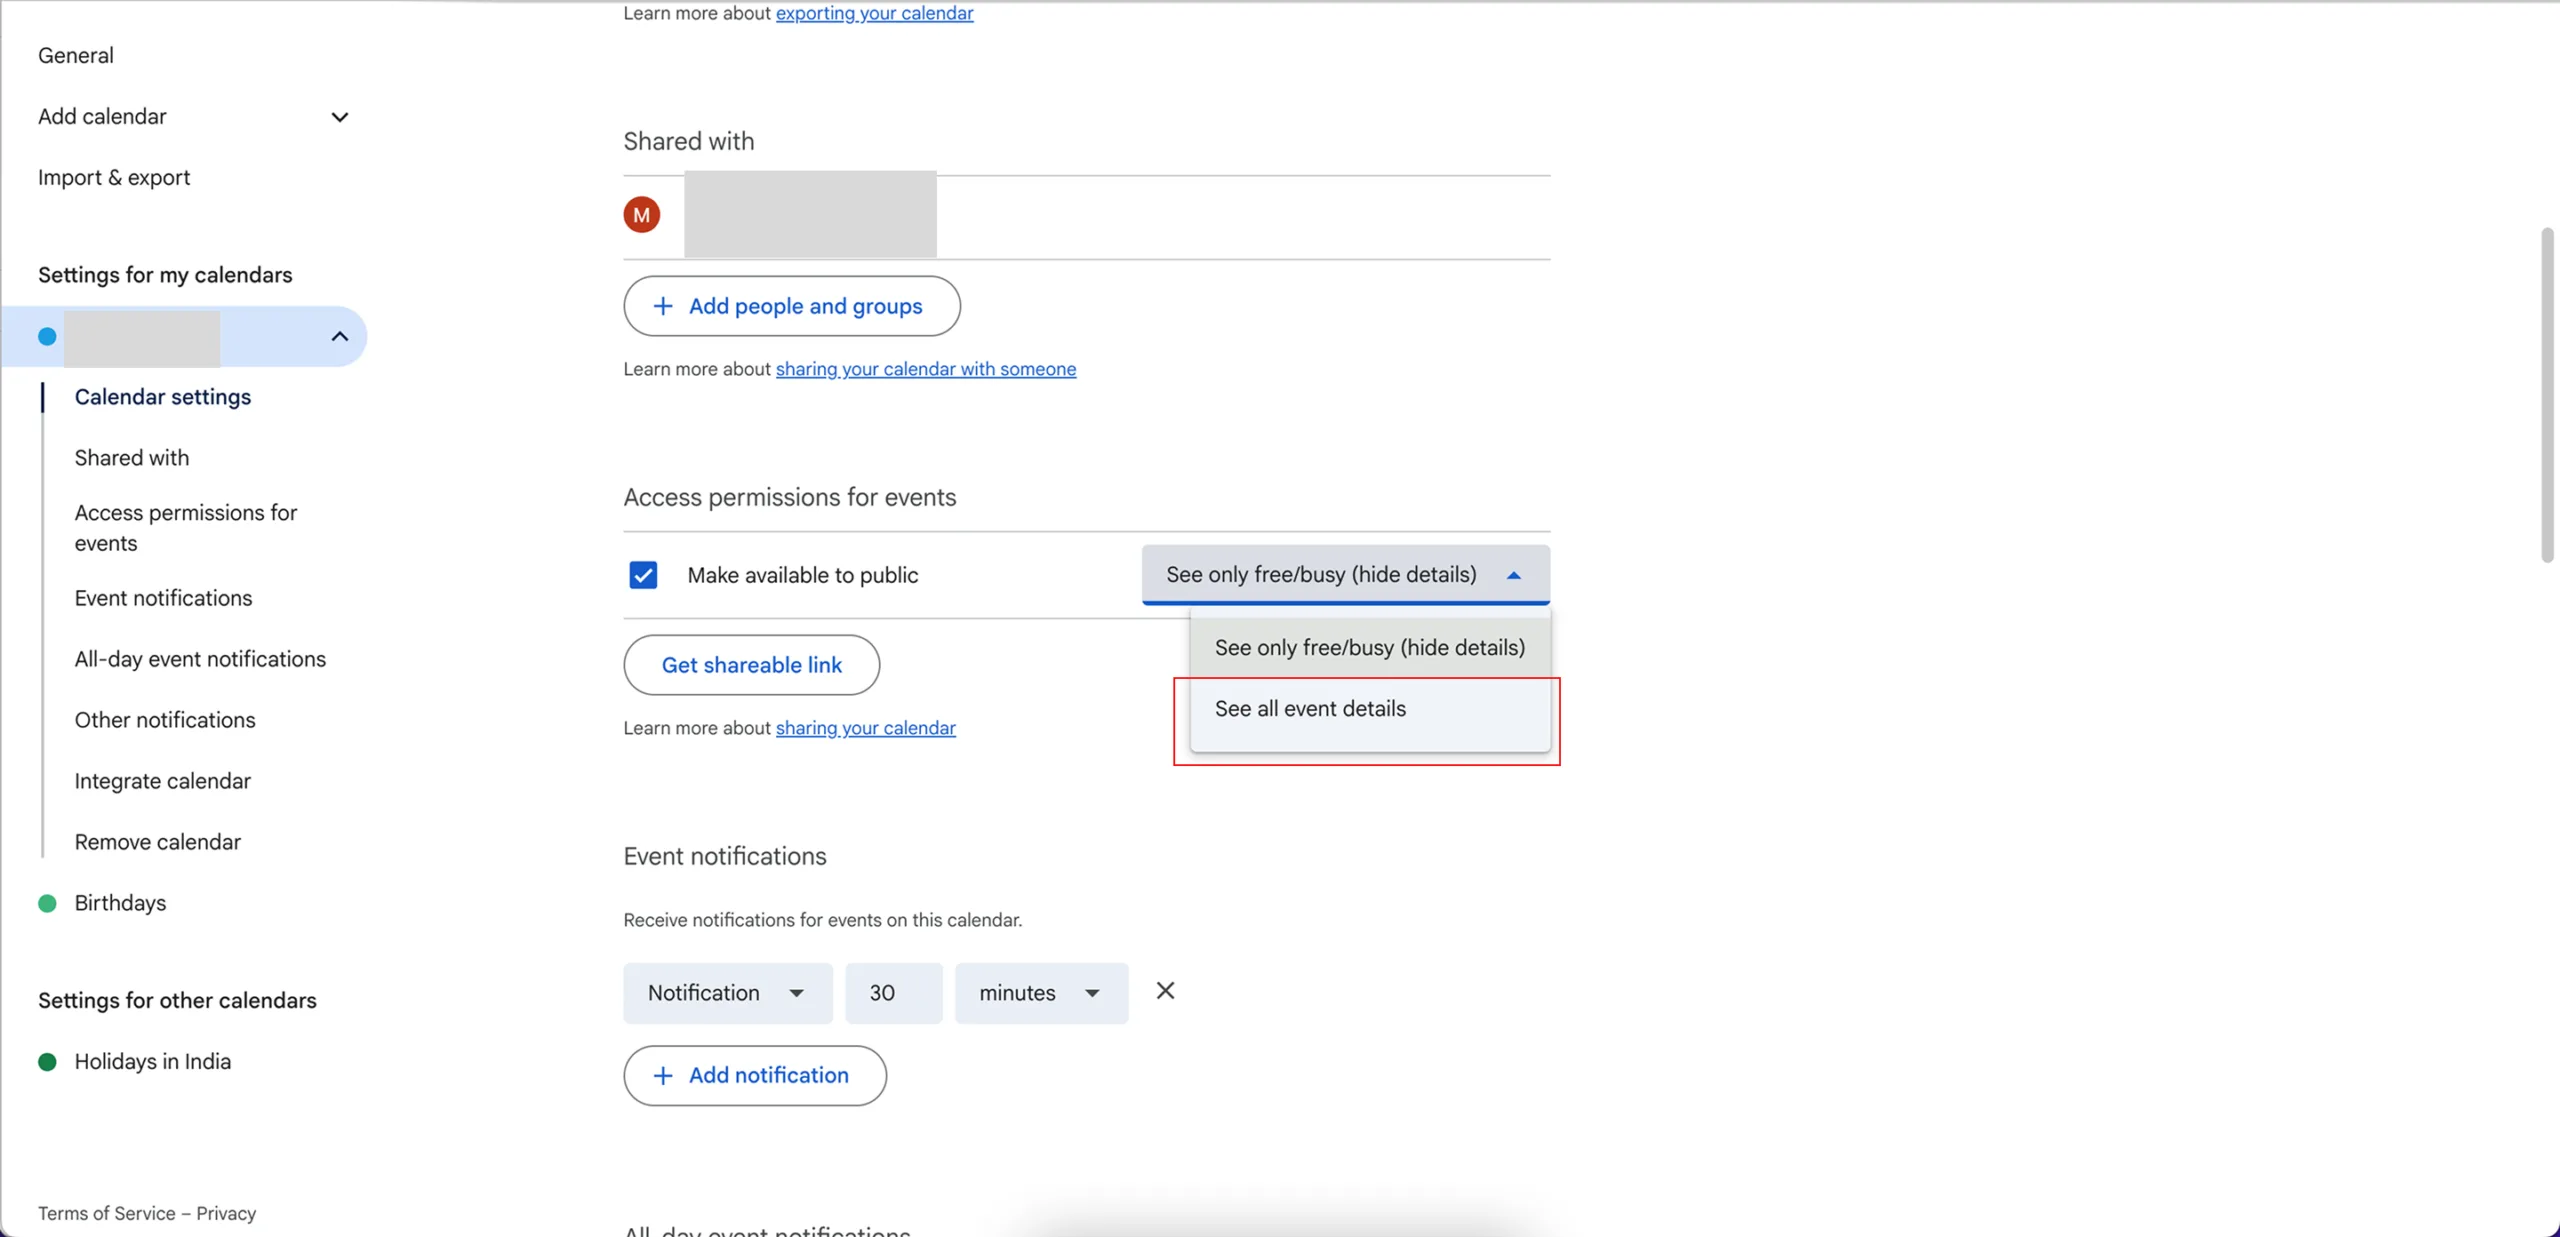
In the same dropdown, choose “See all event details.” This ensures BytePhase can read your calendar events for seamless synchronization.
6. Copy Your Calendar ID
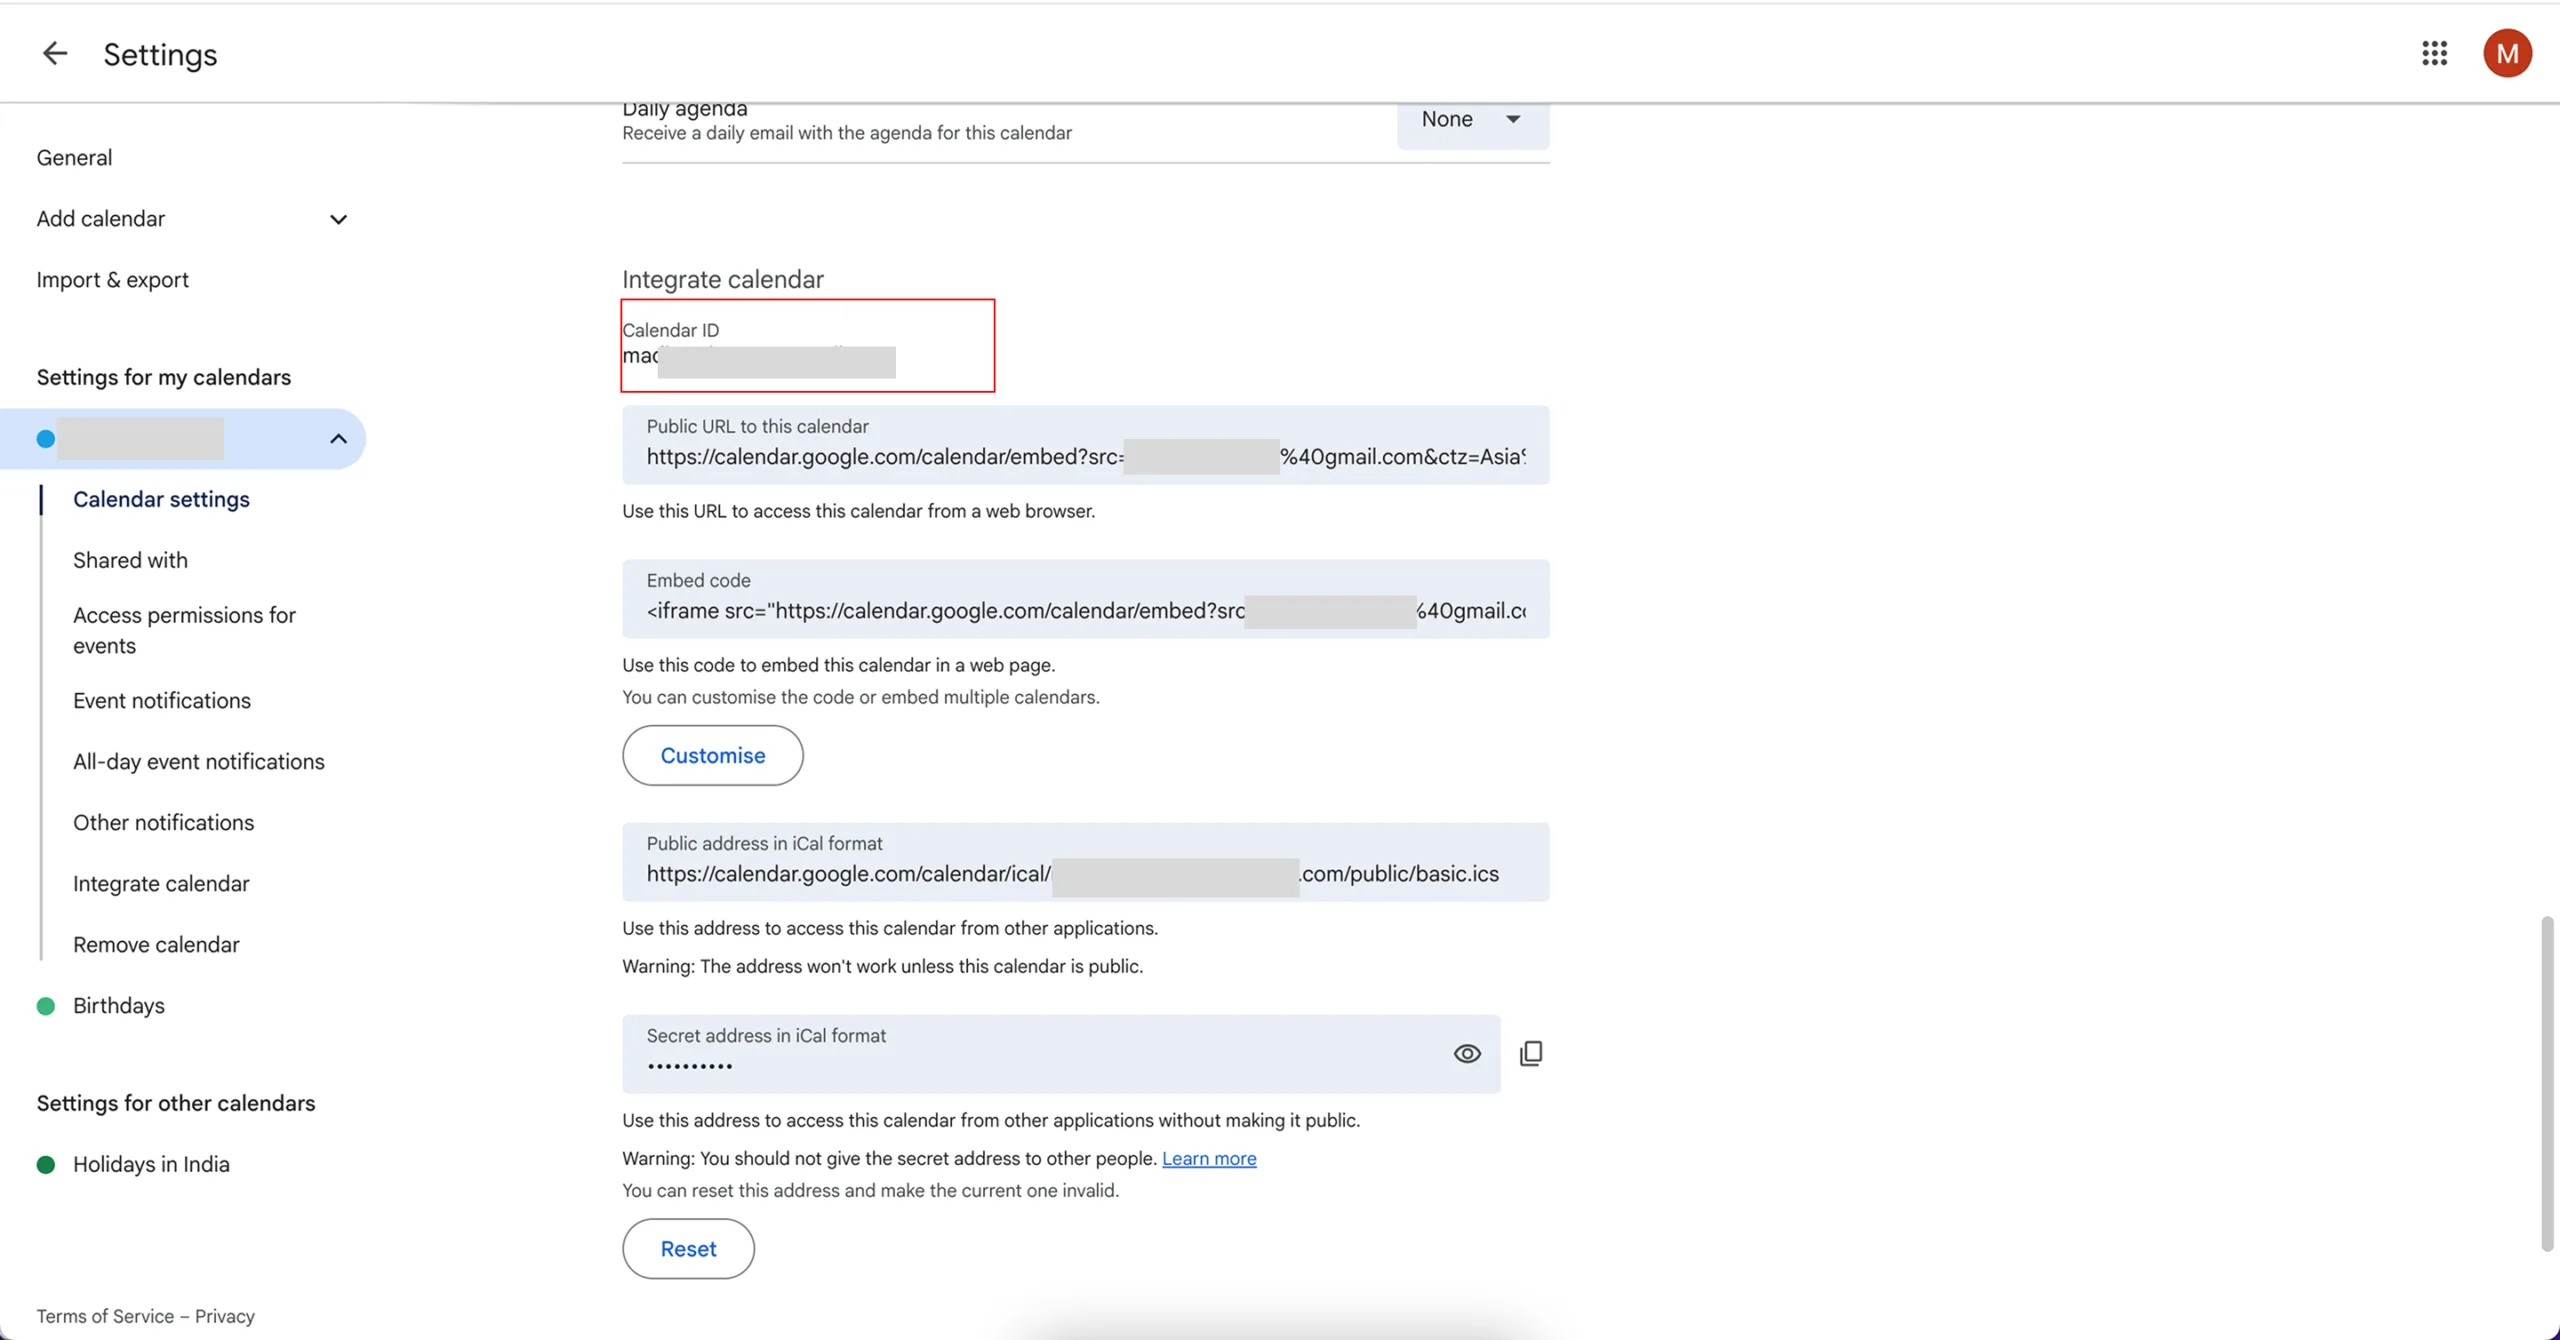
Scroll down to the Integrate calendar section and find your Calendar ID — it looks like an email address (e.g., example@gmail.com or random-id@group.calendar.google.com). Copy it for the next step.
Step 3: Paste the Calendar ID and Save
- Go back to the Calendar page in BytePhase.
- In the Connect Google Calendar popup, paste the Calendar ID you copied.
- Click Save.
That’s it — your Google Calendar is now connected to your BytePhase account, and the Google row in Connected calendars shows a Disconnect option.
Step 4: Verify the Sync
In the calendar toolbar, switch the source dropdown to Google (or All to see system and Google events together). Your Google Calendar events should appear on the board. If they don’t show up right away, refresh the page.
What You Can Do Once Connected
- Switch sources anytime — System, Google, or All, per employee.
- Four views — Month, Week, Day, and Agenda.
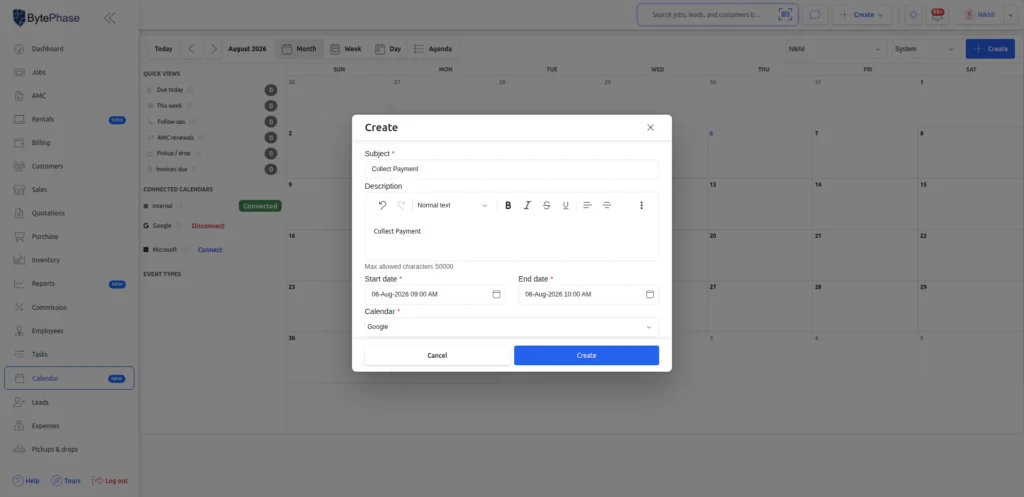
- Create events from BytePhase — click Create, add a subject, description, and dates, and choose Google as the destination calendar (needs the sharing step below).
- Open events in one click — a synced event opens its Google Meet link or the event in Google Calendar.
- Disconnect anytime — click Disconnect next to Google to remove the saved calendar.
Optional: Let BytePhase Create and Update Events
Connecting with a Calendar ID gives BytePhase read access. If you also want to create, update, or delete calendar events from BytePhase, share your Google Calendar with the BytePhase service account:
- Open Google Calendar settings for your calendar.
- Go to the Share with specific people or groups section.
- Click Add people and groups.
- Paste this service account email:
firebase-adminsdk-uvdua@bytephase-push-notificat-4d4b3.iam.gserviceaccount.com
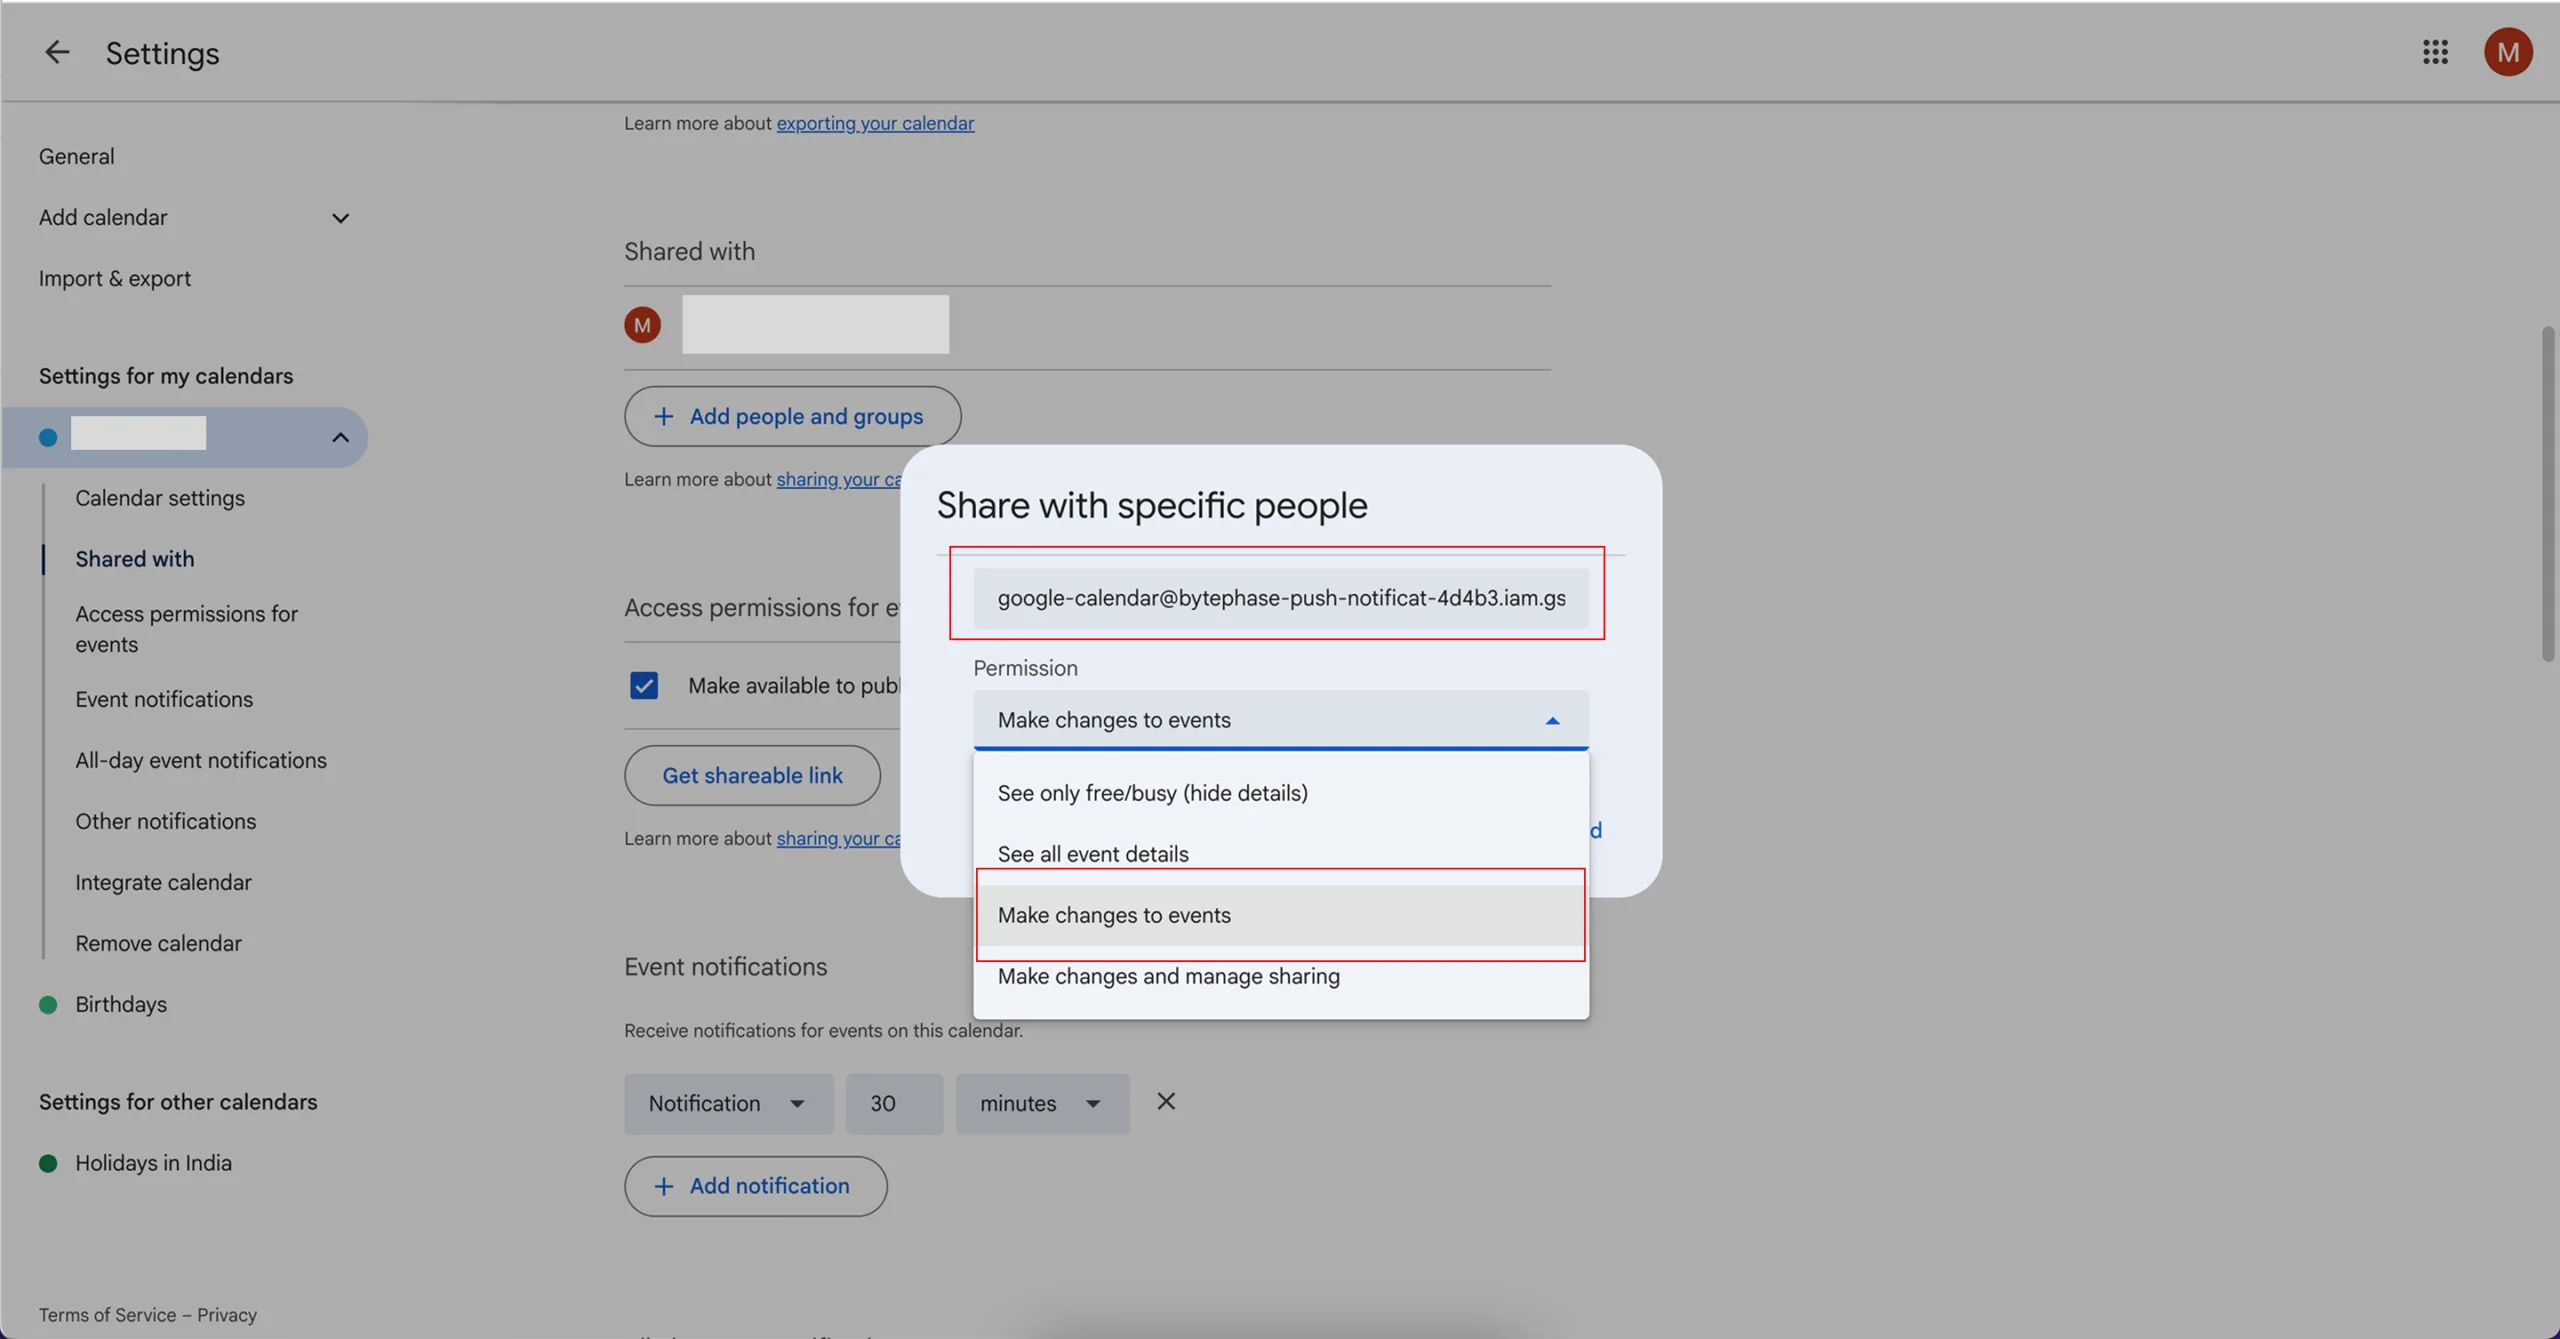
- Under permissions, select Make changes to events.
- Click Send to save the changes.
From now on, events you create on the BytePhase Calendar with Google selected as the destination will appear in your Google Calendar automatically.
For Google Workspace (G Suite) Users
If your calendar belongs to a Google Workspace organization, an admin may need to allow external sharing first:
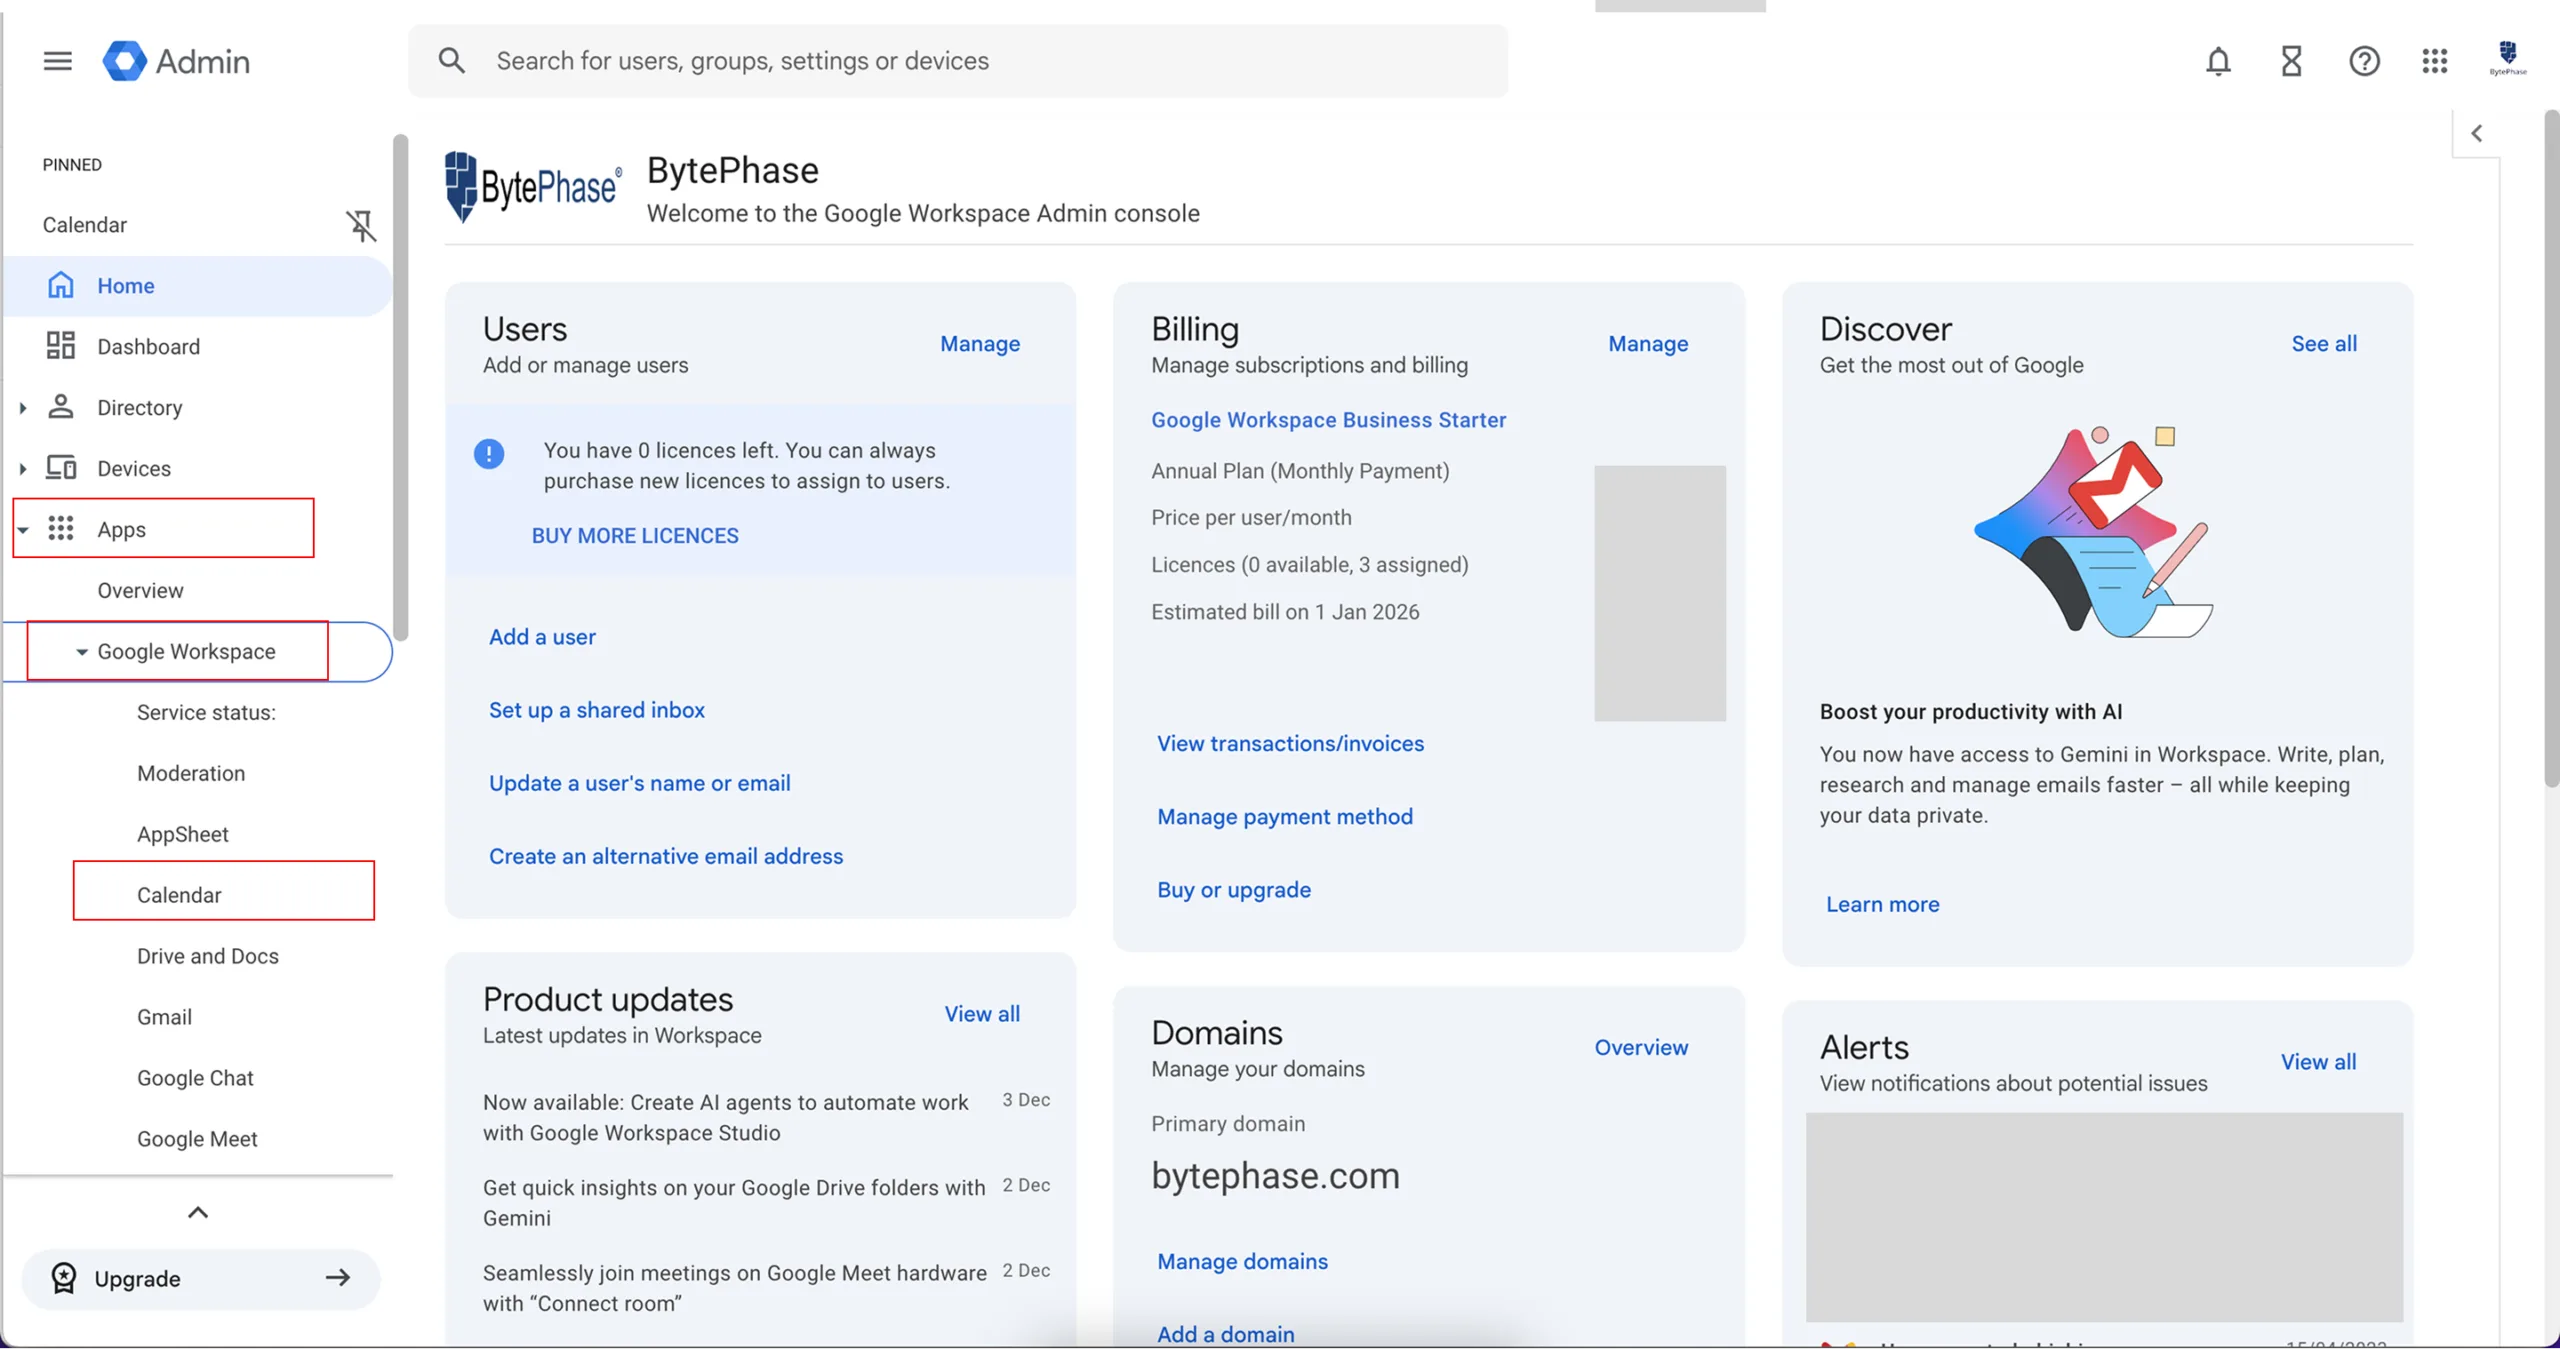
- Sign in to the Google Admin Console at admin.google.com.
- From the left sidebar, click Apps → Google Workspace → Calendar.
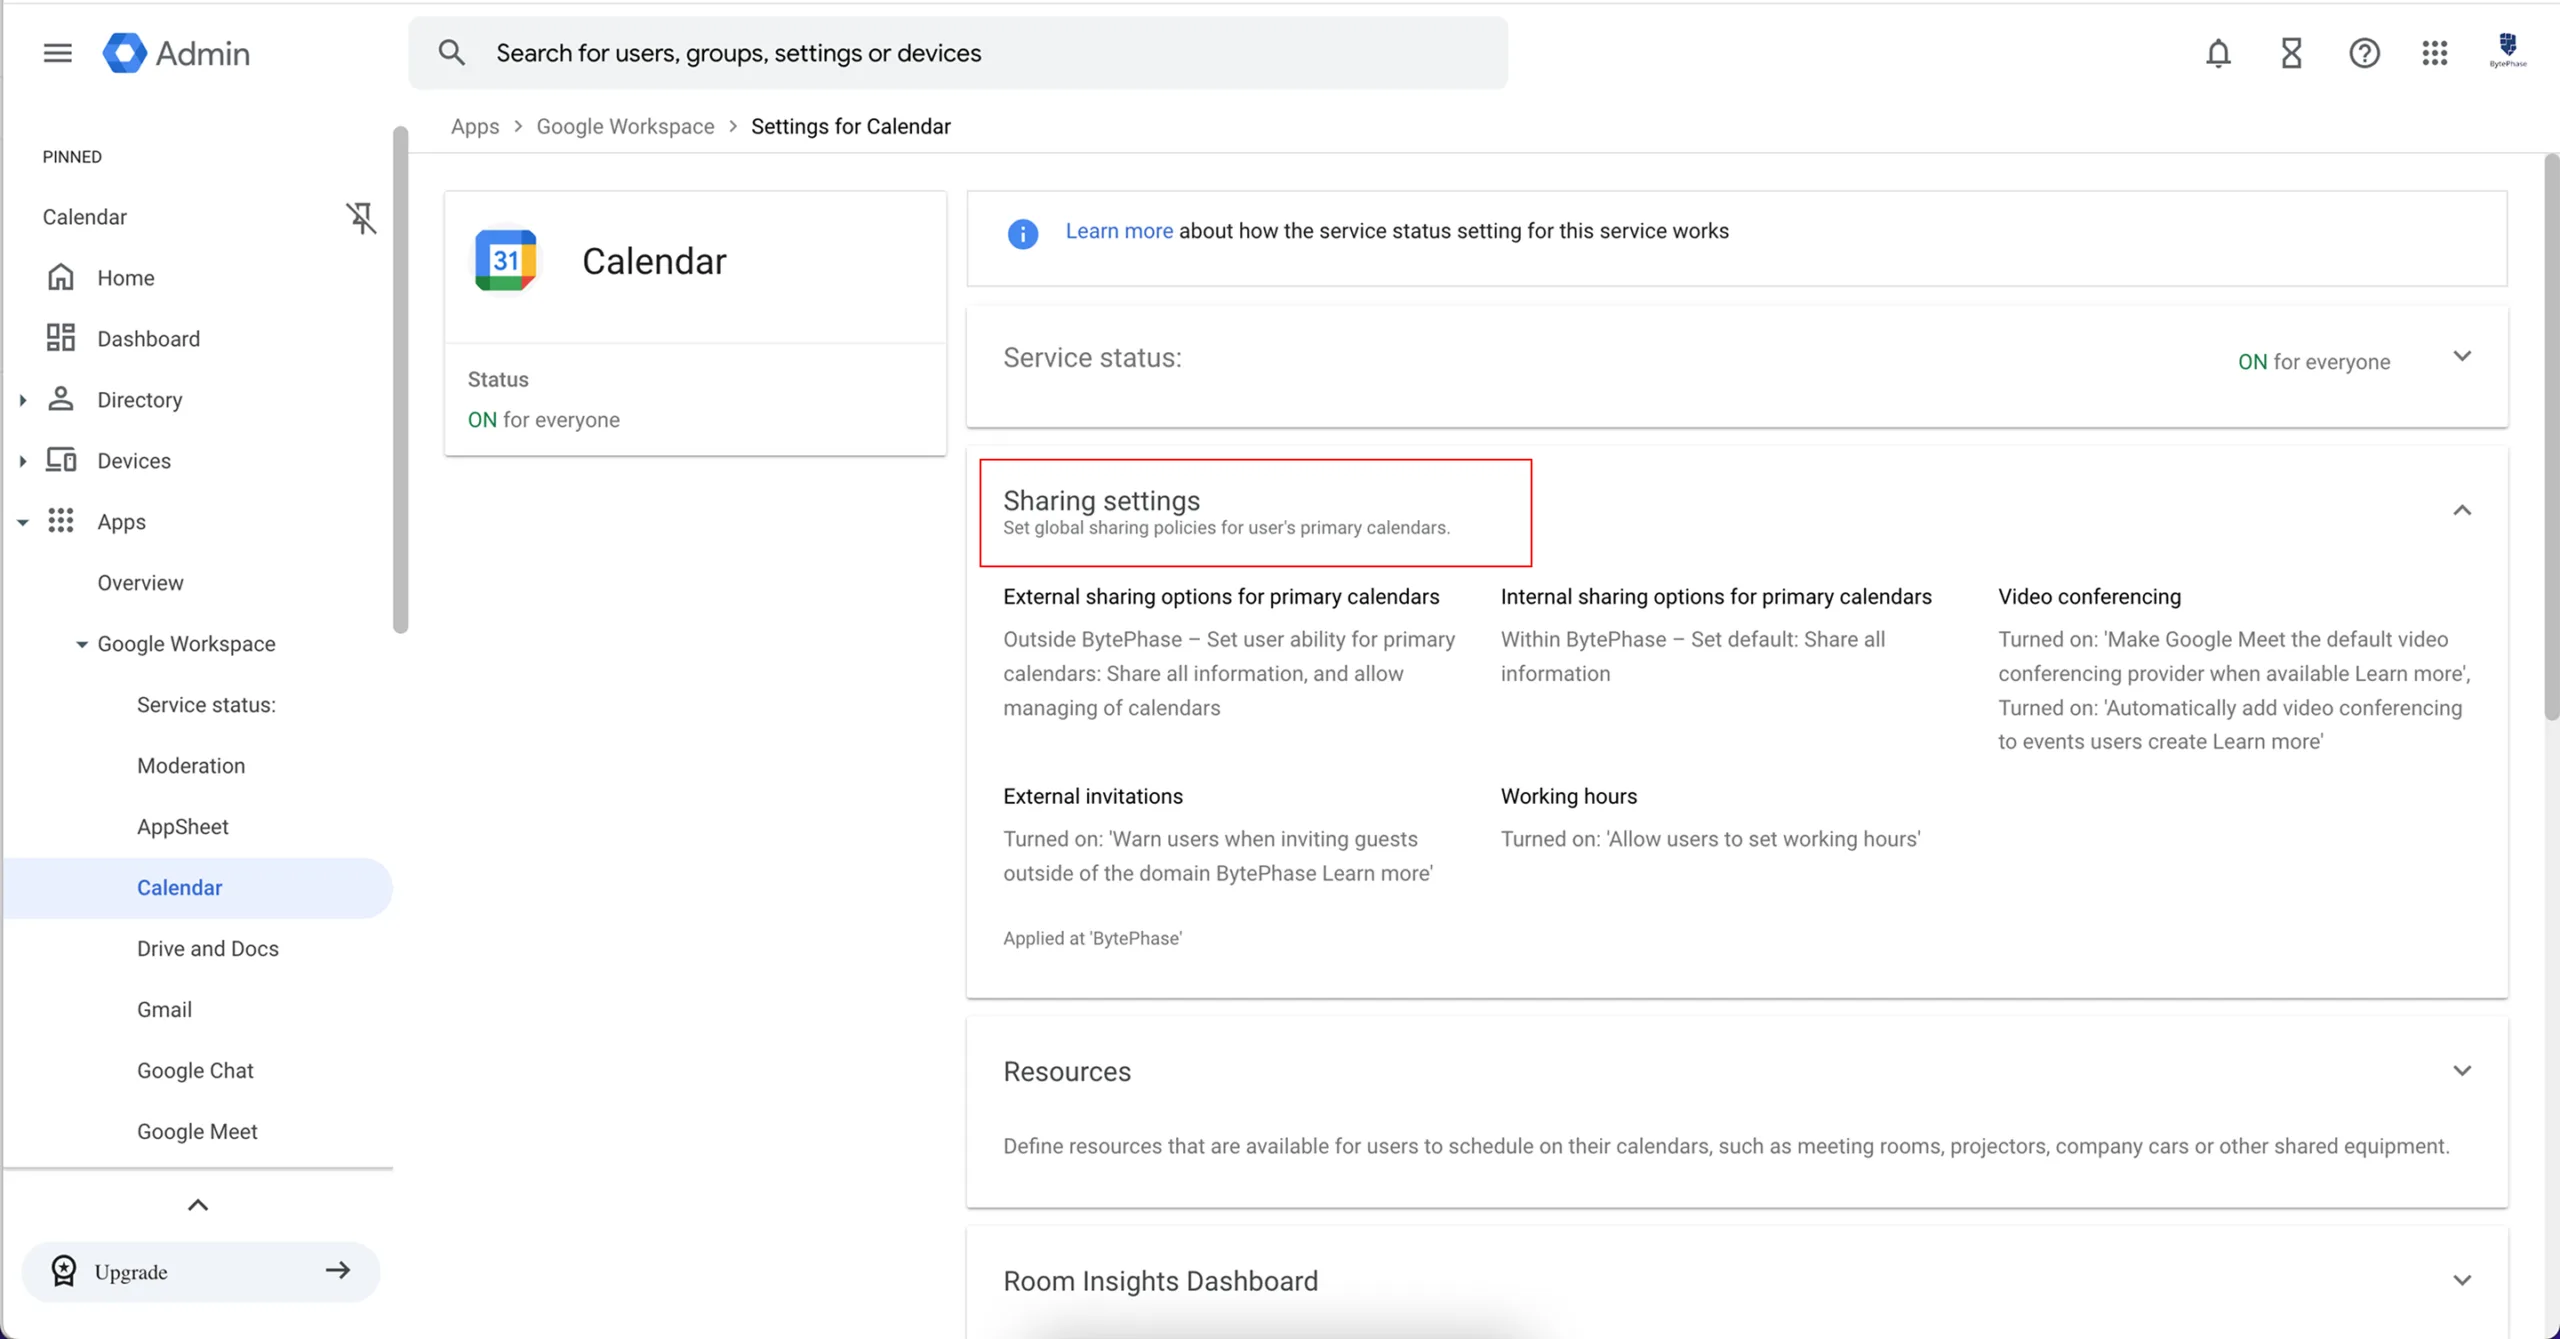
- Click Sharing settings.
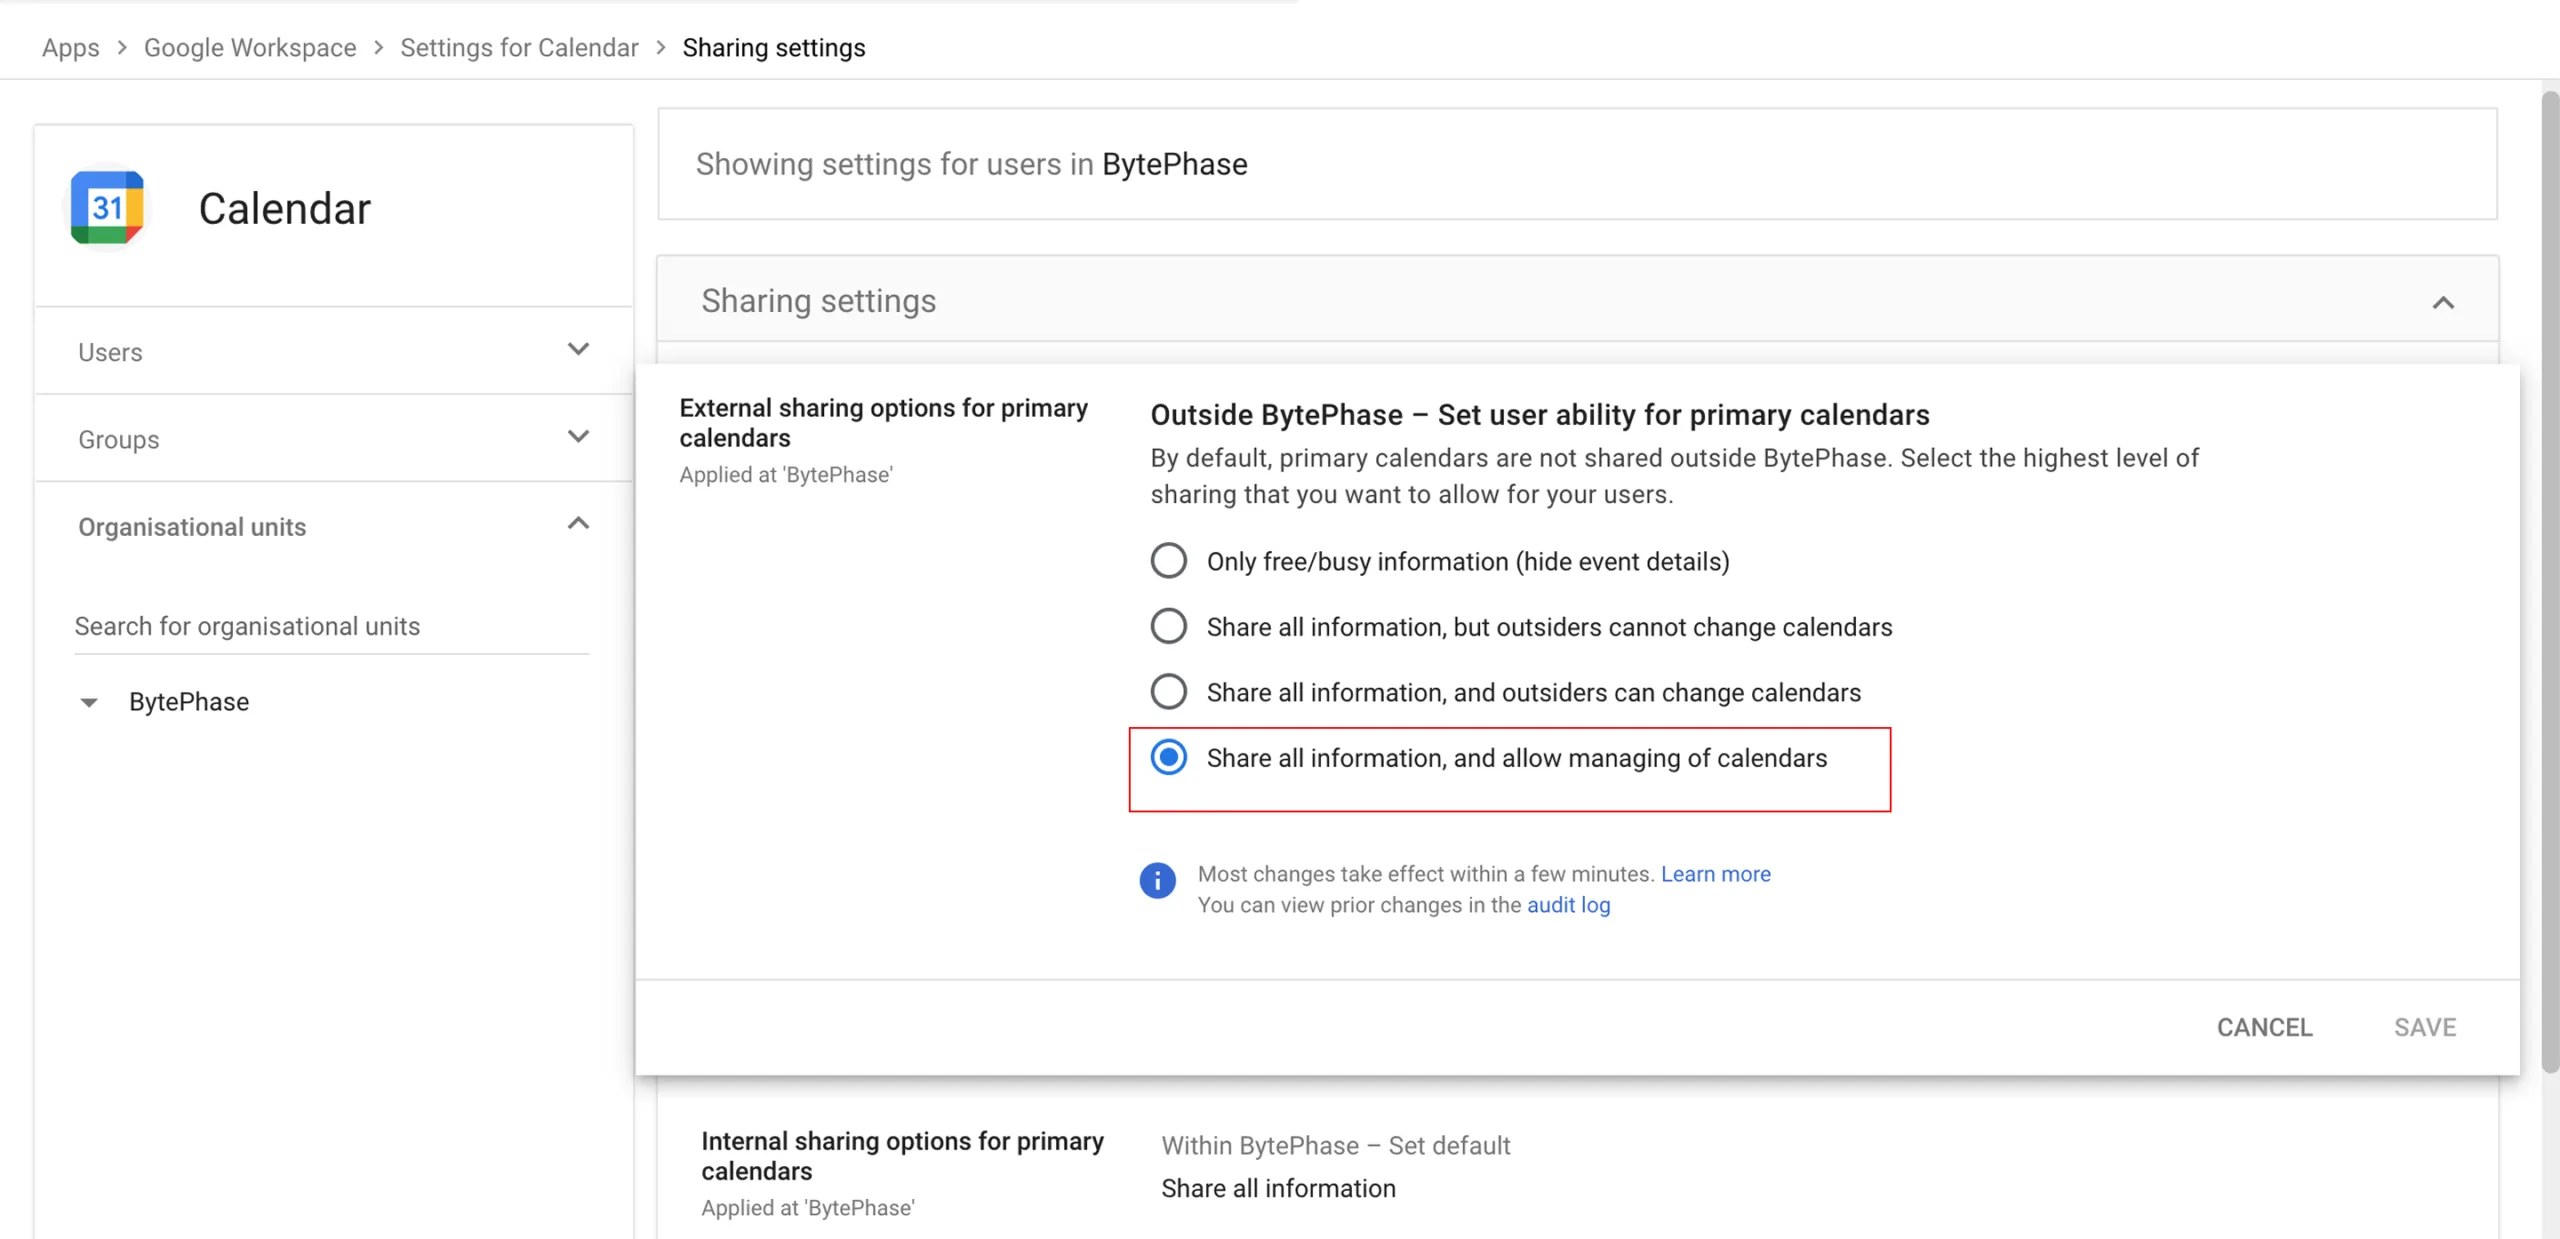
- Under External sharing options for primary calendars, choose “Share all information, and allow managing of calendars.”
- Click Save to apply the settings.
Conclusion: Sync Smarter, Work Faster with BytePhase and Google Calendar
Integrating Google Calendar with BytePhase empowers repair shops to stay organized, save time, and deliver faster service. It brings automation, visibility, and efficiency to your daily operations — ensuring you never miss a job or appointment again.
Prefer Outlook? BytePhase connects to Microsoft too — see how to integrate Outlook Calendar with BytePhase, or read about the Microsoft 365 integration. You can run both calendars at once.
📲 Log in to BytePhase CRM today, connect Google Calendar, and take complete control of your repair scheduling process!