
How to Add and Manage Employees in BytePhase (Step-by-Step)
Table of contents
Share Post

How to Add and Manage an Employee in BytePhase
Step 1: Add a new employee
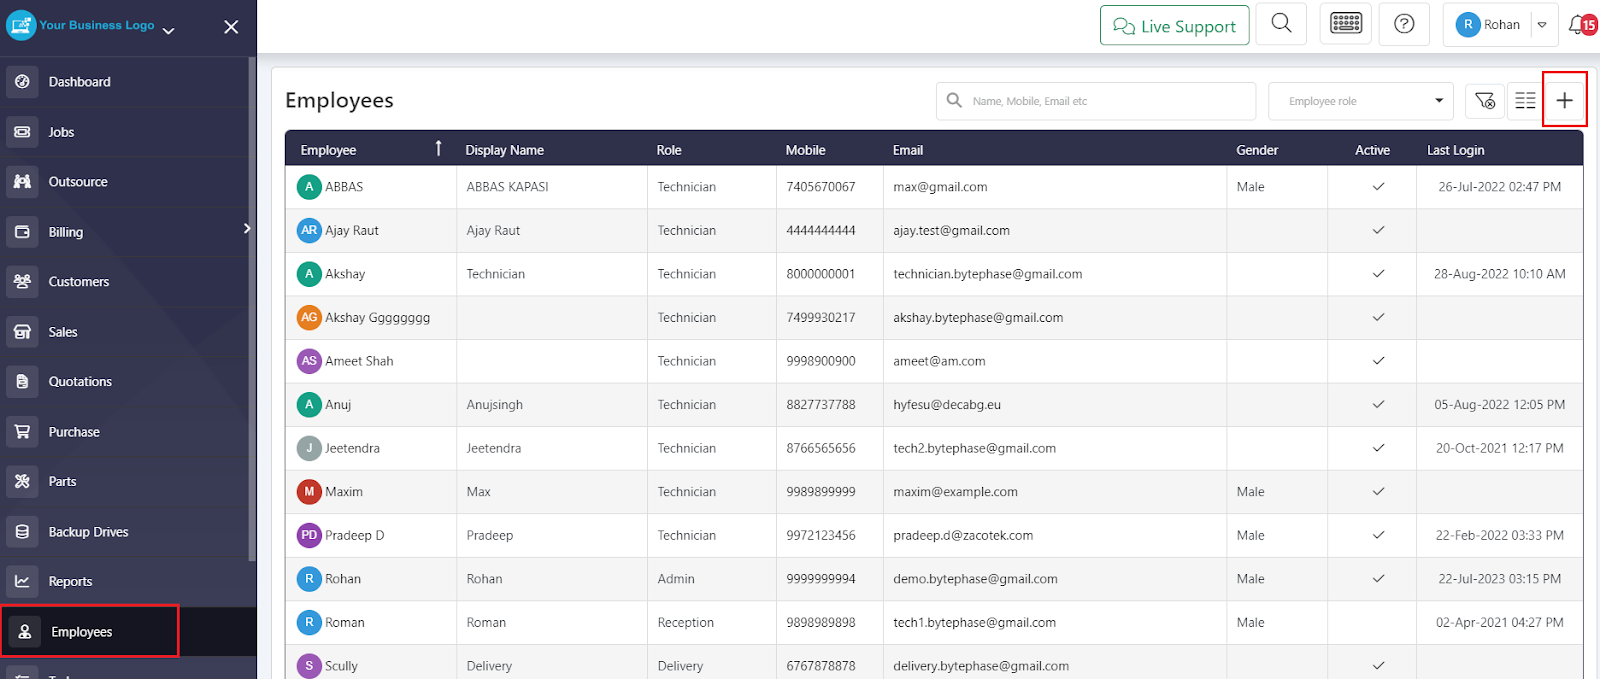
Log in to the BytePhase portal as an admin, then open the Employee tab.
- Click the [ + ] button to create a new employee.
Step 2: Fill in employee details
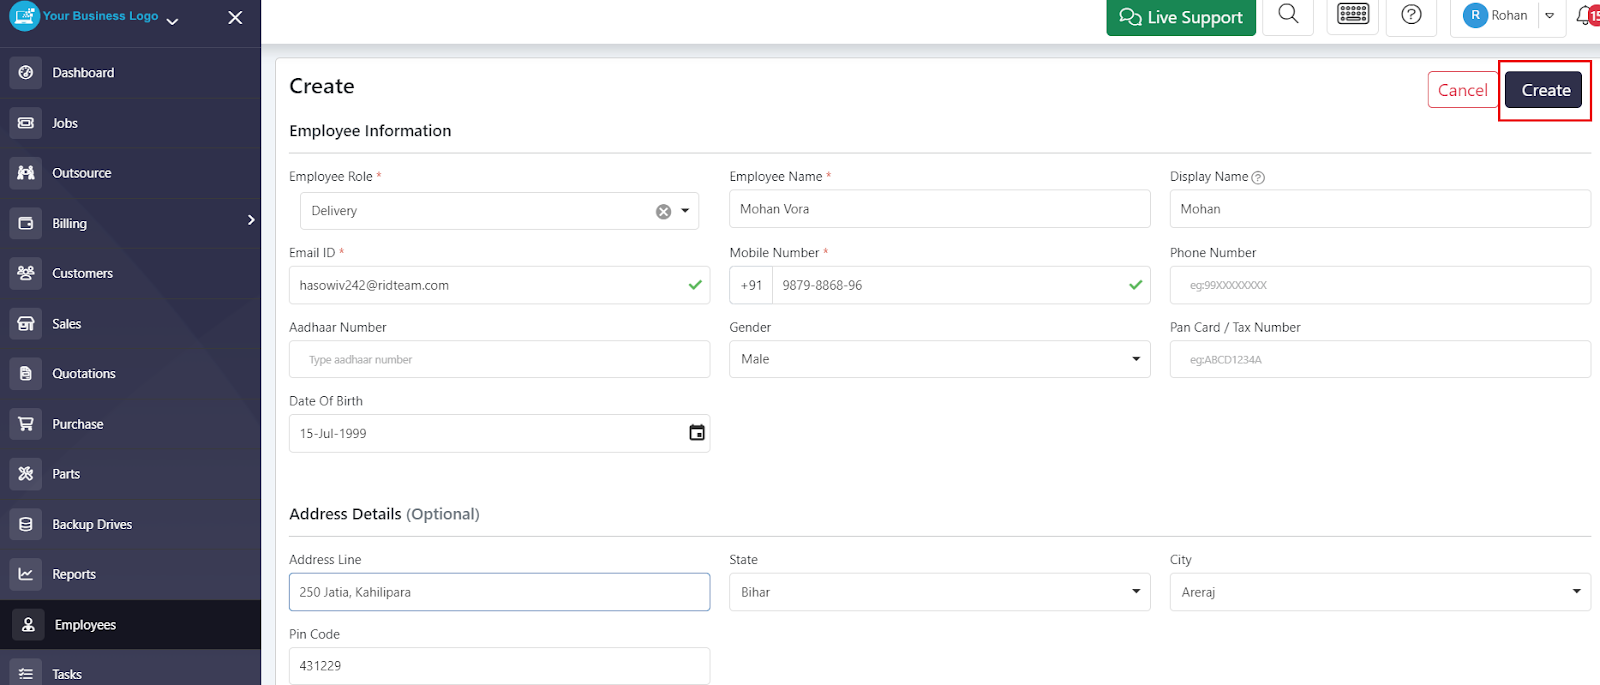
- Fill in the required employee details, then click Create.
Step 3: Open the employee profile
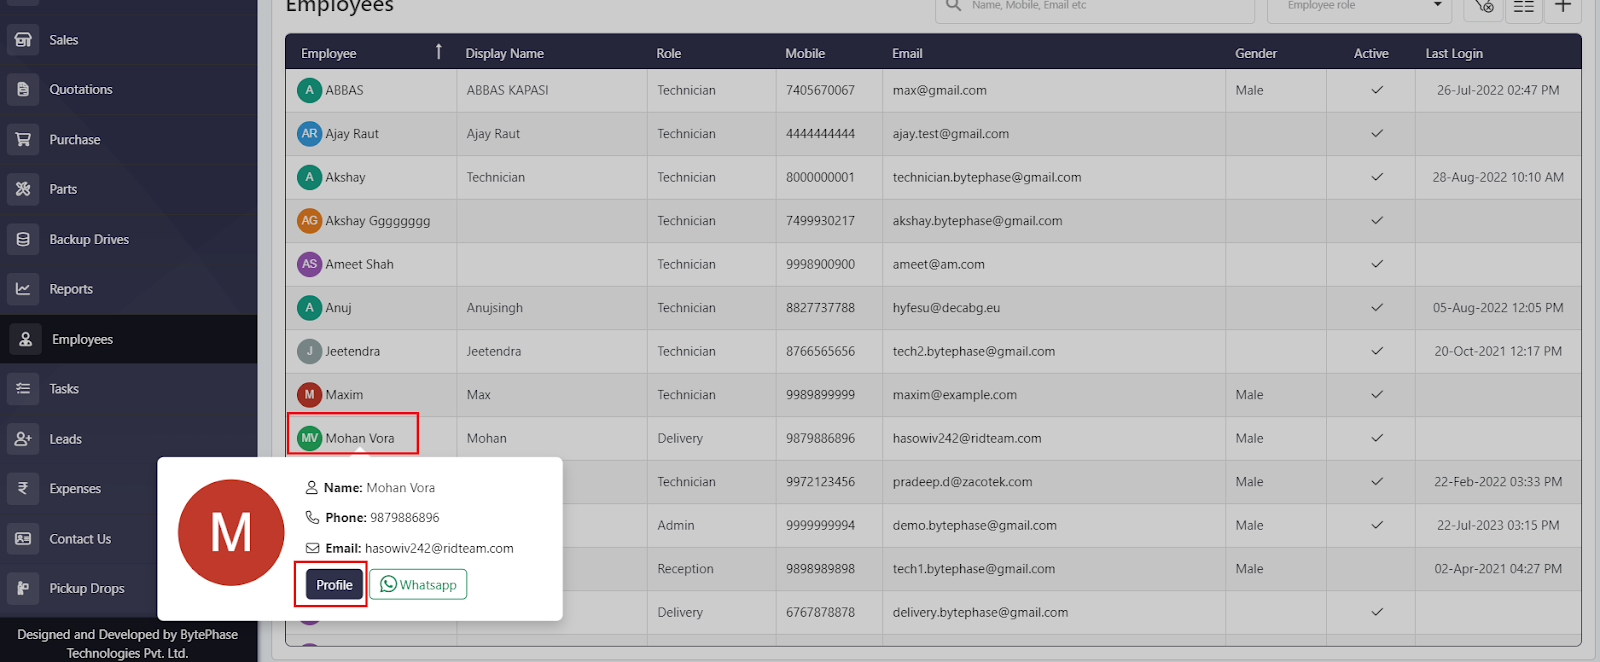
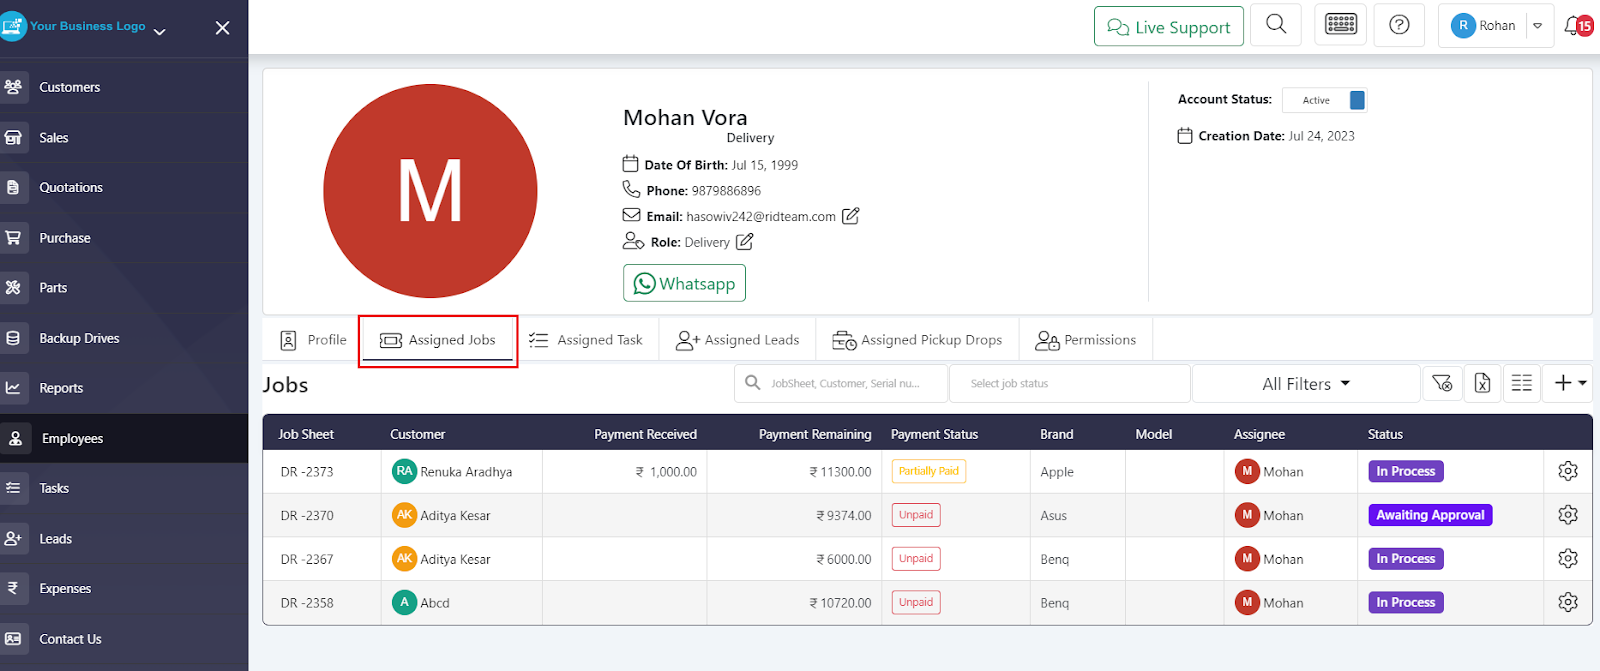
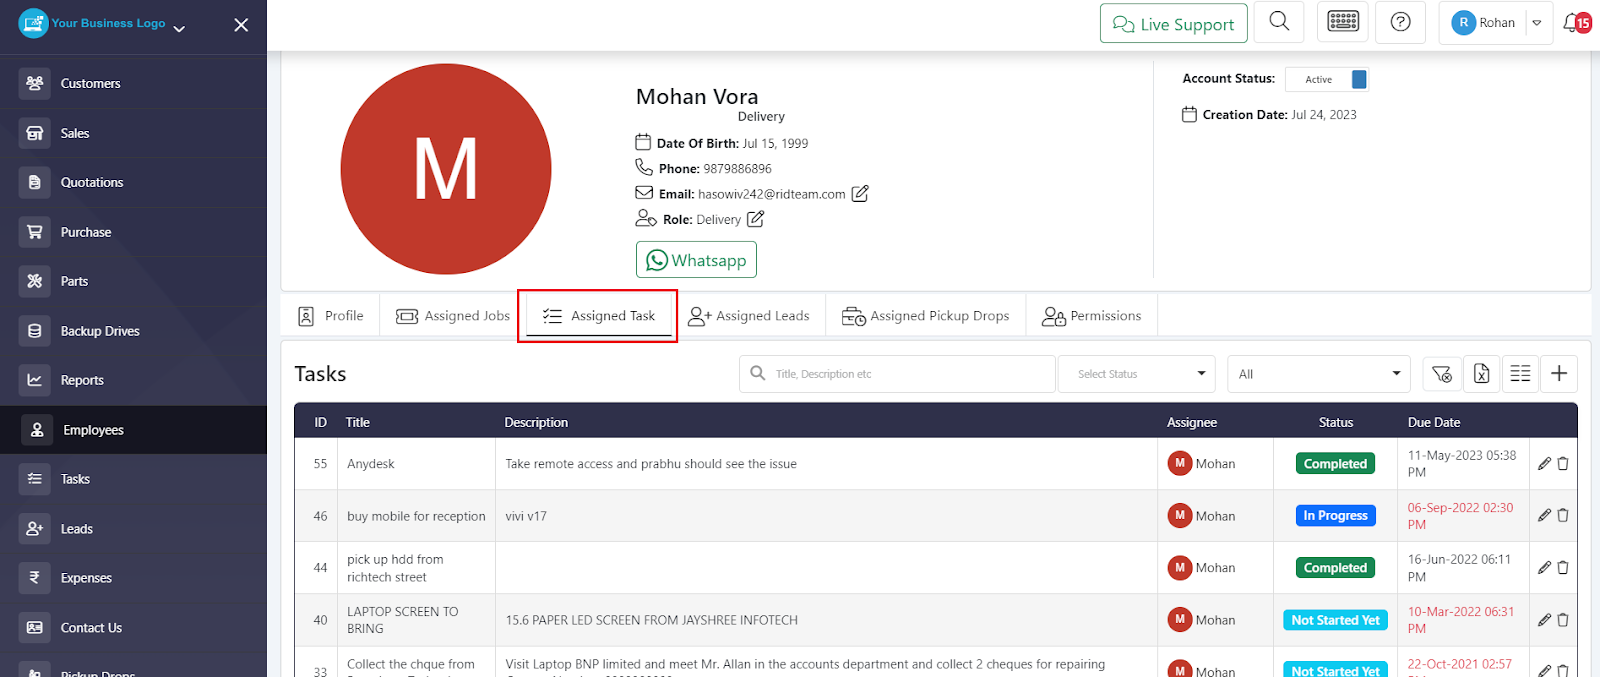
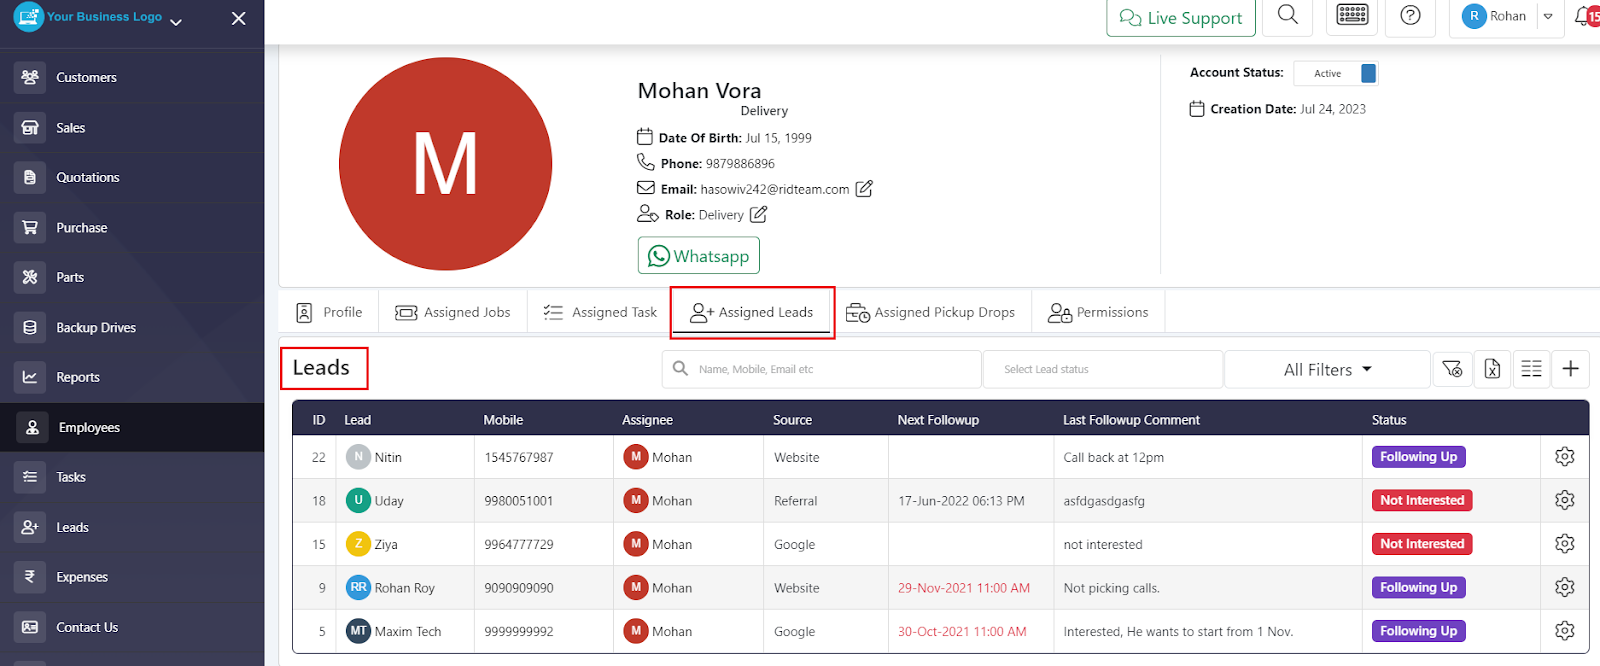
- Click on an employee to open their profile. From here you can see the jobs, leads, tasks, and pickup/drop assignments for that employee.
- From the profile, you can view or edit the employee’s details at any time.
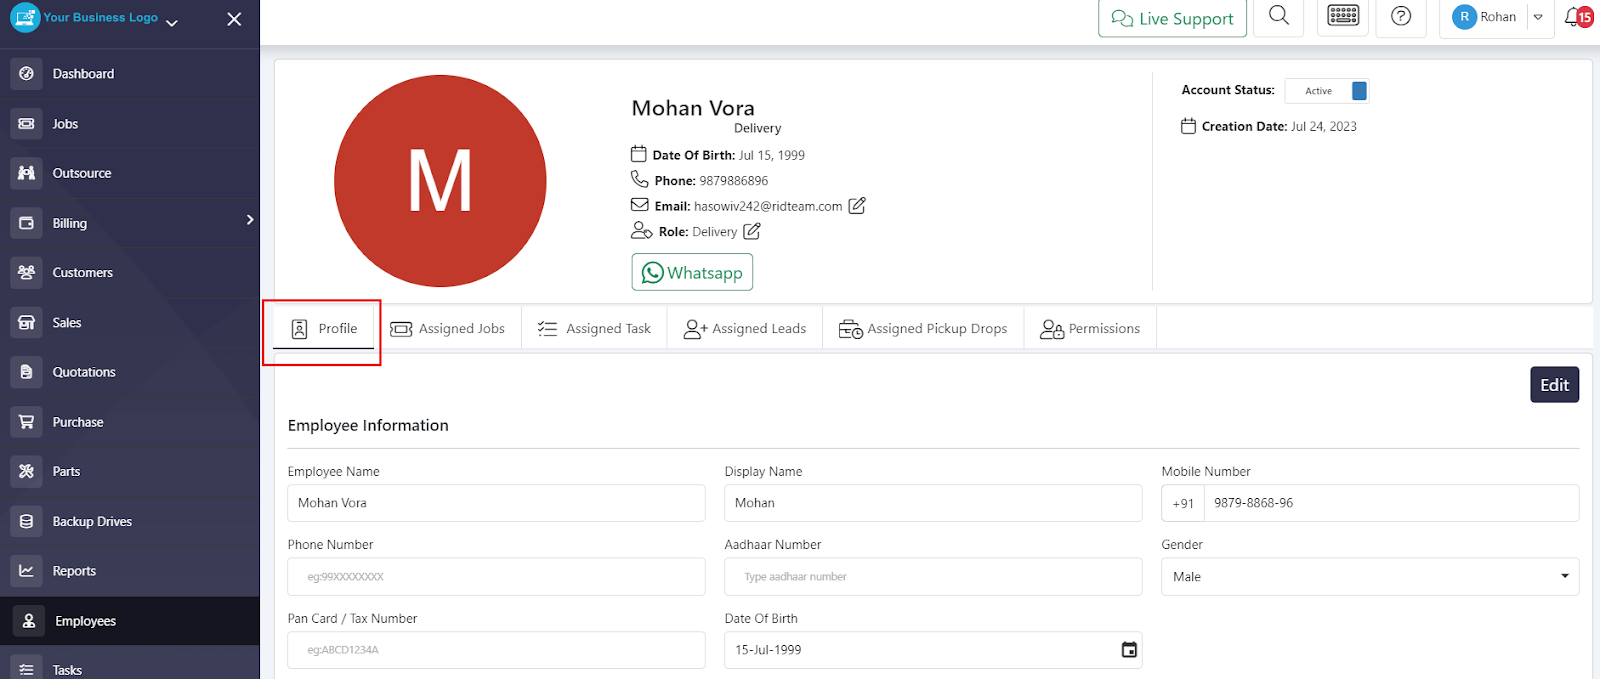
- The Assigned Jobs tab lists every job currently assigned to that employee.
- The Assigned Tasks tab shows the tasks assigned to that employee.
- The Leads tab shows the leads that have been assigned to that employee.
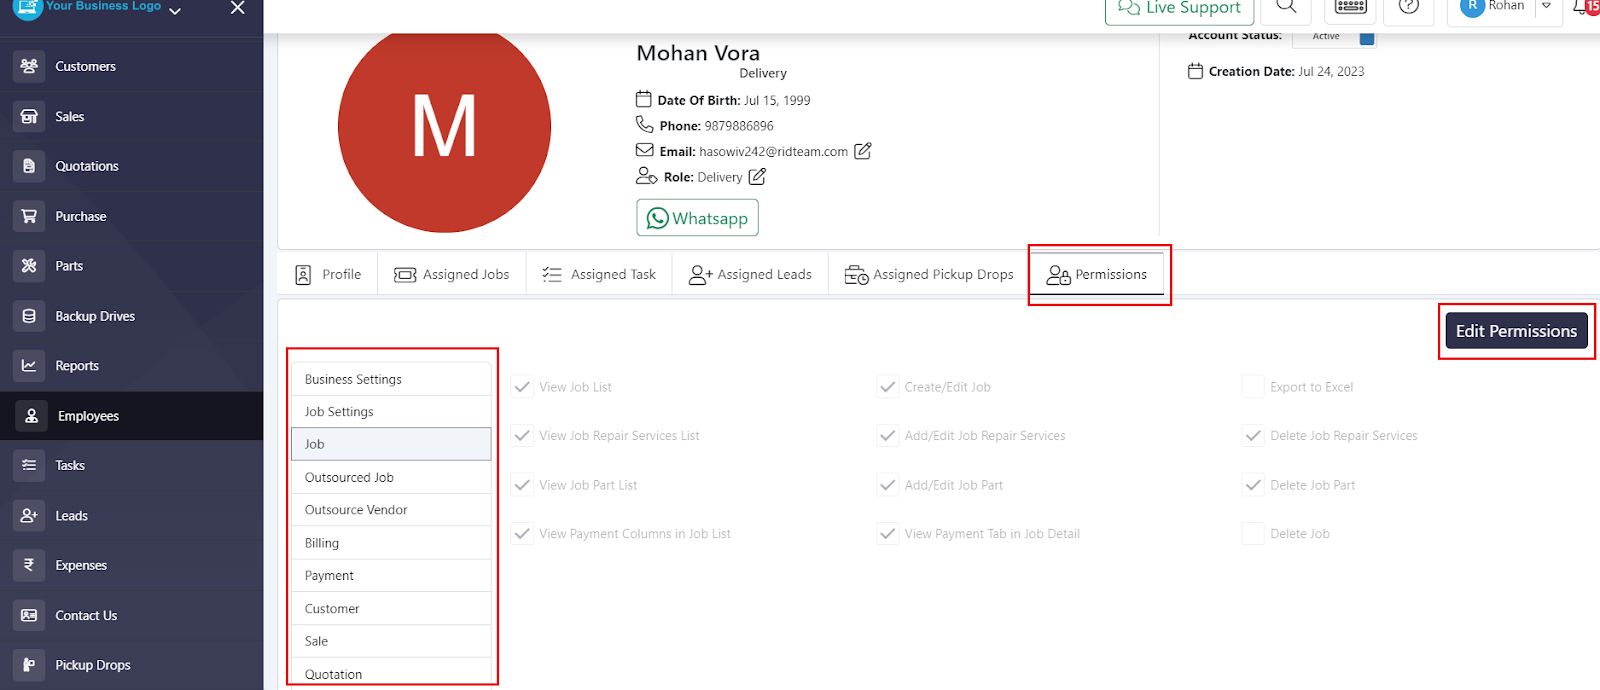
Step 4: Set employee permissions
- Use the Permissions tab to configure or edit what that employee is allowed to access.
Step 5: Employee accepts the invite
- As soon as the employee’s BytePhase account is created, an invite email is sent automatically.
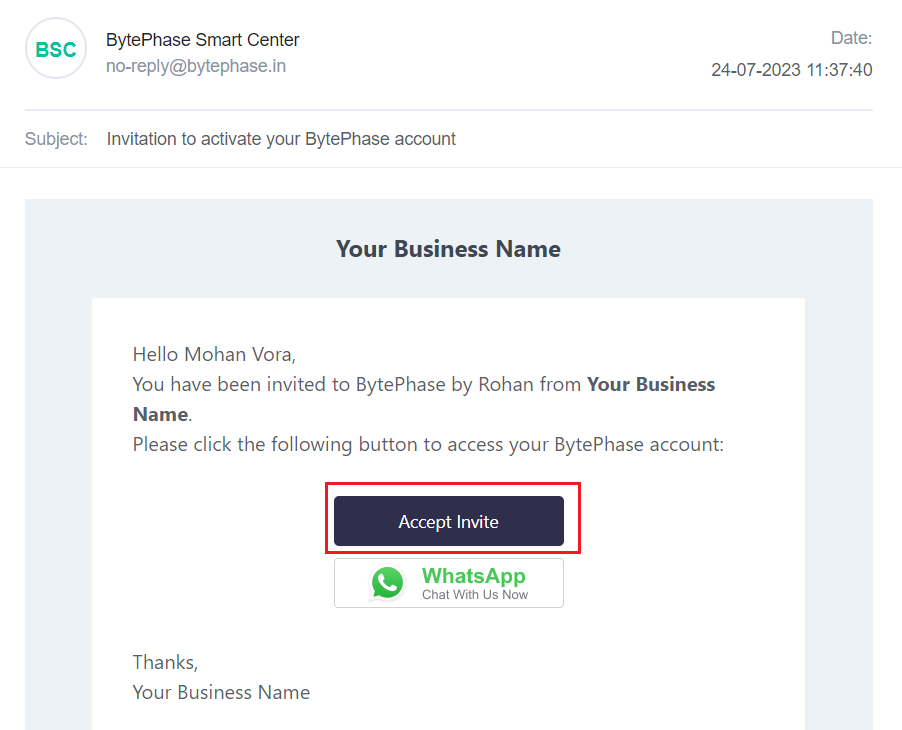
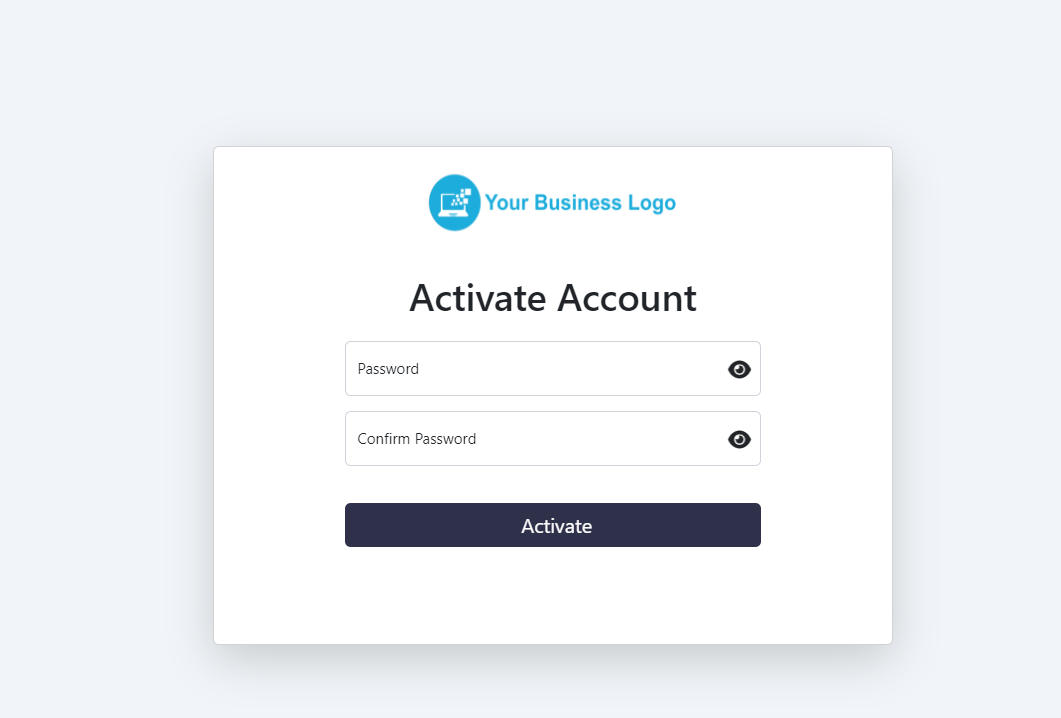
- Clicking Accept invite lets the employee set a password for their BytePhase account.
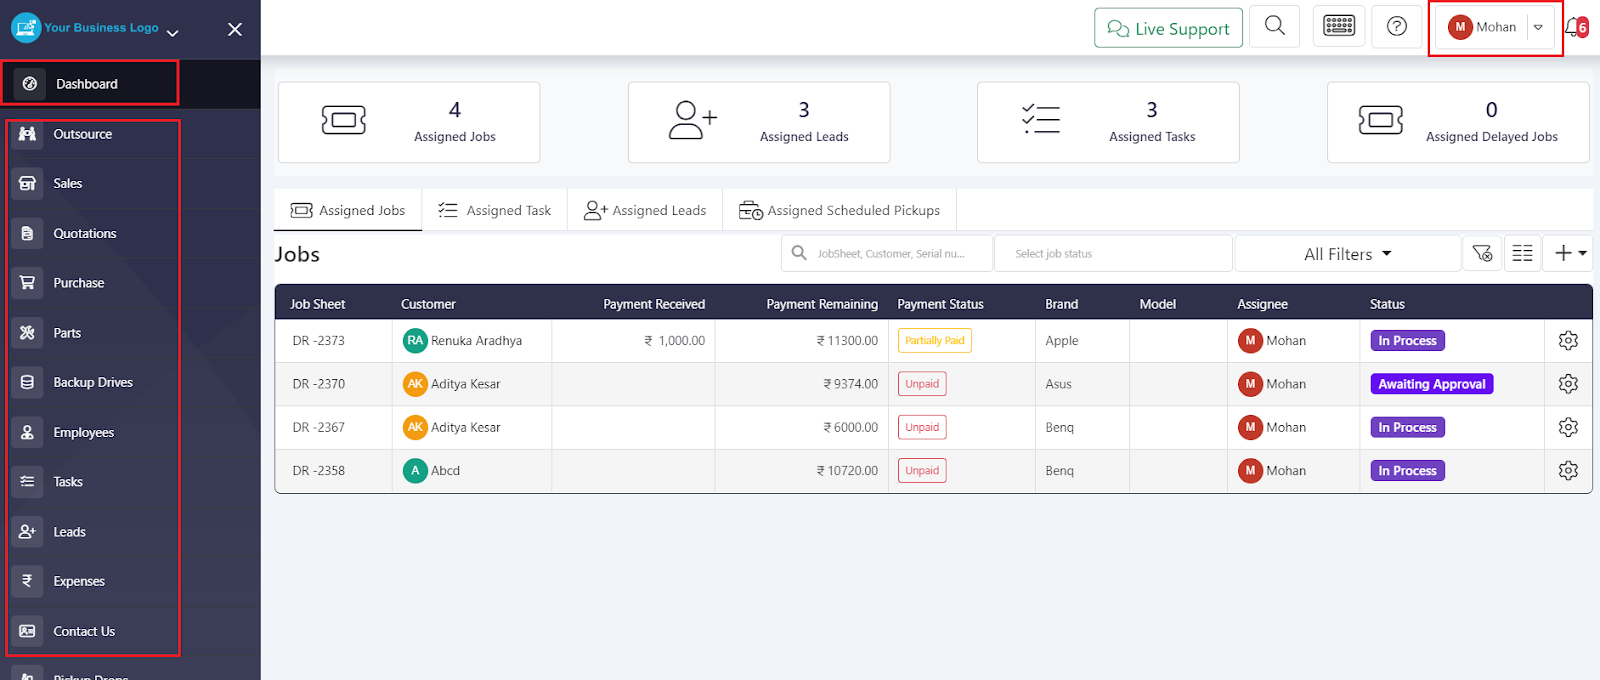
- An employee without permission to view all jobs and customers only sees their own assigned jobs on the dashboard — this is how BytePhase keeps each technician’s view scoped to their own work.
Why this matters
The employee profile gives you one place to track every assignment — jobs, leads, tasks, and pickup/drop schedules — for each staff member, so nothing falls through the cracks as your team grows. Employee management like this is a core part of how repair shop management software keeps a shop organized once you have more than one technician on the floor.
That’s the full flow for adding, permissioning, and managing employees in BytePhase — try it free for 15 days.
Share Post