How to Create Custom Fields in the BytePhase Portal?

Introduction
Every business is unique, and so are its data requirements. That’s why custom fields are an essential feature for businesses using BytePhase. Whether you need to capture extra client details, track specific job information, or manage custom data points for leads and sales, custom fields help you tailor the platform to fit your exact workflow. With BytePhase, creating and managing custom fields is quick, simple, and highly flexible—giving you full control over how you collect and organize important information.
In this detailed guide, you’ll learn how to create custom fields in the BytePhase portal, understand the key benefits, and explore real-life use cases to get the most out of this powerful feature.
Why Are Custom Fields Important in BytePhase?
First, custom fields allow you to collect specific data that standard forms may not cover. Second, they give you complete flexibility to adapt the system to your unique processes without needing external tools or add-ons. Third, custom fields improve data organization and customer insights, making your operations smoother and more efficient. And finally, they help create personalized experiences for clients and teams, leading to better service delivery.
Step-by-Step Guide to Creating Custom Fields in BytePhase Portal
Step 1: Log in to the BytePhase Portal
- Visit the official BytePhase Portal.
- Enter your login credentials to securely access your dashboard.
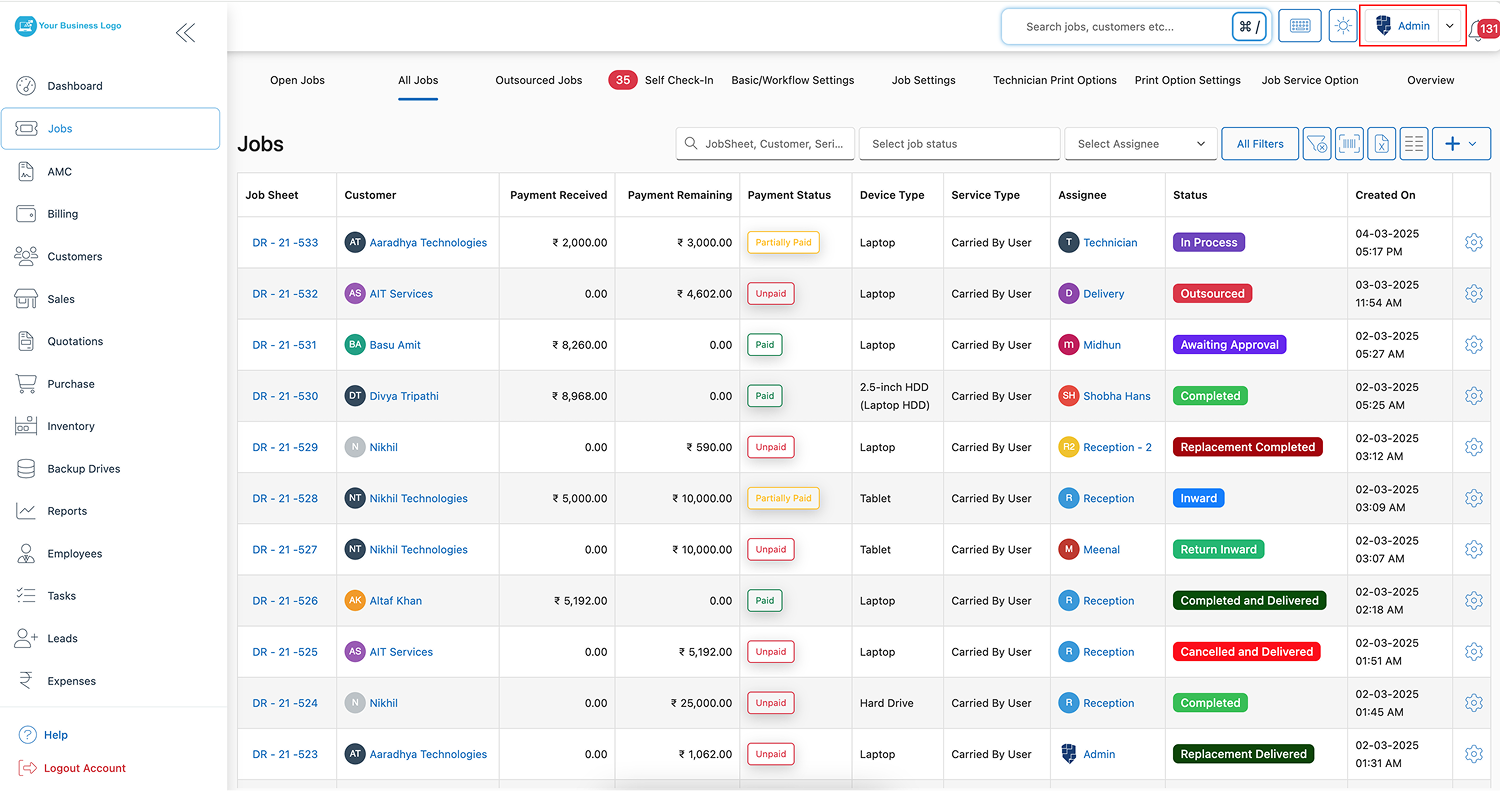
Step 2: Go to Business Settings
- Click on your profile icon in the top-right corner of the portal.
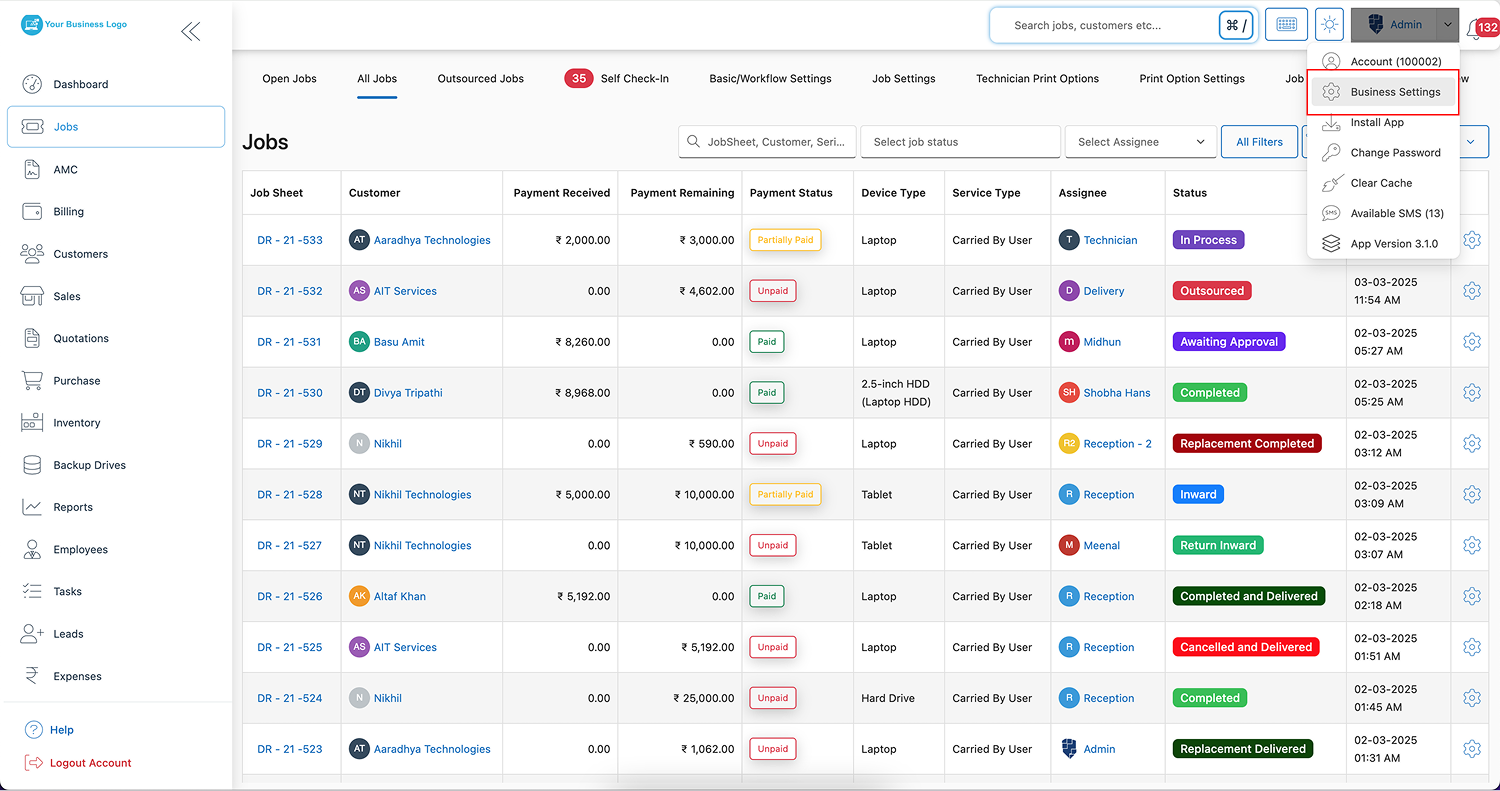
- From the dropdown, select “Business Settings” to open customization options.
Step 3: Select ‘Add Custom Fields’ Tab
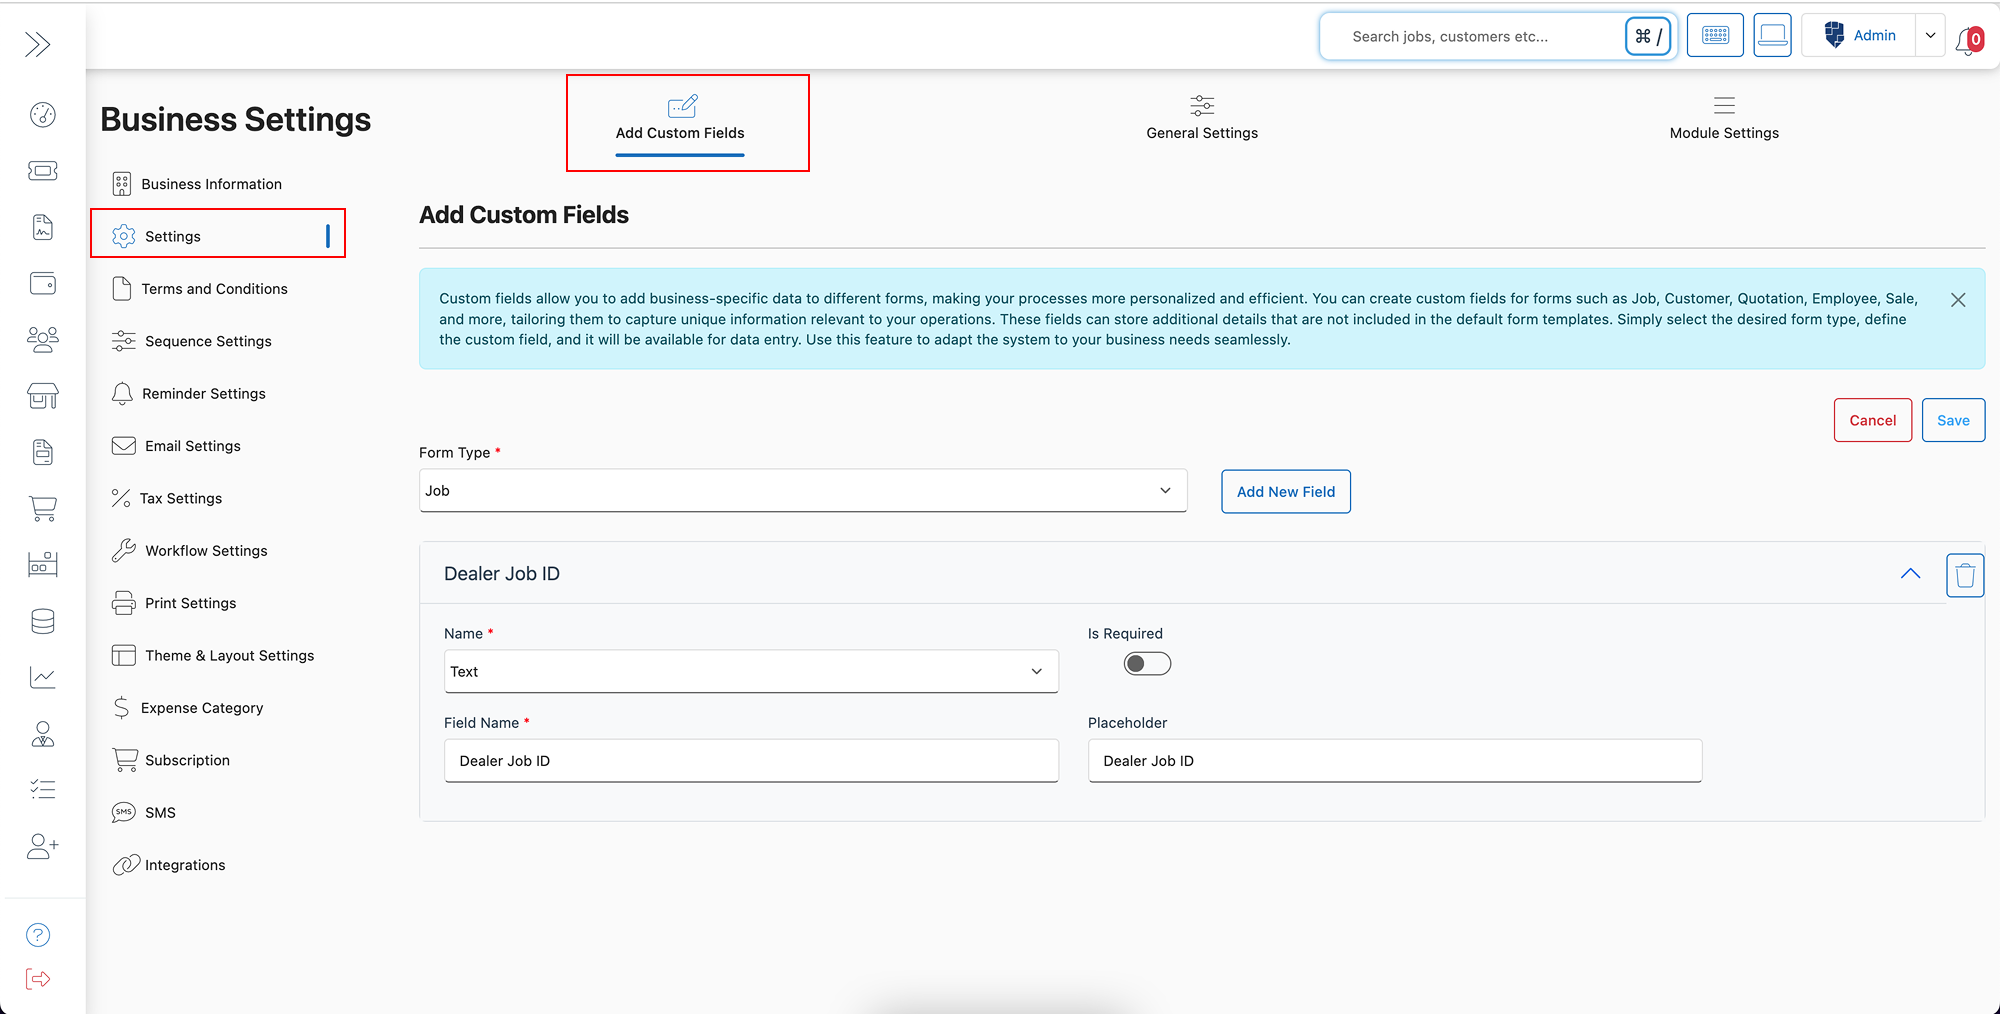
- Inside Settings, choose the “Add Custom Fields” tab to start creating a new field.
Step 4: Click on the Edit Button
- Click the “Edit” button to open the custom field configuration panel.
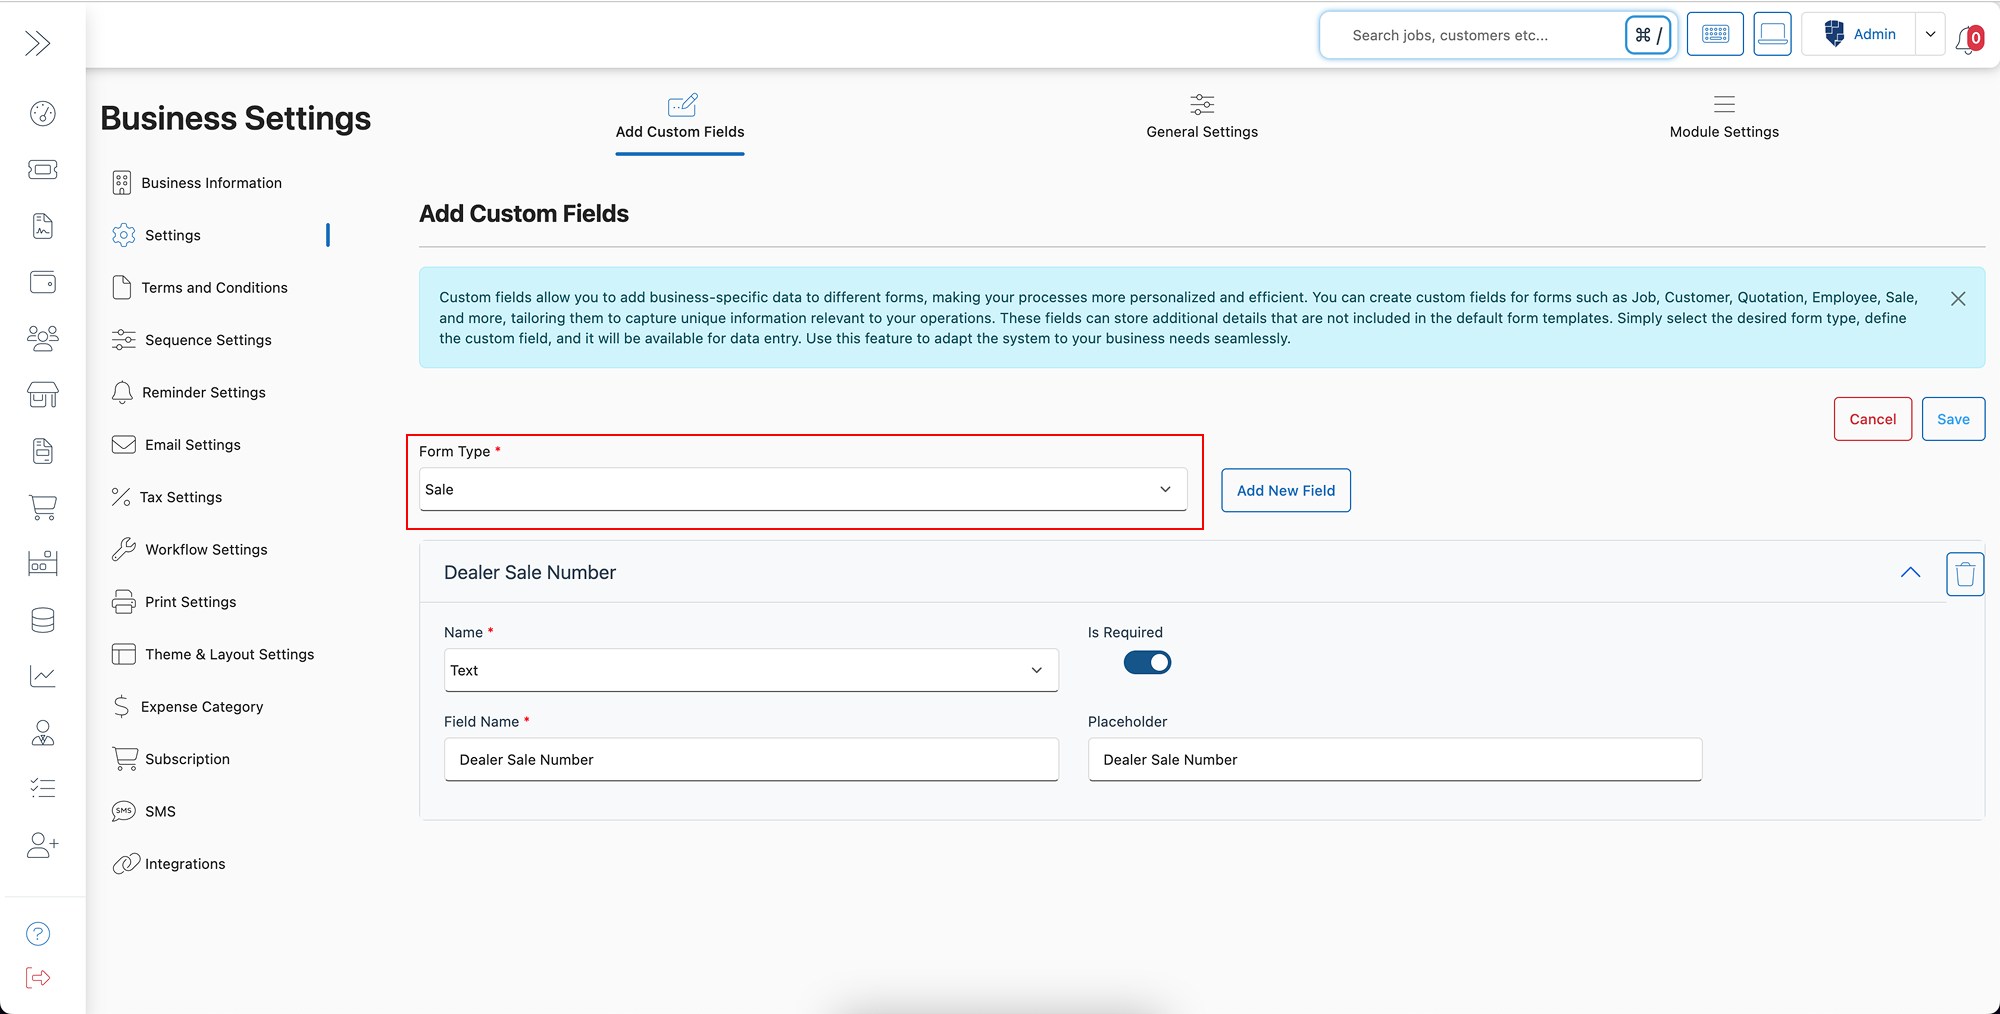
Step 5: Choose the Form Type
-
Select the form where you want the custom field to appear. You can choose from various options, including:
- Job
- Customer
- Quotation
- Employee
- Sale
- Task
- Expense
- Lead
- AMC Contract
- AMC Complaint
- Device Information
Step 6: Add the Required Information
- Enter the custom field name, type (text, dropdown, date, number, etc.), and other relevant details based on your needs.
- Define whether the field is mandatory or optional.
Step 7: Save the Custom Field
- Once done, click “Save” to apply the custom field to the selected form.
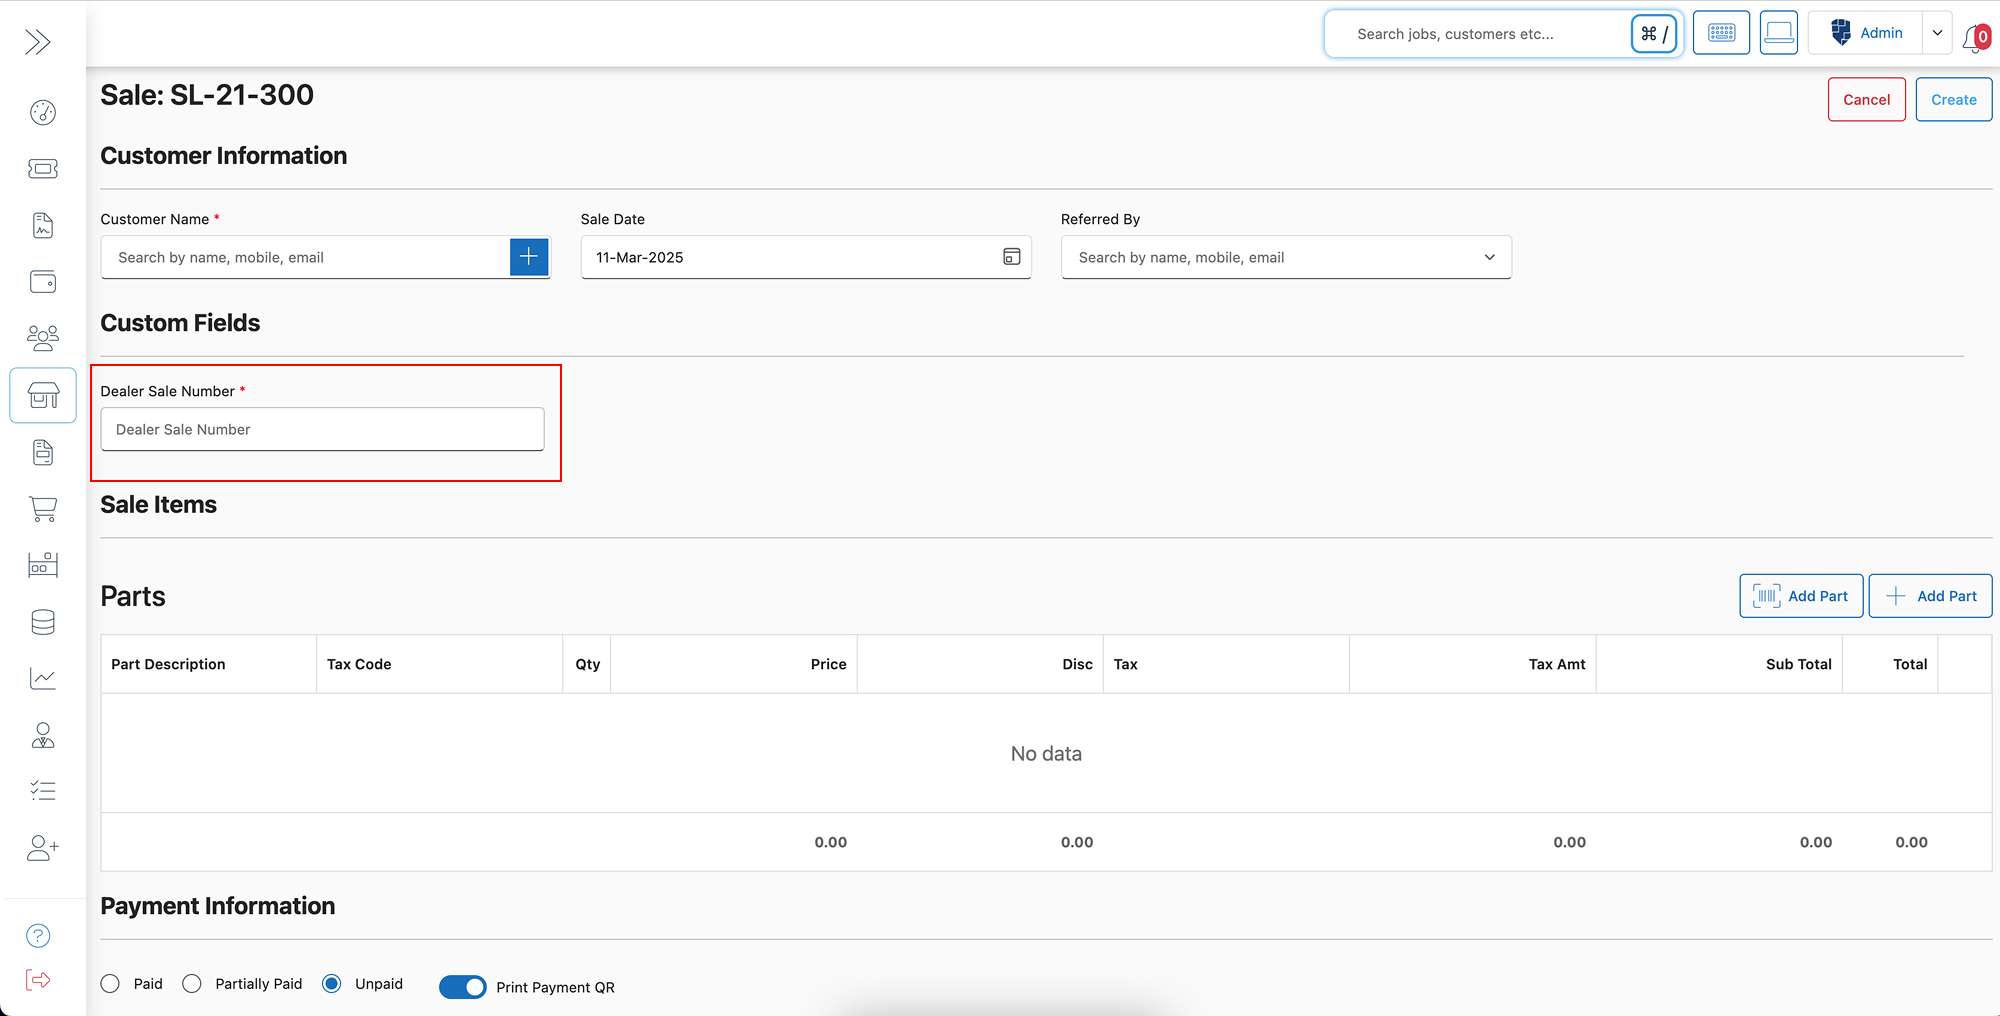
✅ Now, when you open that form, the custom field will be visible and ready to use!
Key Features and Benefits of Creating Custom Fields in BytePhase
✨ Full Customization – Easily adapt BytePhase to match your unique business processes without coding.
✨ Form-Specific Fields – Add custom fields to any module, including jobs, customers, sales, and more.
✨ Improved Data Management – Collect exactly the information you need, ensuring clean and organized data.
✨ Enhanced Customer Insights – Capture detailed client or transaction-specific data for better analysis and reporting.
✨ Flexible and Scalable – As your business grows, you can add, edit, or remove fields anytime.
✨ No Technical Expertise Required – Simple interface allows any user to create custom fields without technical support.
Practical Example: How BytePhase Custom Fields Help Your Business
Imagine managing multiple clients where each job requires different specifications. Without custom fields, you may struggle to organize important details like equipment type, service preferences, or deadlines. But with BytePhase’s custom fields, you can easily add fields like “Preferred Technician” or “Special Instructions” directly into the job form. This way, every team member sees the same information, ensuring consistency and professionalism.
Additional Tips for Using Custom Fields Effectively
- ✅ Keep custom fields specific and relevant to avoid overwhelming users with unnecessary information.
- ✅ Use dropdowns or checkboxes for fields with limited options to maintain data consistency.
- ✅ Mark essential fields as mandatory to ensure critical data is always collected.
- ✅ Review and update custom fields periodically to keep up with evolving business needs.
- ✅ Combine custom fields with reports to analyze trends and improve decision-making.
Conclusion: Customize Your BytePhase Portal for Maximum Efficiency and Accuracy
Creating custom fields in BytePhase is a simple yet powerful way to tailor the portal to your exact business needs. It gives you the flexibility to capture important details, streamlines data collection, and enhances overall efficiency. Whether you are managing jobs, sales, leads, or customer relationships, custom fields ensure that nothing important is ever missed.
? Ready to take full control of your business data?
? Log in to BytePhase today, add your bank details, and ensure smooth financial transactions!
Read more about our other features.
Need assistance? Check our Help Center or contact BytePhase Support for expert help.

