
How to Add Bank Details in BytePhase CRM (Step-by-Step Guide)
Introduction
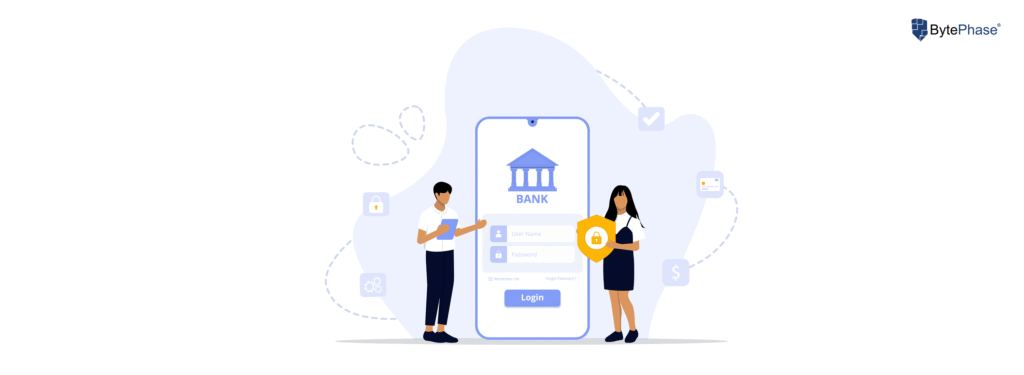
Accurate banking information is essential for smooth business transactions, especially when it comes to generating invoices, collecting payments, and keeping financial records consistent. Learning how to add bank details in BytePhase takes only a few minutes, and once saved, the information is stored securely and displayed automatically on customer-facing documents such as invoices, receipts, and quotations.
Whether you’re onboarding BytePhase for the first time or updating existing account information, this guide walks you through the step-by-step process to add bank details in the BytePhase Portal, along with the key benefits and a few best practices.
Why adding bank details in BytePhase CRM is important?
Before we dive into the process, let’s understand why this small step makes a big impact:
-
🔐 As a result, it enables seamless payment collection, streamlining your cash flow and improving overall business efficiency.
-
📄 Additionally, it automatically displays account information on invoices and receipts, saving time and ensuring consistency across all financial documents.
-
🔍 Furthermore, it ensures professional documentation by including accurate financial details, enhancing the overall credibility of your business communications.
-
💳 Moreover, it improves customer trust by displaying verified bank credentials, reinforcing the professionalism and reliability of your business.
-
⚙️ In addition, it reduces manual entry and minimizes billing errors, ensuring a smoother and more accurate financial workflow.
Step-by-Step: How to Add Bank Details in BytePhase CRM
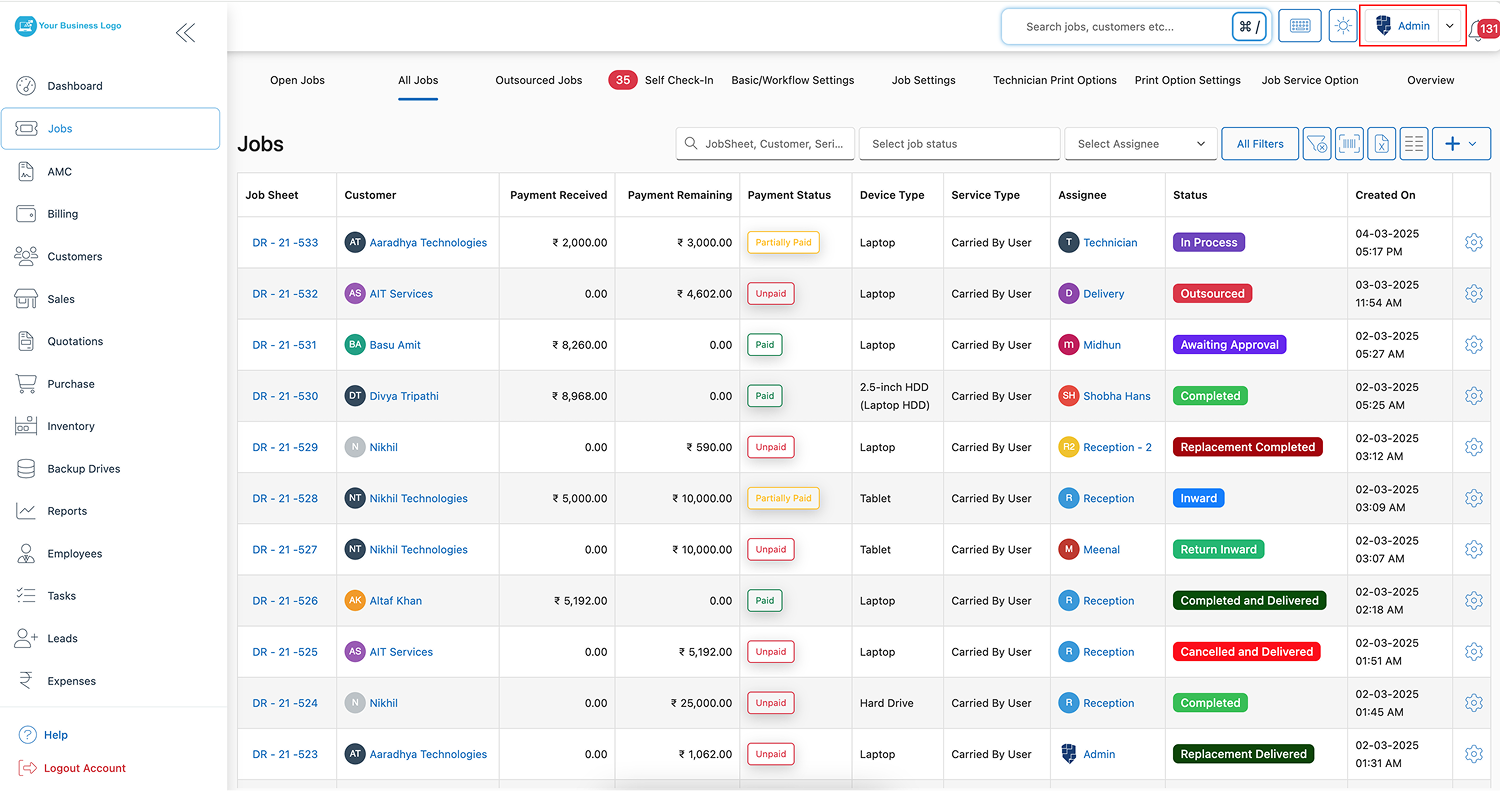
Step 1: Log in to BytePhase Portal
- Start by visiting the BytePhase login page and entering your email/phone number and account password to securely access your dashboard
Step 2: Navigate to Business Settings
-
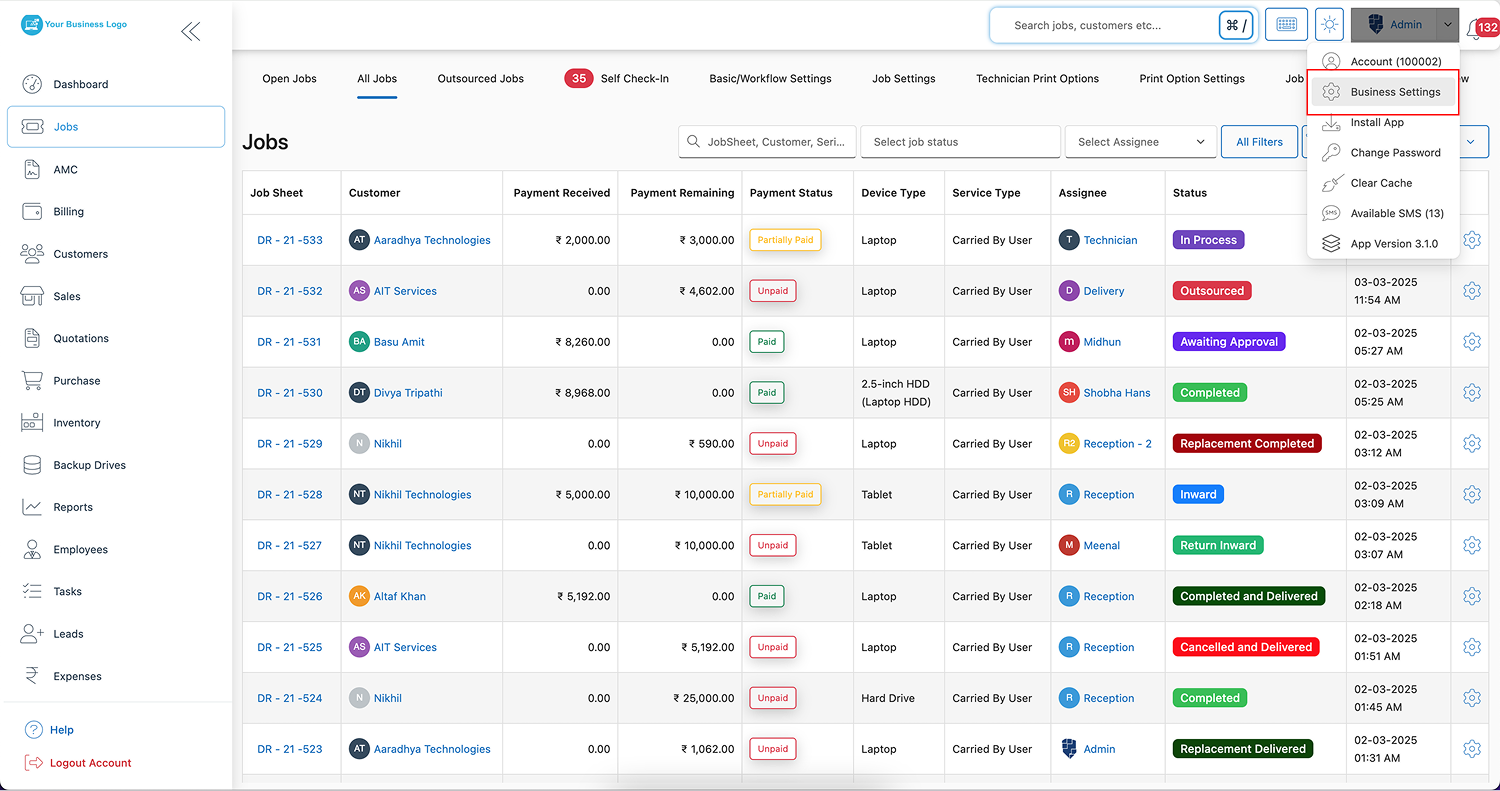
Once logged in, go to the top-right corner of the screen and click on your user icon. From the dropdown menu, select “Business Settings.”
Step 3: Go to the Bank Details Section
-
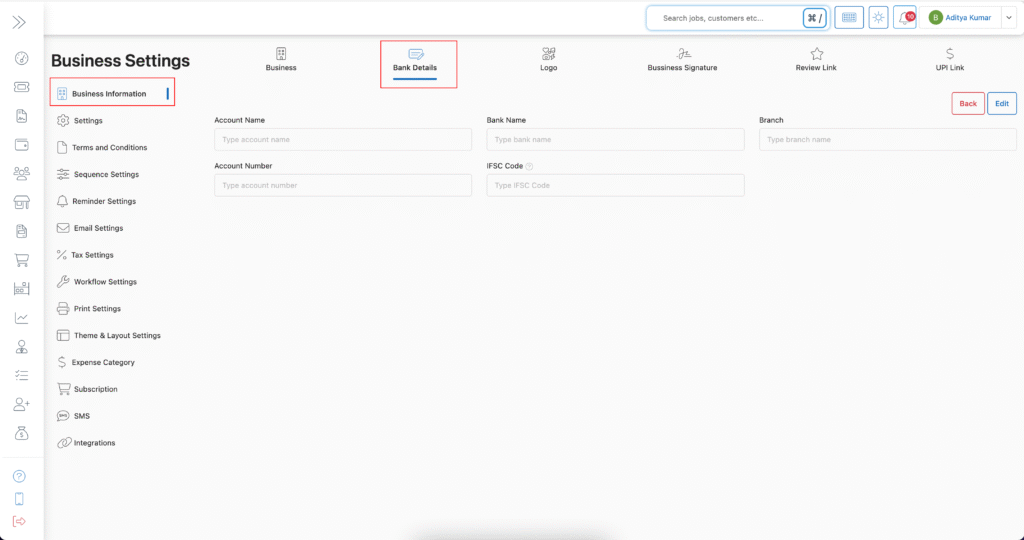
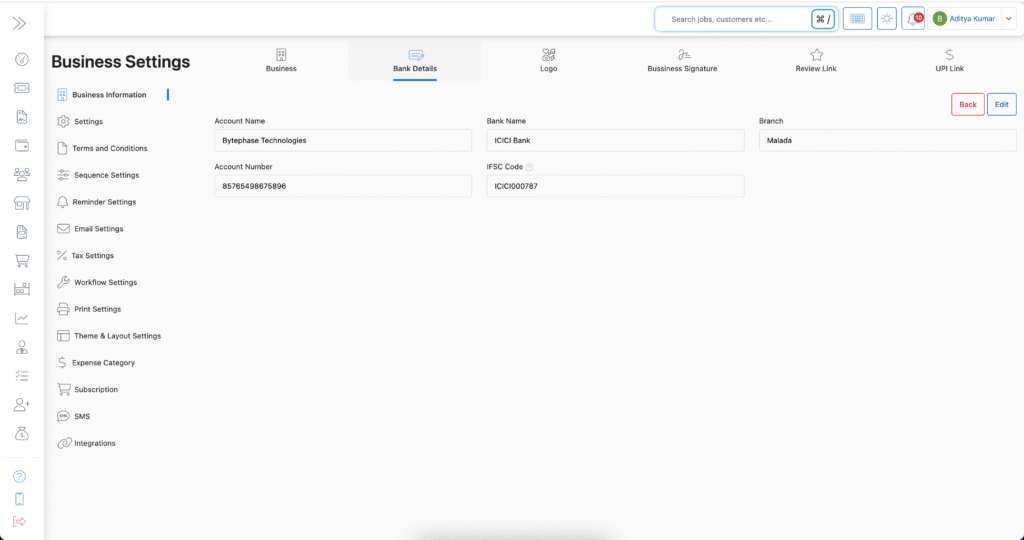
On the Business Settings page, locate and click on the “Bank Details” tab in the sidebar.
Step 4: Click the Edit Button
-
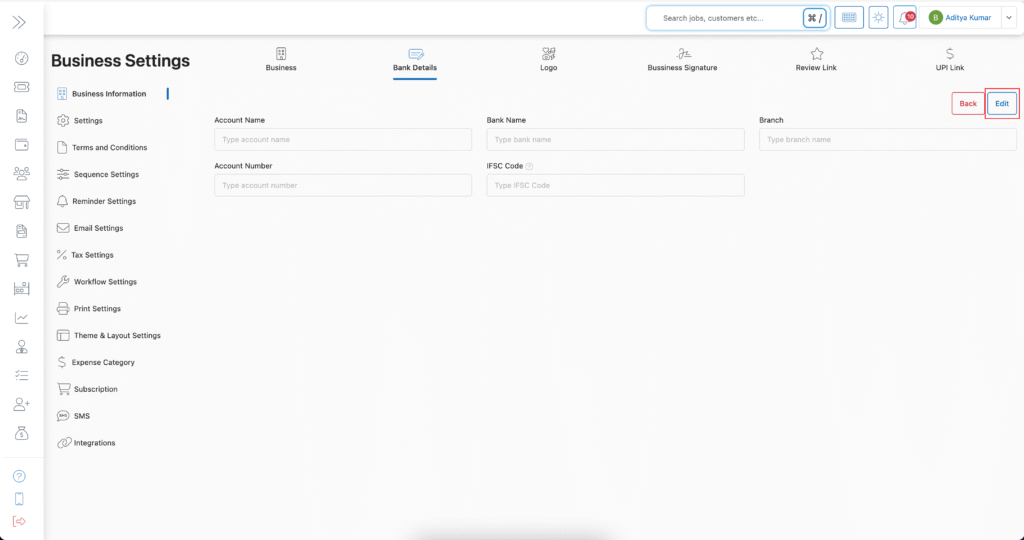
Next, click the “Edit” button to make changes or input new bank information.
Step 5: Enter Your Bank Details
Fill in all required fields carefully:
-
Account Name – Name of the account holder (business or individual)
-
Bank Name – Full name of your bank
-
Branch – Bank branch where the account is registered
-
Account Number – Your unique account number for payments
-
IFSC Code – Bank’s IFSC code for NEFT/RTGS/IMPS transfers
Step 6: Save Your Bank Details
-
After reviewing the information, click on the “Save” button to apply changes. Once added, your bank details will be securely stored in BytePhase and automatically linked to all financial documents generated through the CRM, such as invoices, receipts, and quotations.
Where Will These Bank Details Appear?
Once saved, your banking information will automatically display on:
-
🧾 Invoices – Makes it easier for customers to send payments
-
📬 Quotations – Enhances credibility with verified financial information
-
📥 Receipts – Ensures transaction consistency across records
This not only streamlines the billing process but also reduces customer confusion, leading to faster and more accurate payments.
Best Practices for Adding Bank Details
To ensure smooth setup and avoid mistakes, follow these tips:
-
✔ Double-check account number and IFSC code before saving
-
✔ Use the official business account for better record-keeping
-
✔ Update immediately if there are changes in account details
Key Benefits for Service-Based Businesses
Because BytePhase doubles as complete repair shop billing software, your saved bank details carry through everywhere money changes hands:
⭐️ Faster customer payments with clear bank instructions
⭐️ Professional-looking invoices with branded account details
⭐️ Reduced follow-ups regarding bank transfers
⭐️ Centralized banking info for all employees using BytePhase
⭐️ Compliant documentation ready for audits or financial reviews
Secure Your Payments by Adding Bank Details Today
Setting up your bank details in BytePhase CRM is more than a formality — it’s a foundational step that streamlines payments, boosts customer confidence, and enhances business professionalism. With just a few clicks, this information is applied automatically across all your documents, saving time and reducing the risk of manual errors.
👉 Log in to BytePhase, head to Business Settings, and add your bank details to start accepting payments faster and more securely.
Need help? Visit our YouTube channel or contact BytePhase Support for personalized assistance.