How to Set Up Tax Settings in BytePhase
Table of contents
Share Post

Step-by-Step Process
- Log in to the BytePhase portal, then click your business logo
- Click Business Settings -> Tax Setting
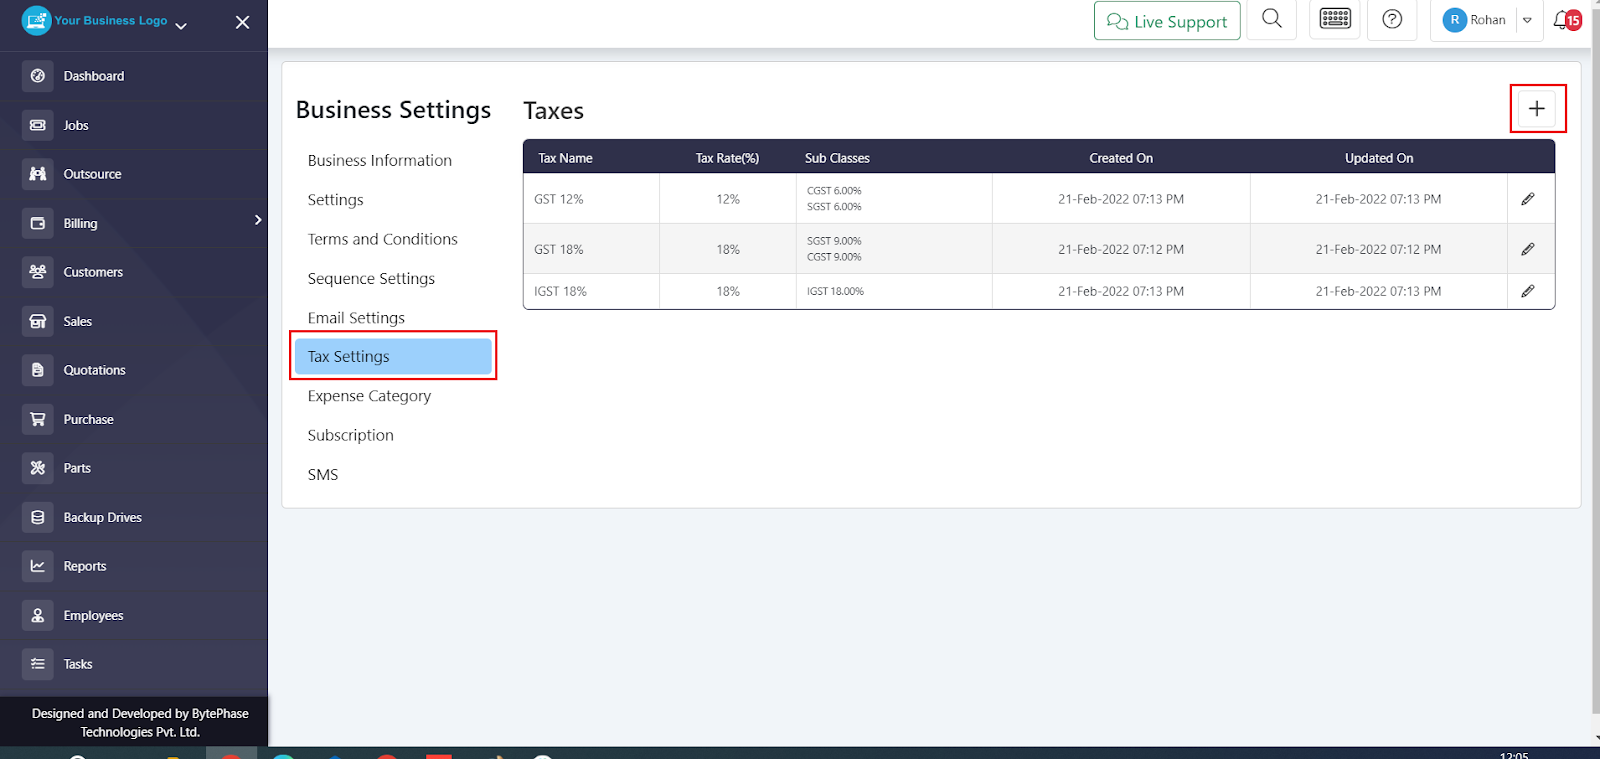
- Click the plus button [ + ] in the image above to create a new tax
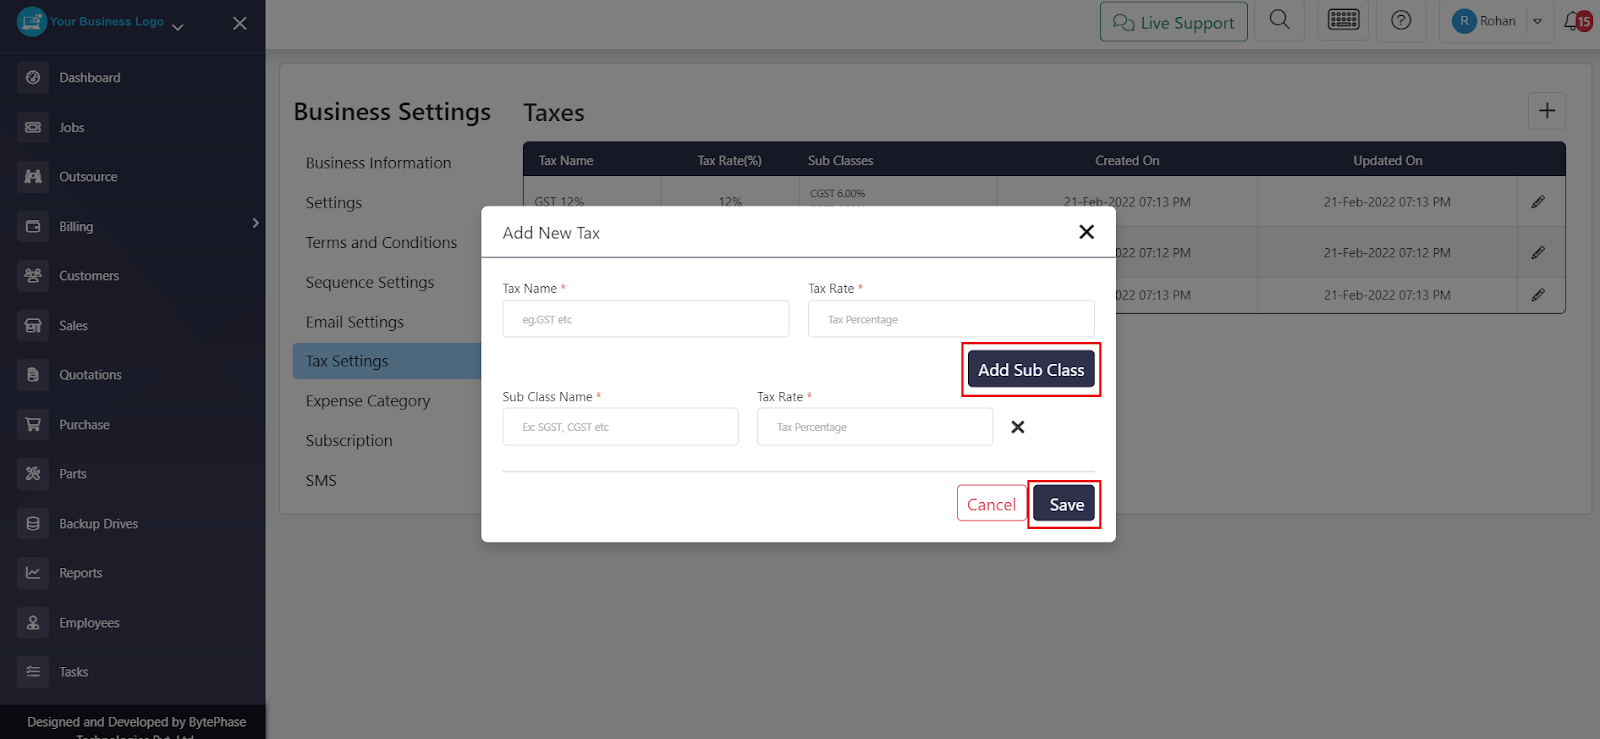
- The window above opens once you click the plus button. Enter the tax name and tax rate. To add subclasses to the tax rate, click the plus button as shown above.
- Click Save to add that tax to your BytePhase account.
BytePhase applies your configured tax settings to invoices, quotations, and other financial documents automatically, keeping tax reporting accurate and consistent for your customers and partners.
That’s it — your tax settings are ready to use across the BytePhase portal.
Share Post