Skip to content

How to Create and Manage Purchase Orders in BytePhase
Table of contents
Share Post

Purchase order management in BytePhase is part of the platform’s inventory management software, so you can request, track, and pay for spare parts from suppliers without leaving the CRM. Here is how purchase order management works in BytePhase, step by step.
How Purchase Order Management Works in BytePhase
- When you log in to the BytePhase CRM Portal, you will see the Purchase option on the sidebar and you can also use Alt+Shift+P to open the Purchase listing page.
- You can view your purchase order history on the listing page and create an invoice from the action menu.
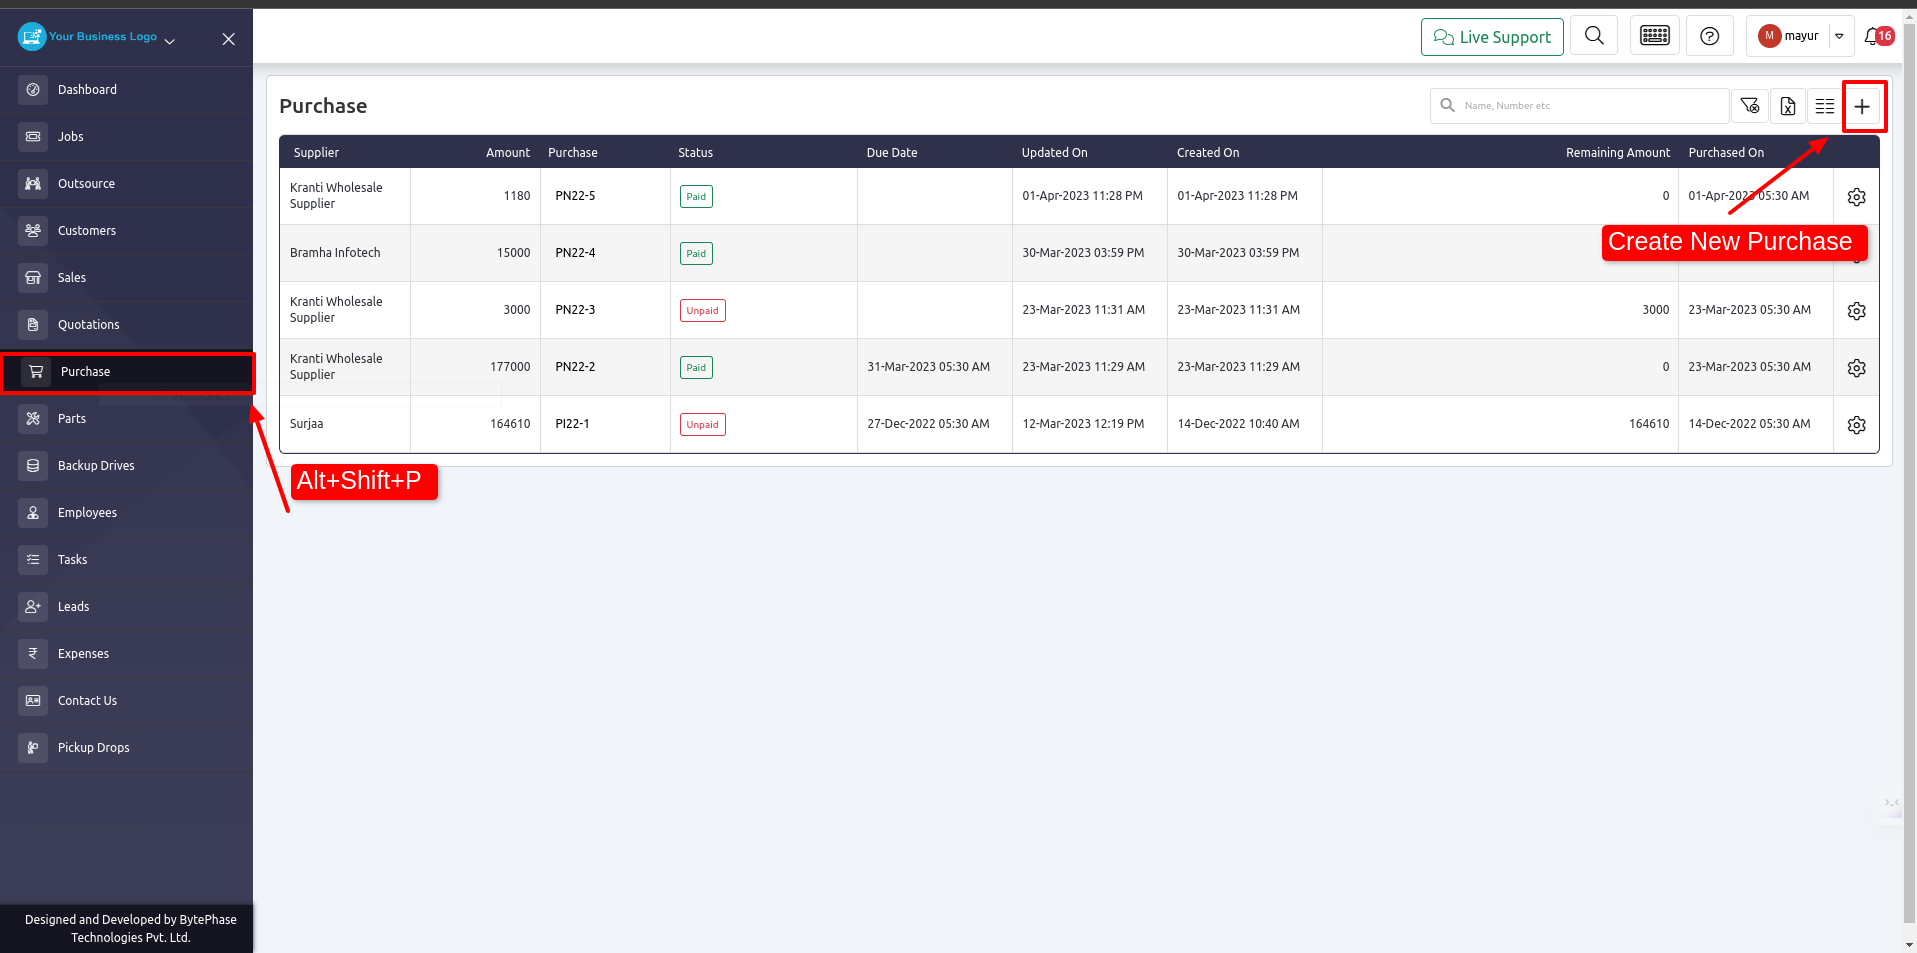
- Clicking on a row opens the detail page of that purchase order, where you can make changes.
- Click [+] Add New Purchase Order and a form appears — fill it out to create a new order.
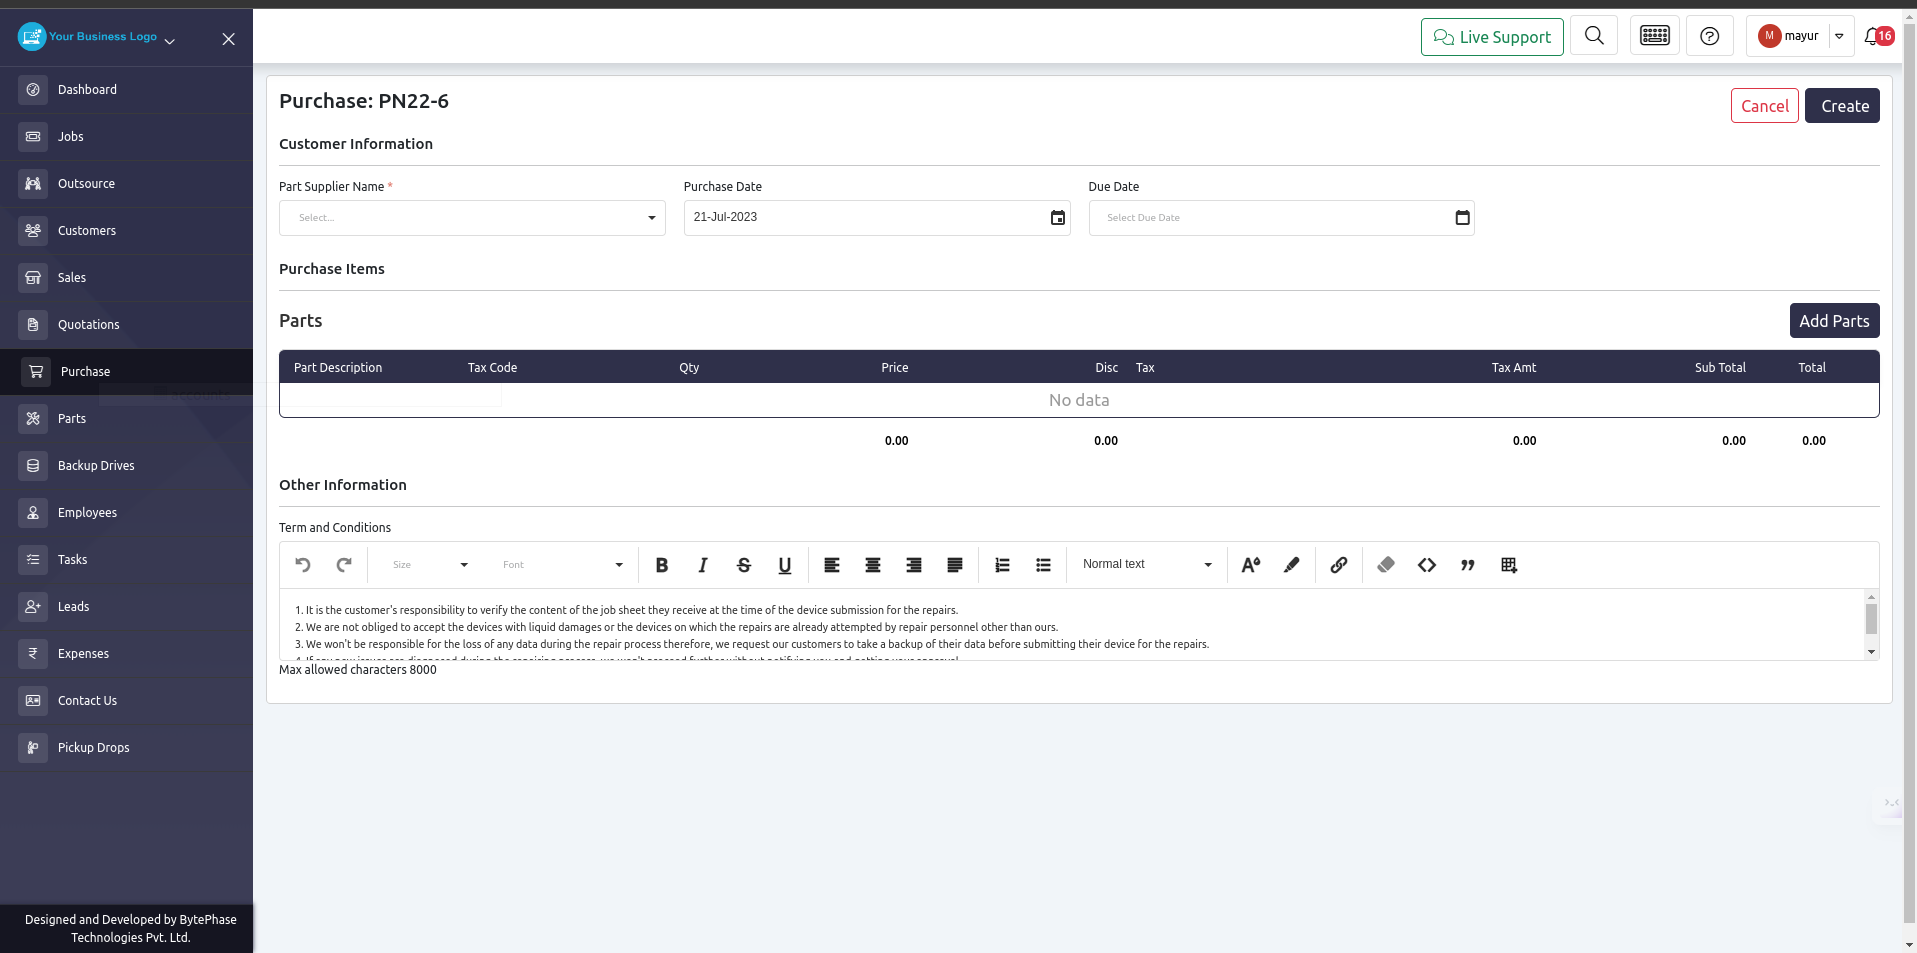
- From the dropdown list, select the part you wish to purchase and the supplier.
- You can also edit the terms and conditions before submitting the purchase order.
- From the action menu after creating a purchase order, you can create an invoice for it.
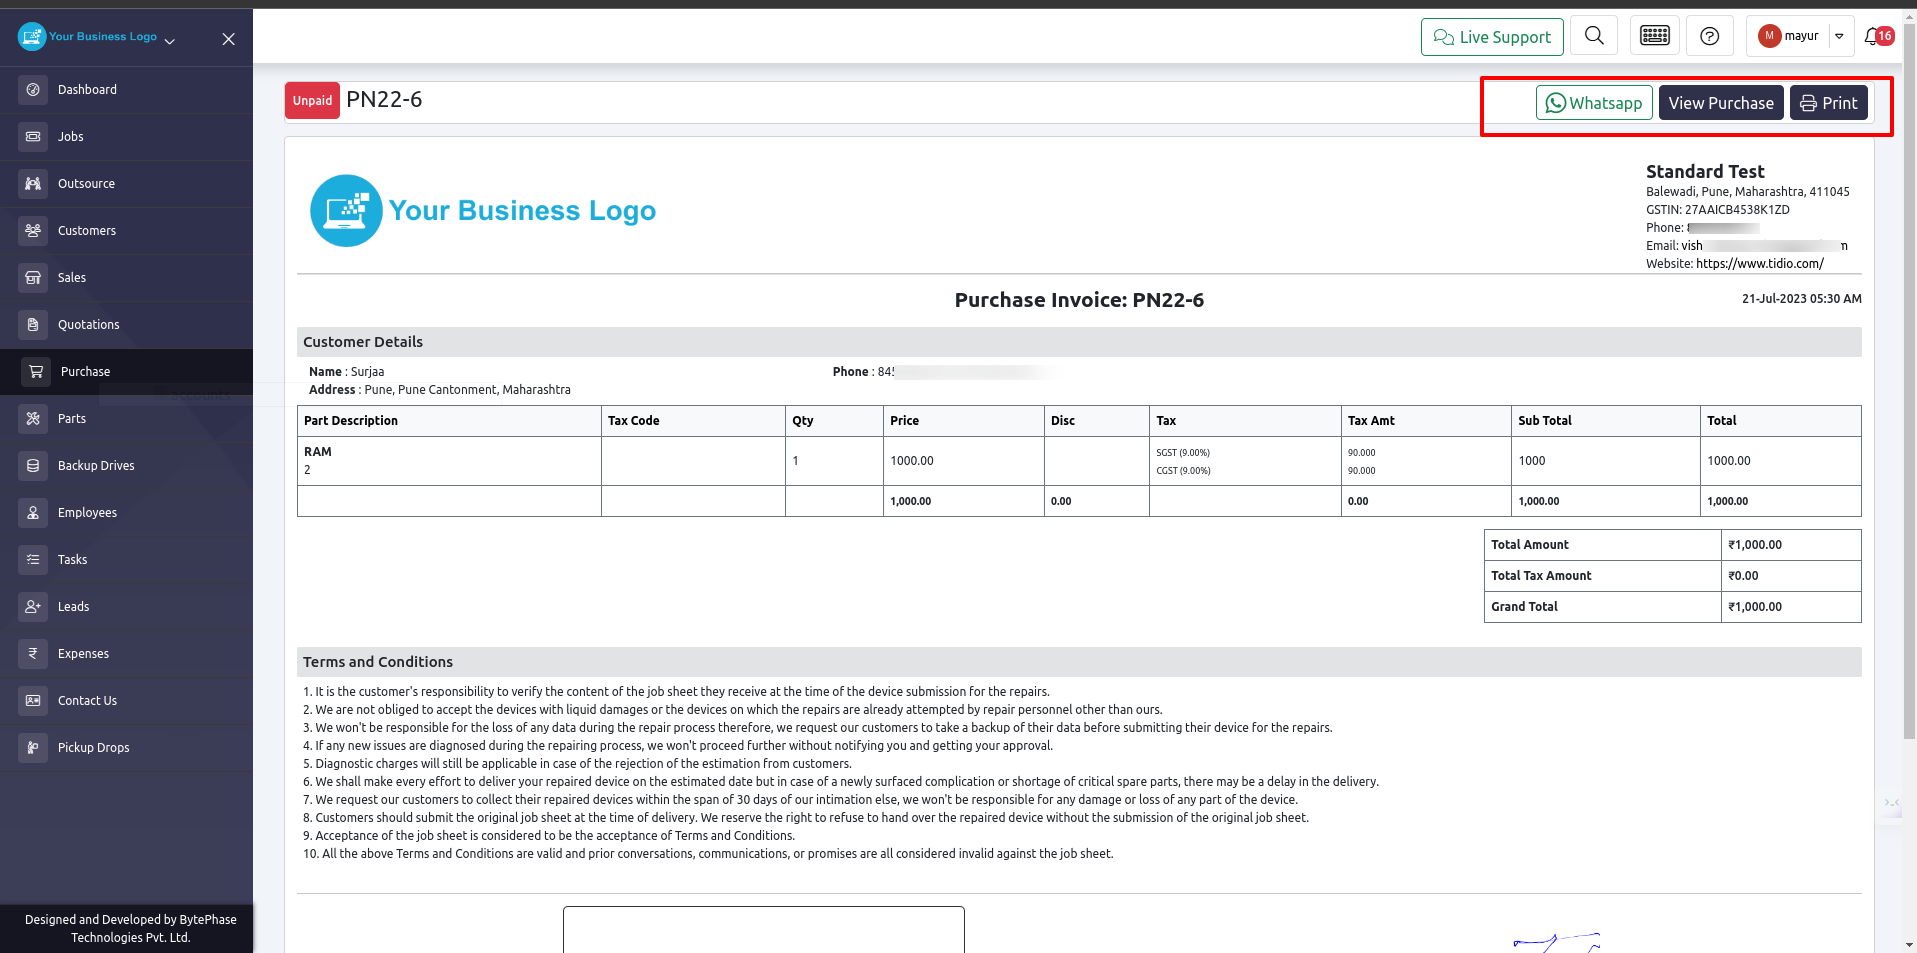
- This invoice can be printed or sent via WhatsApp to the supplier.
- Digital signatures are supported for purchase invoices, so suppliers can sign them electronically.
How to record a payment for a purchase order
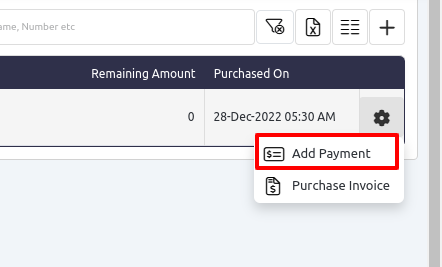
- Open the action menu on the purchase listing page and select Add Payment.
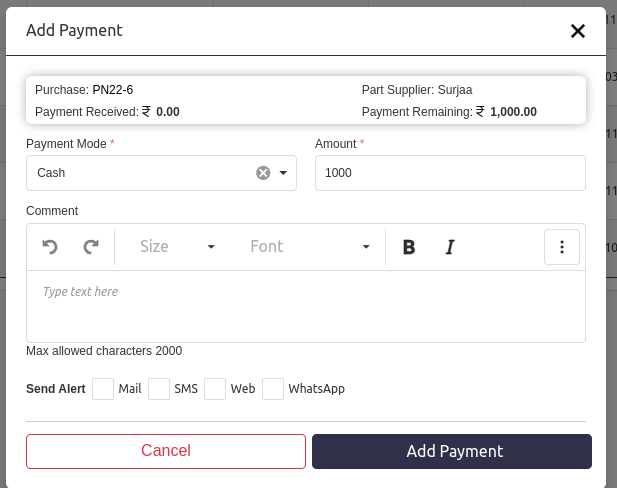
- After clicking Add Payment, a pop-up appears.
- No additional fields are required — just add an optional comment or choose a notification channel to alert the supplier that payment has been made.
- The payment receipt can be tracked under Billing → Payments in the sidebar.
Share Post