How to Add Your Business Bank Details in BytePhase Portal?

Introduction
In today’s fast-paced business landscape, having accurate and up-to-date bank details is essential for ensuring seamless financial transactions and uninterrupted operations. Whether you’re issuing invoices, receiving payments, or managing vendor transactions, Add your business bank details in your BytePhase portal ensures everything runs without a hitch. Furthermore, updating your banking information enhances professionalism, trust, and efficiency in every transaction.
In this guide, we’ll walk you through how to add or update your business bank details in BytePhase—quickly, securely, and effectively. You’ll also discover the key benefits and practical tips to optimize your banking setup for smoother financial processes.
Why Adding Business Bank Details in BytePhase is Important?
Firstly, accurate banking information guarantees timely and error-free payments. Secondly, it fosters trust with clients and partners who depend on precise details to ensure smooth financial transactions. Thirdly, integrating your bank details with BytePhase enables automated and faster payments, thereby minimizing the need for manual follow-ups.
Step-by-Step Guide to How Add Your Business Bank Details in BytePhase Portal
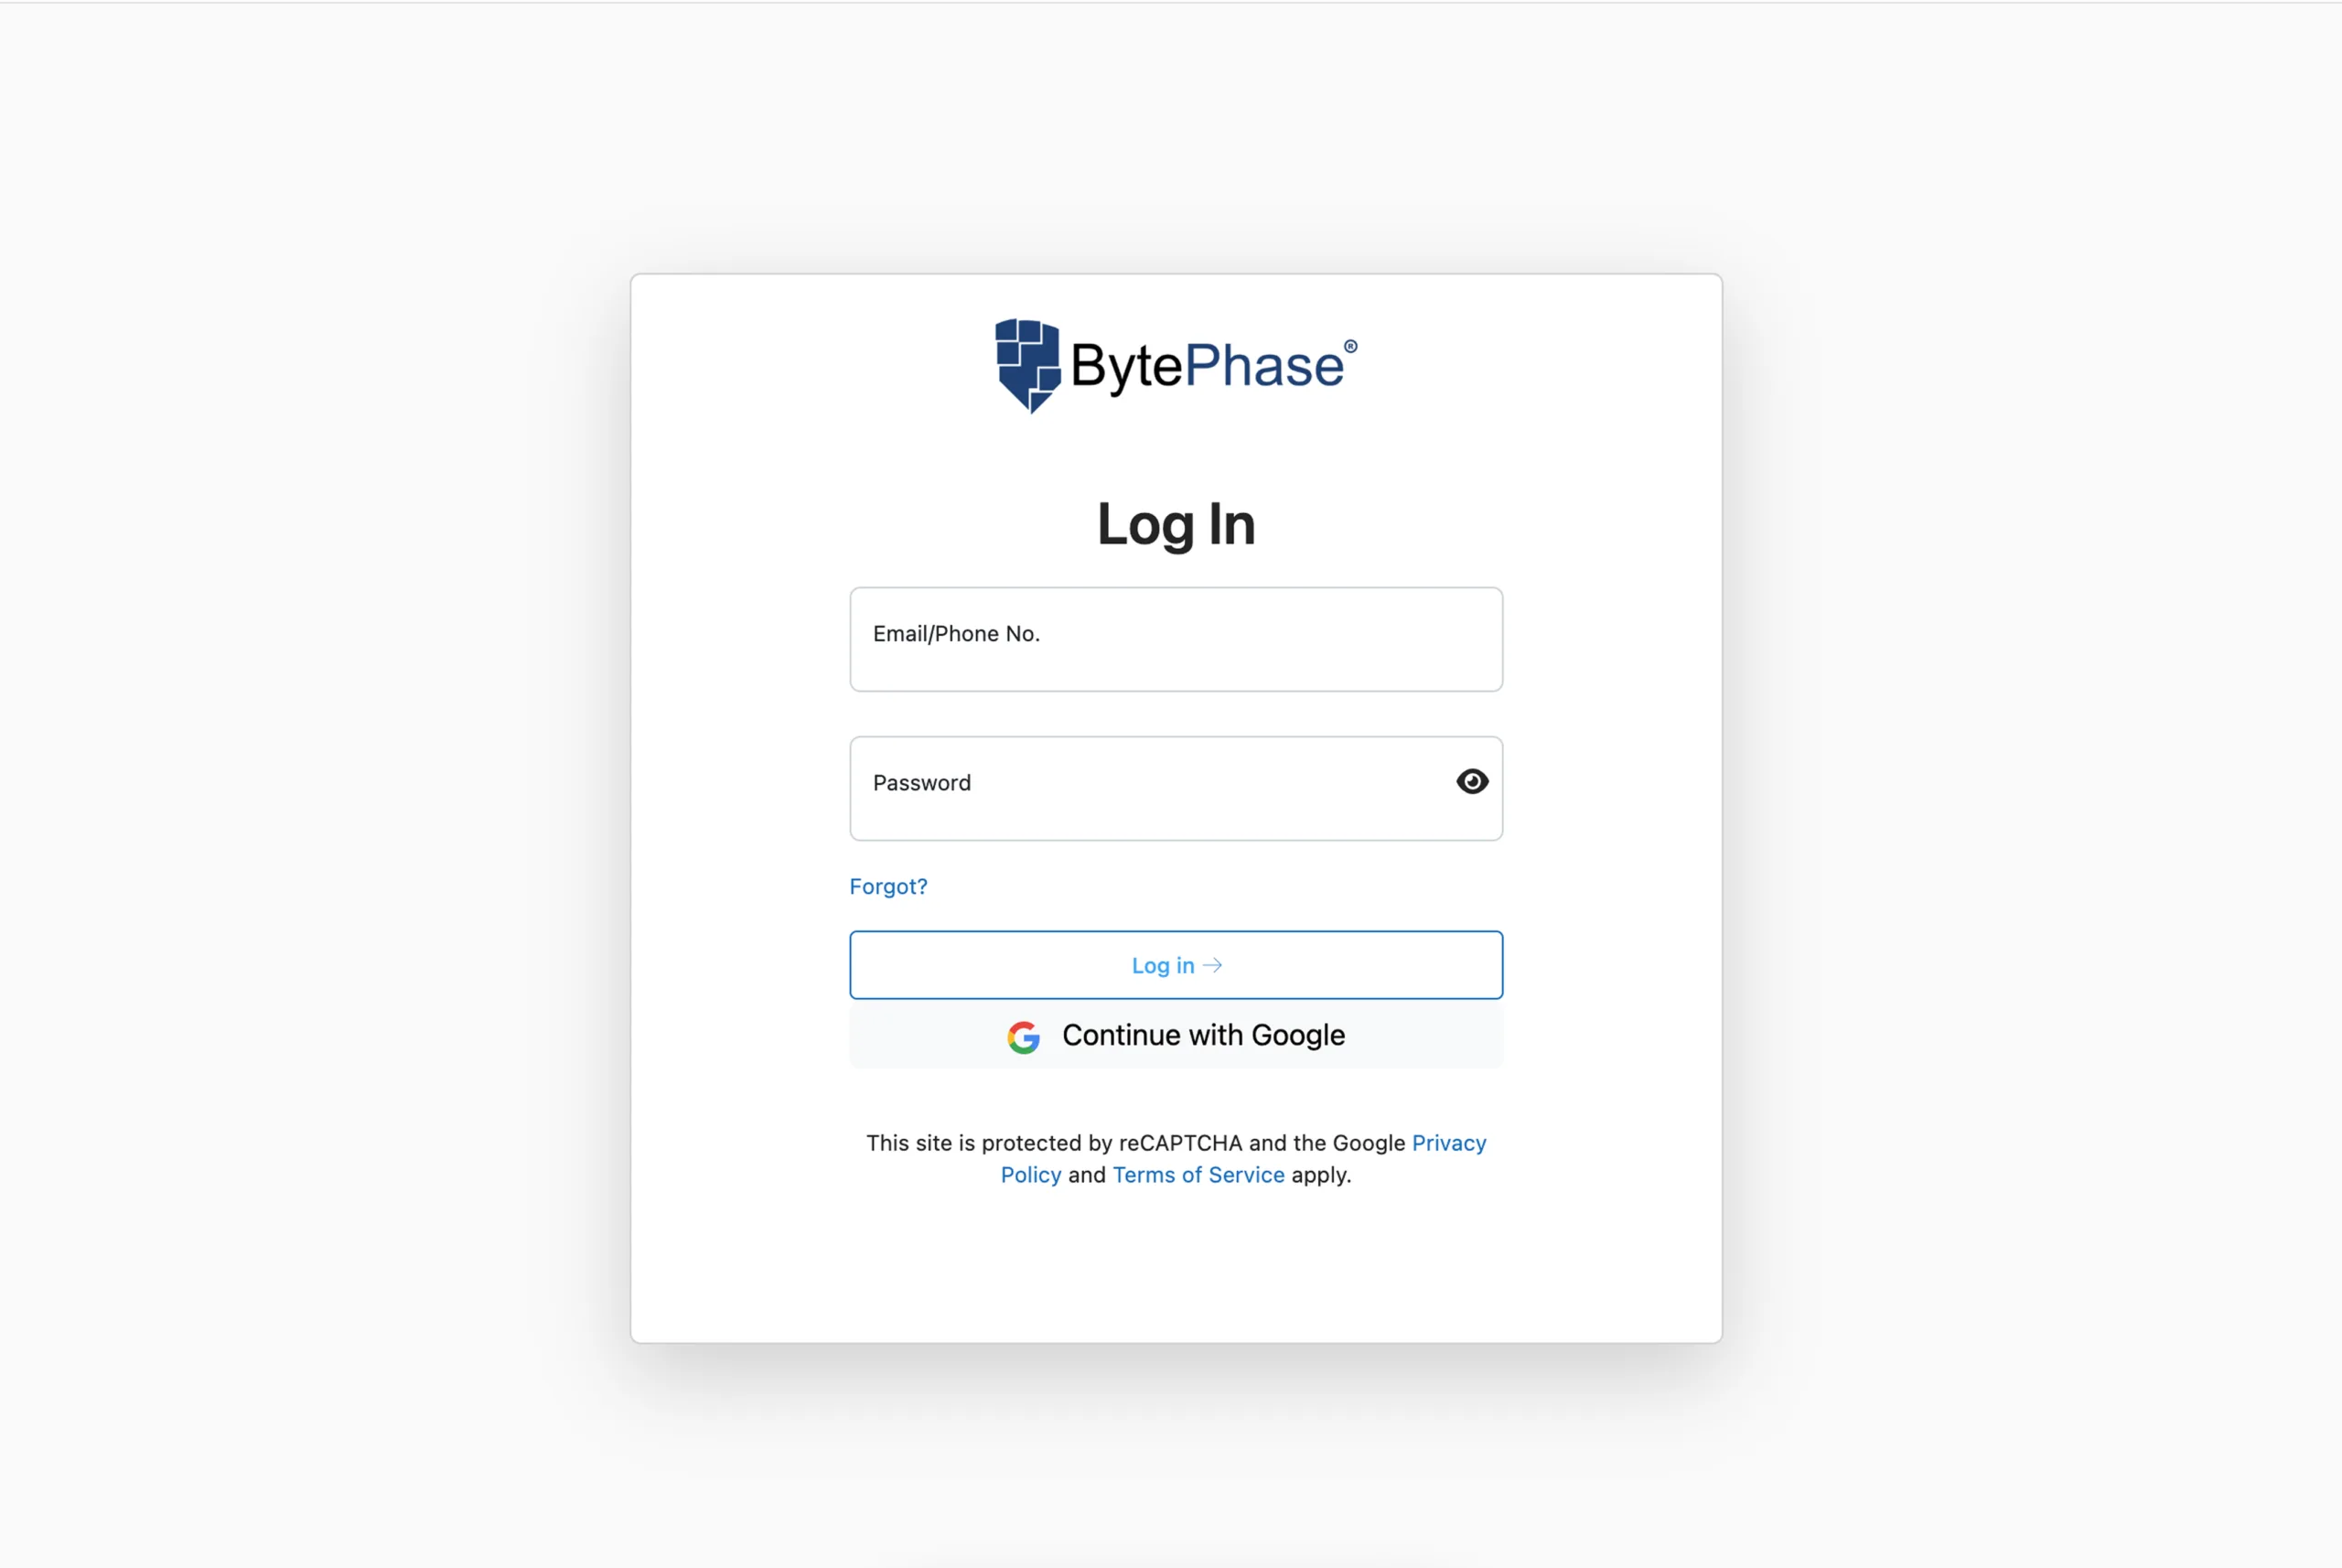
Step 1: Log in to BytePhase Portal
-
Visit the official BytePhase Portal.
-
Enter your username and password to access your account.
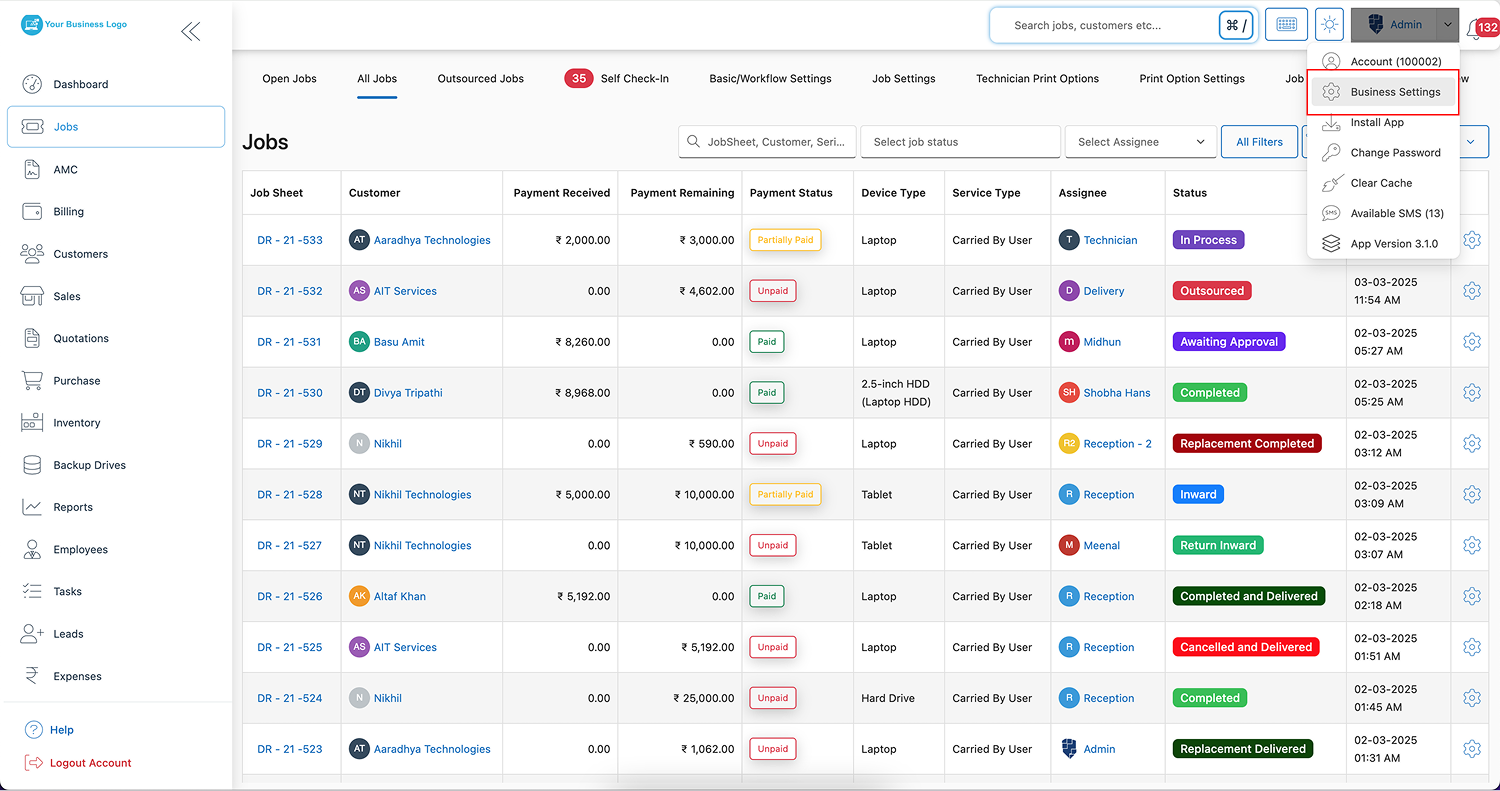
Step 2: Navigate to Business Settings
-
Click on your profile icon at the top right corner of the portal.
-
From the dropdown menu, choose “Business Settings.”
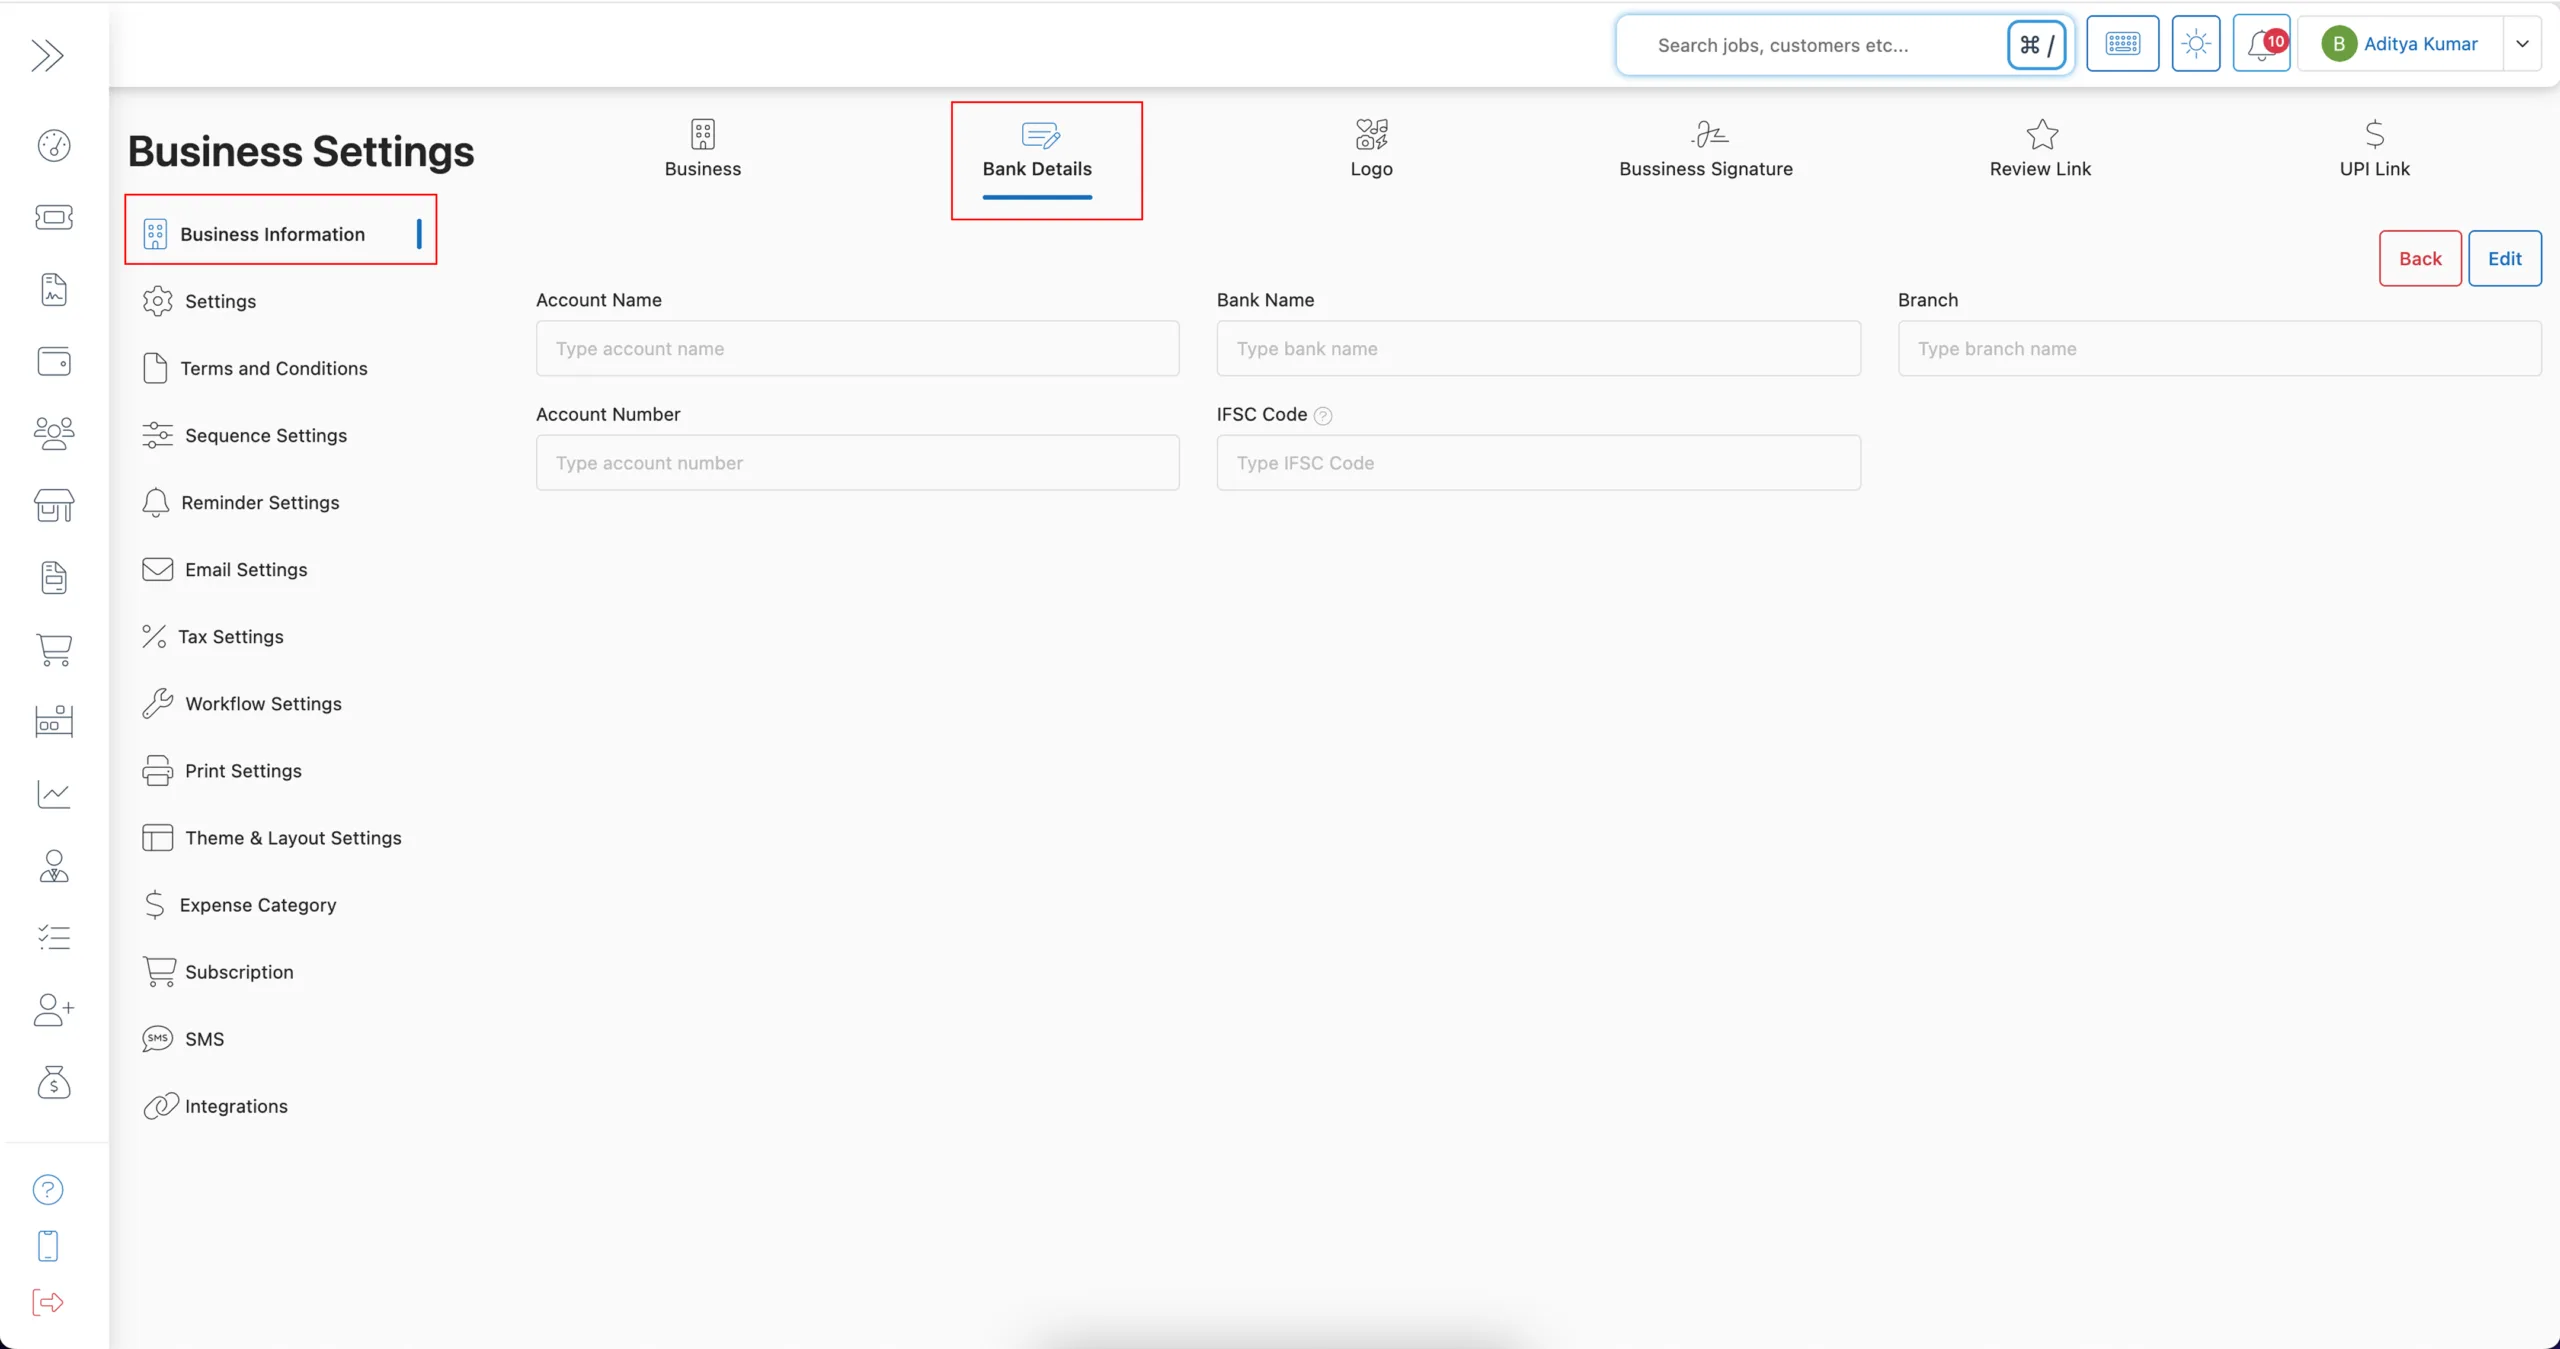
Step 3: Navigate to Business Information
- In Business Settings, click on “Business Information” to access and edit company details.
Step 4: Click on Bank Details
-
First, go to Business Information, then locate and click the “Bank Details” tab to start updating your payment information.
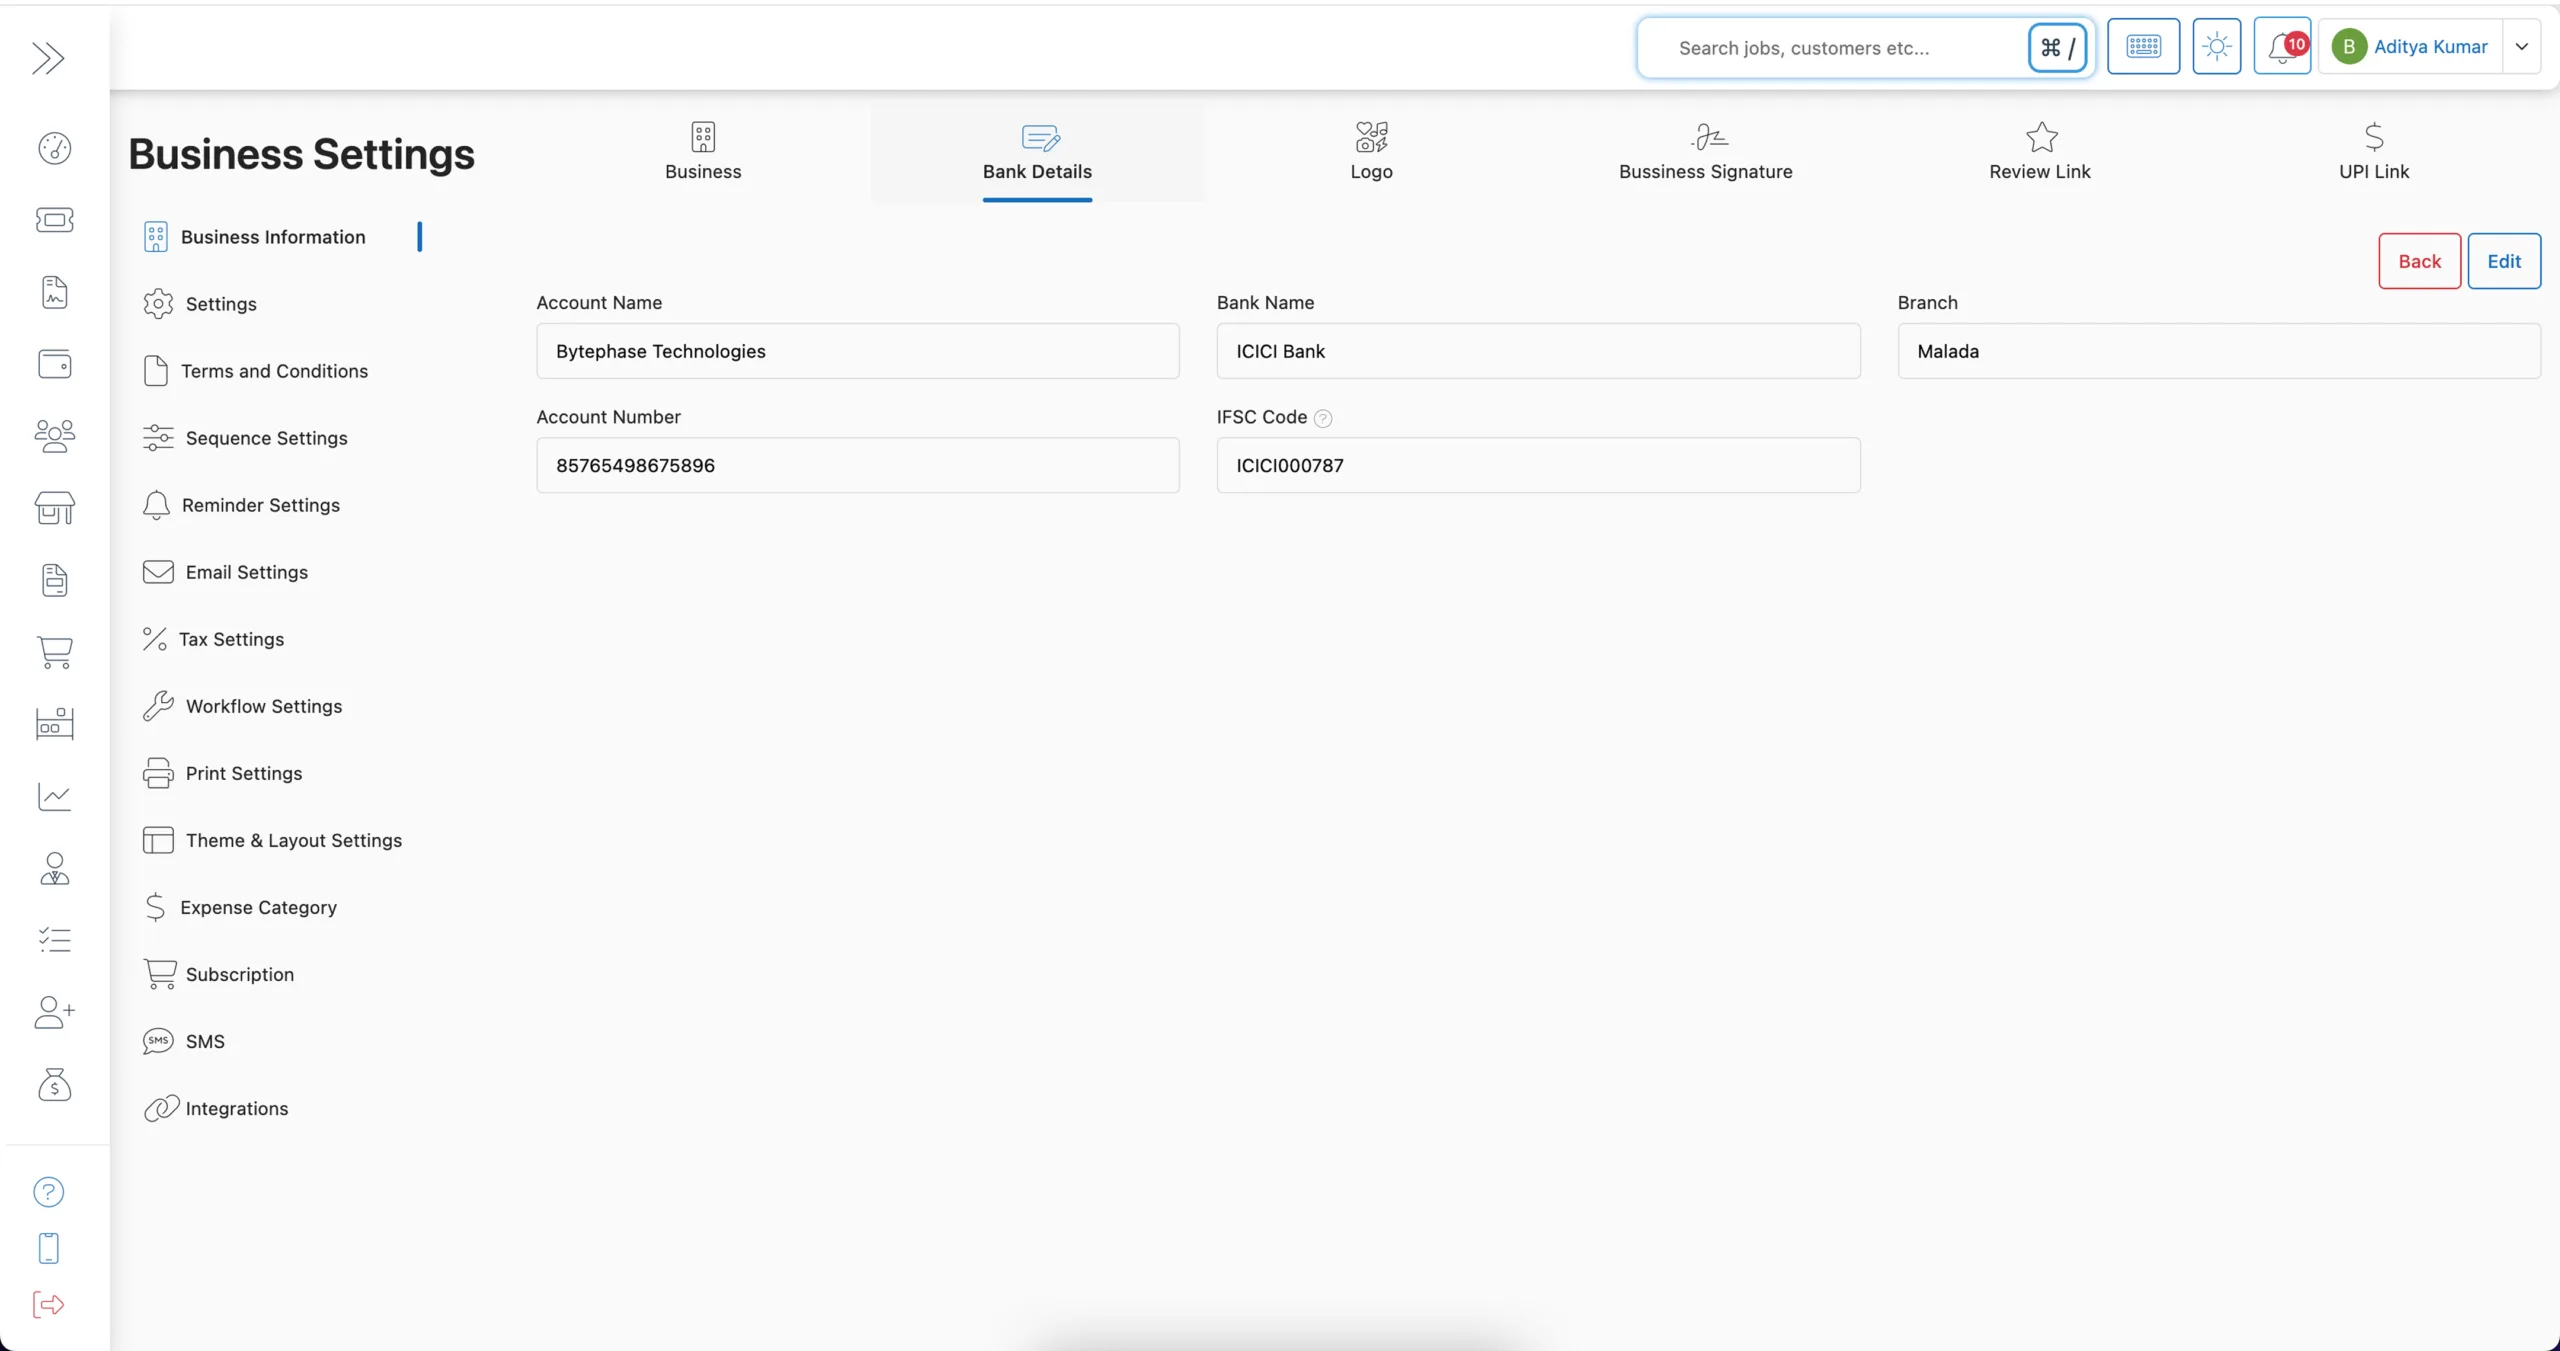
Step 5: Update Your Bank Details
Fill in the required fields carefully:
✔️ Bank Name – Enter the full official name of your bank to ensure clarity and avoid payment errors.
✔️ Account Number – Provide your accurate bank account number, as this is crucial for direct deposits.
✔️ Account Name – Add the registered name associated with the bank account for verification.
✔️ Branch – Specify the exact branch name where the account is held to ensure accurate routing.
✔️ Bank/Branch Code – Enter the unique branch code assigned to your bank location, essential for identifying the correct branch.
✔️ IFSC Code – Input the IFSC code to enable seamless electronic transfers.
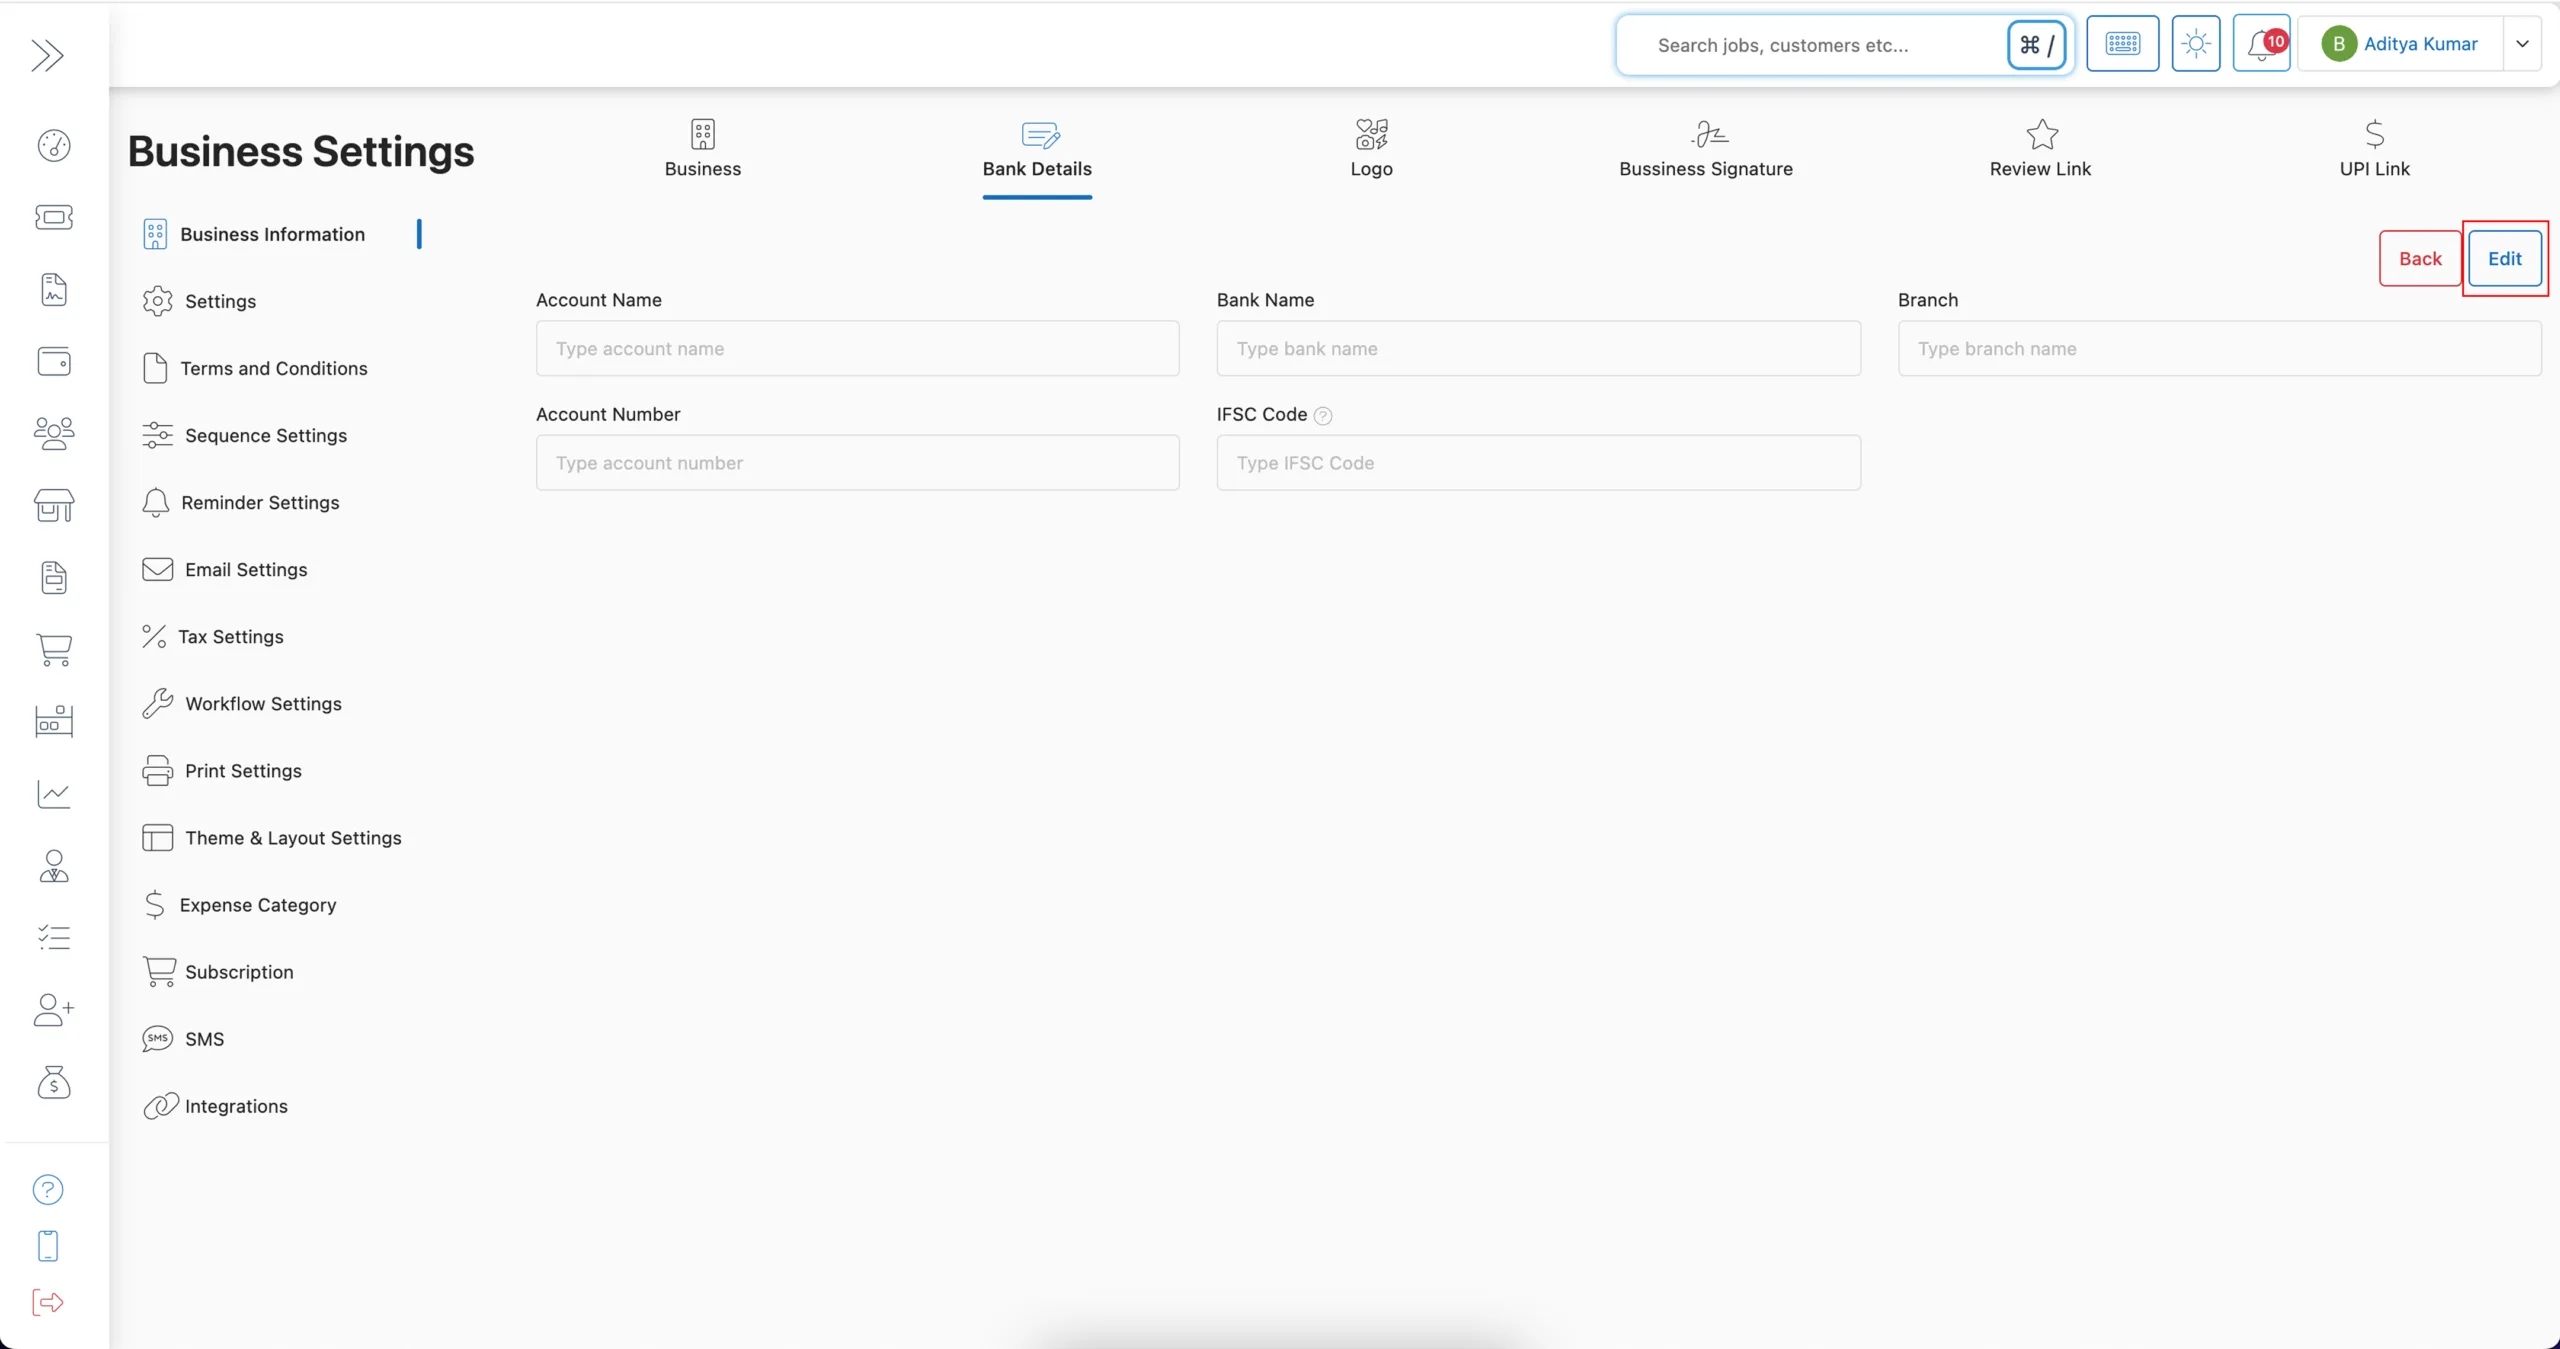
Step 6: Save Your Bank Details
- After entering all required information, click ‘Save’ to update your bank details successfully.
- Your updated bank information will now be used for payments, transactions, and billing processes.
Key Features and Benefits of Adding Your Bank Details in BytePhase
✨ Fast and Accurate Payments – To ensure you receive payments promptly and accurately, always maintain up-to-date and verified banking details.
✨ Professional Invoicing – Automatically populate bank details on invoices to deliver a professional and seamless customer experience.
✨ Streamlined Operations – With everything securely stored in one place, you no longer need to manually share bank details.
✨ Increased Trust and Transparency – Moreover, clients and partners appreciate having clear, easily accessible bank information, which leads to smoother transactions.
✨ Secure Information Handling – Additionally, BytePhase uses encrypted data storage to keep your sensitive bank information secure.
Practical Example: Why Configuring Banking Details in BytePhase Matter
Imagine sending out an invoice but forgetting to include bank details. Not only does this delay payment, but it also affects customer trust. Consequently, by having your bank details pre-set in BytePhase, every invoice appears complete and professional, automatically showcasing the correct payment information.
As a result, this saves time for both you and your clients, leading to faster payments and stronger business relationships.
Additional Tips for Managing Business Bank Details in BytePhase
✅ Double-check account numbers and codes before saving to avoid costly errors.
✅ Keep bank details updated if you change accounts or branches.
✅ Use business accounts only — Instead of using personal bank details, always opt for business accounts to maintain professionalism and ensure secure transactions.
✅ Therefore, to avoid payment rejections, make sure the account name aligns with your registered business name.
✅ Additionally, monitor transactions regularly to ensure smooth operations and confirm that payments are reaching the correct account.
Conclusion: Entering Bank Information in BytePhase in BytePhase for Hassle-Free Payments
Although it may seem like a small task, adding and updating your business bank details in BytePhase ultimately delivers significant benefits. As a result, from faster payments to enhanced professionalism and trust, this feature keeps you focused on what truly matters—growing your business. Therefore, don’t let missing bank details hold back your success.
🚀 Ready to streamline your payments?
👉Log in to BytePhase today, add your bank details, and ensure smooth financial transactions!
Check our latest updates.
Need help? Visit our Help Center or contact BytePhase Support for personalized assistance.