
Create a Repair Ticket in BytePhase CRM: Step-by-Step Guide

In the fast-paced world of laptop repair businesses, efficiently managing customer requests is essential. This guide shows you how to create a repair ticket in BytePhase Laptop Repair Management CRM, a repair ticket management system built for repair shop owners who need every job tracked from intake to pickup.
Follow the steps below to create a repair ticket in minutes, from logging customer and device details to saving the completed job.
Why Use BytePhase to Create a Repair Ticket?
BytePhase Laptop Repair Management CRM offers several benefits that make repair ticket creation seamless and hassle-free:
- Centralized Management: Keep track of all repair jobs in one place.
- Enhanced Productivity: Streamlined workflow to speed up the ticketing process.
- Customer Satisfaction: Faster turnaround times with accurate record-keeping.
- Easy Monitoring: Track repair progress and updates effortlessly.
Step-by-Step Guide to Creating a Repair Ticket in BytePhase
Step 1: Log In to BytePhase Repair Management CRM Portal to Create Ticket
Start by logging into your BytePhase CRM account using your credentials. Once you’re in, navigate to the dashboard.
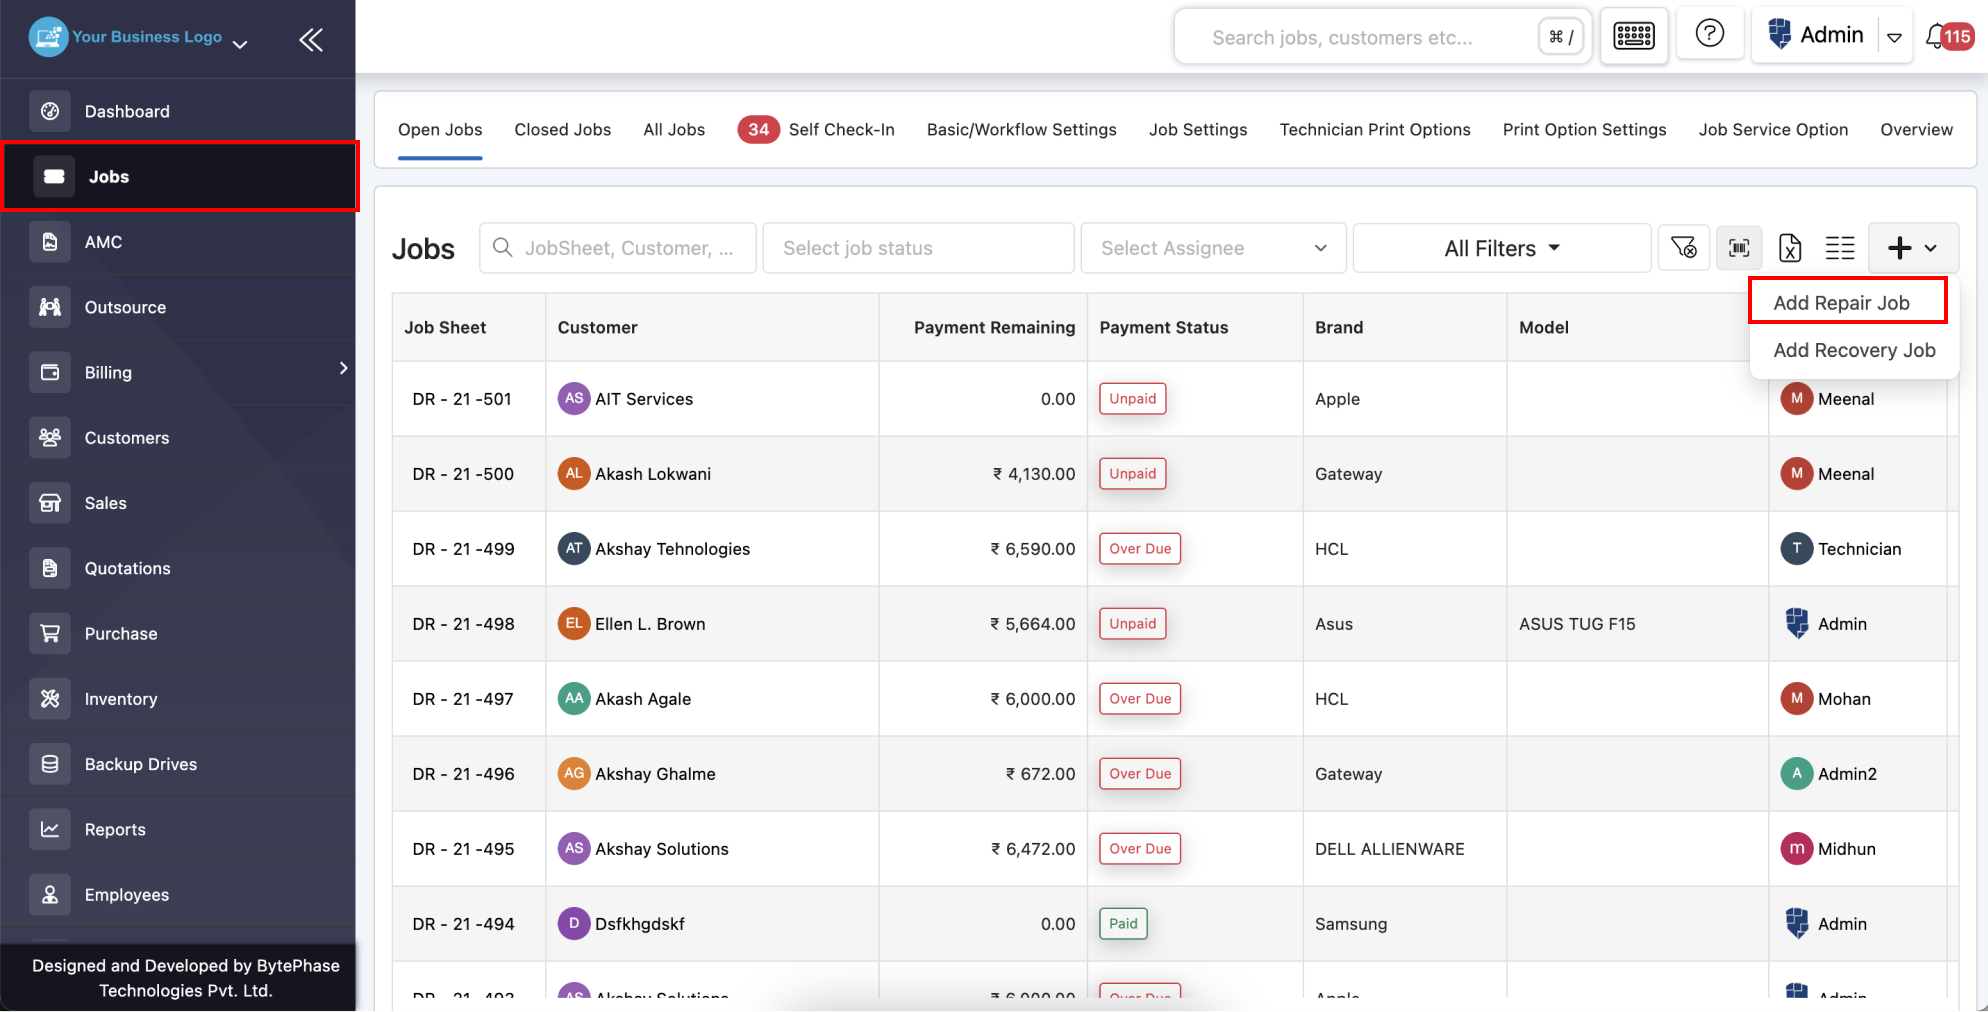
Step 2: Access the Job List
- Go to the Job List section to view all list of repair jobs.
- Click on the Plus (+) button, select Add Repair Job to create a new repair ticket.
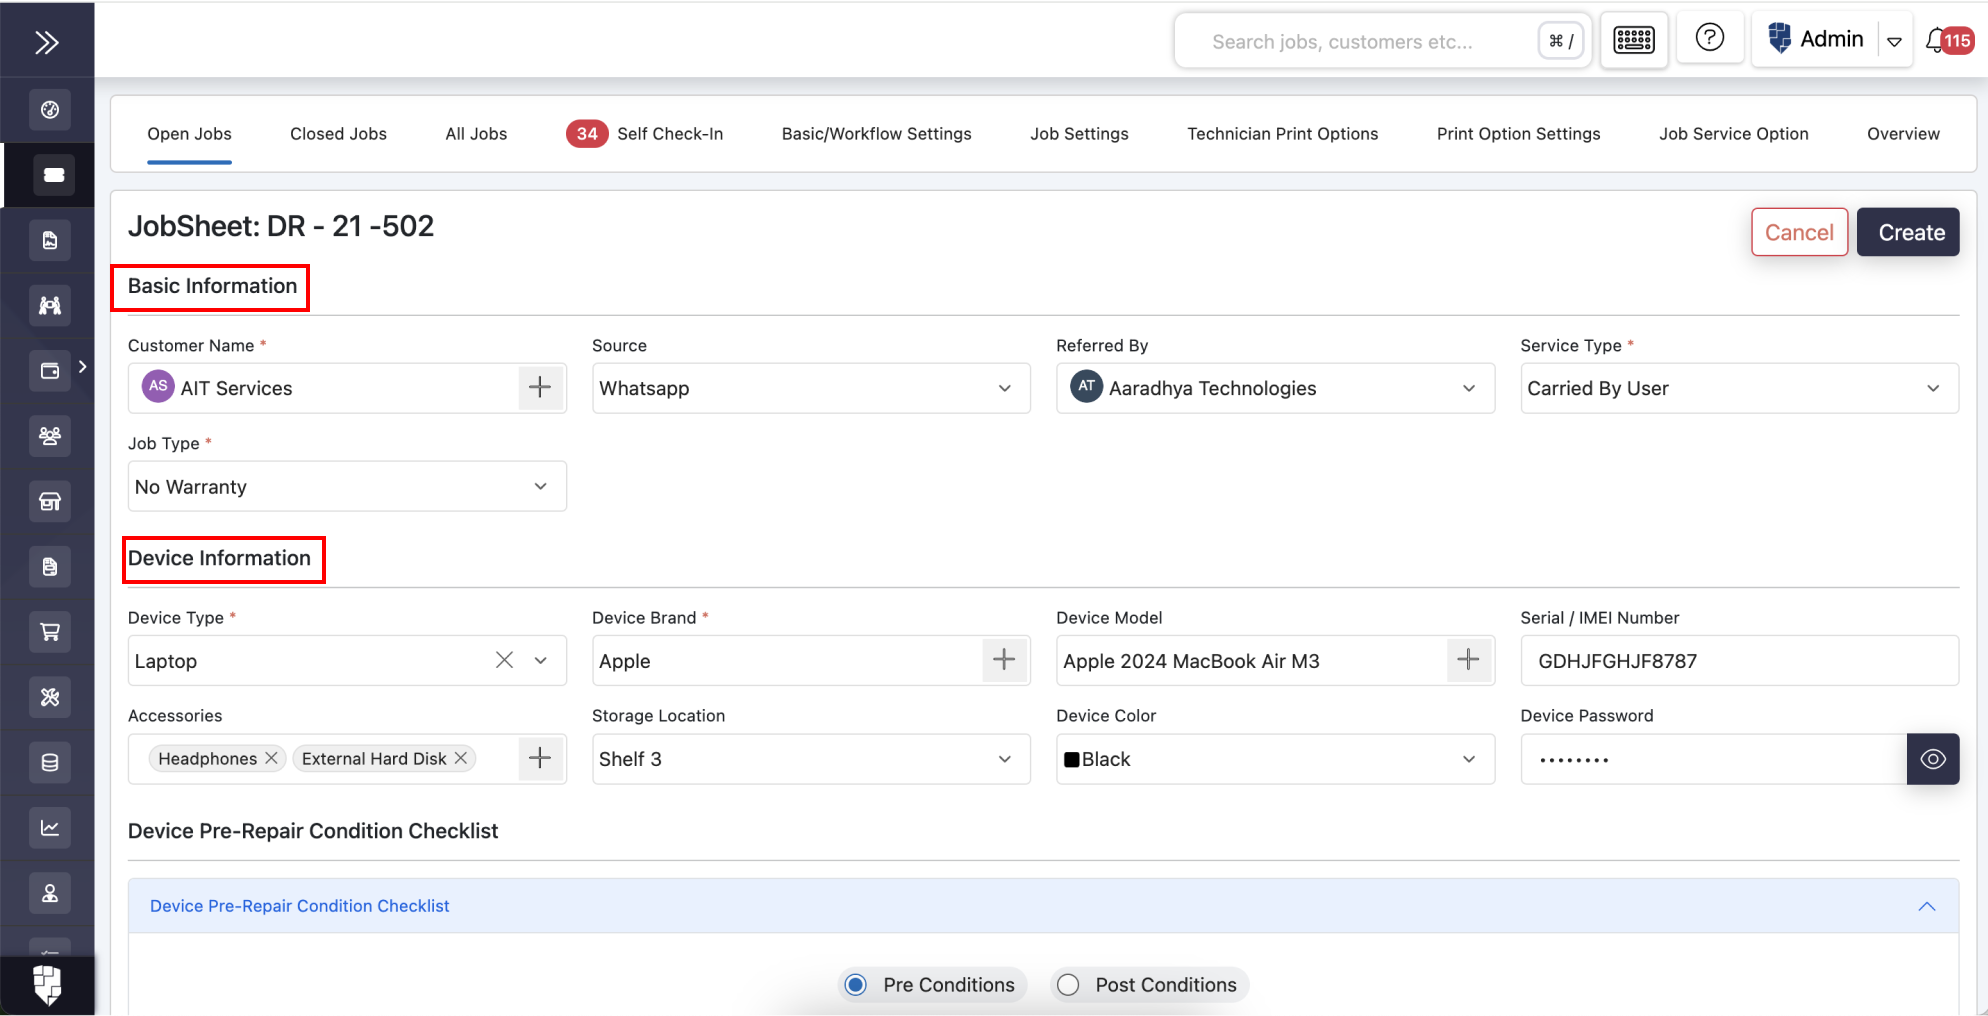
Step 3: Fill in Customer and Repair Ticket Details
Provide the necessary details about the customer, including:
- Customer Name
- Source (e.g., walk-in, referral, website)
- Referred By (if applicable)
- Service Type (e.g., repair, upgrade, maintenance)
- Job Type (e.g., warranty repair, out-of-warranty service)
Step 4: Enter Device Information
Accurate device details ensure proper tracking and service. Fill in the following fields:
- Device Type (Laptop, Desktop, Tablet, etc.)
- Device Brand (e.g., Dell, HP, Apple)
- Device Model
- Serial / IMEI Number
- Accessories (chargers, bags, additional peripherals)
- Device Password (if required)
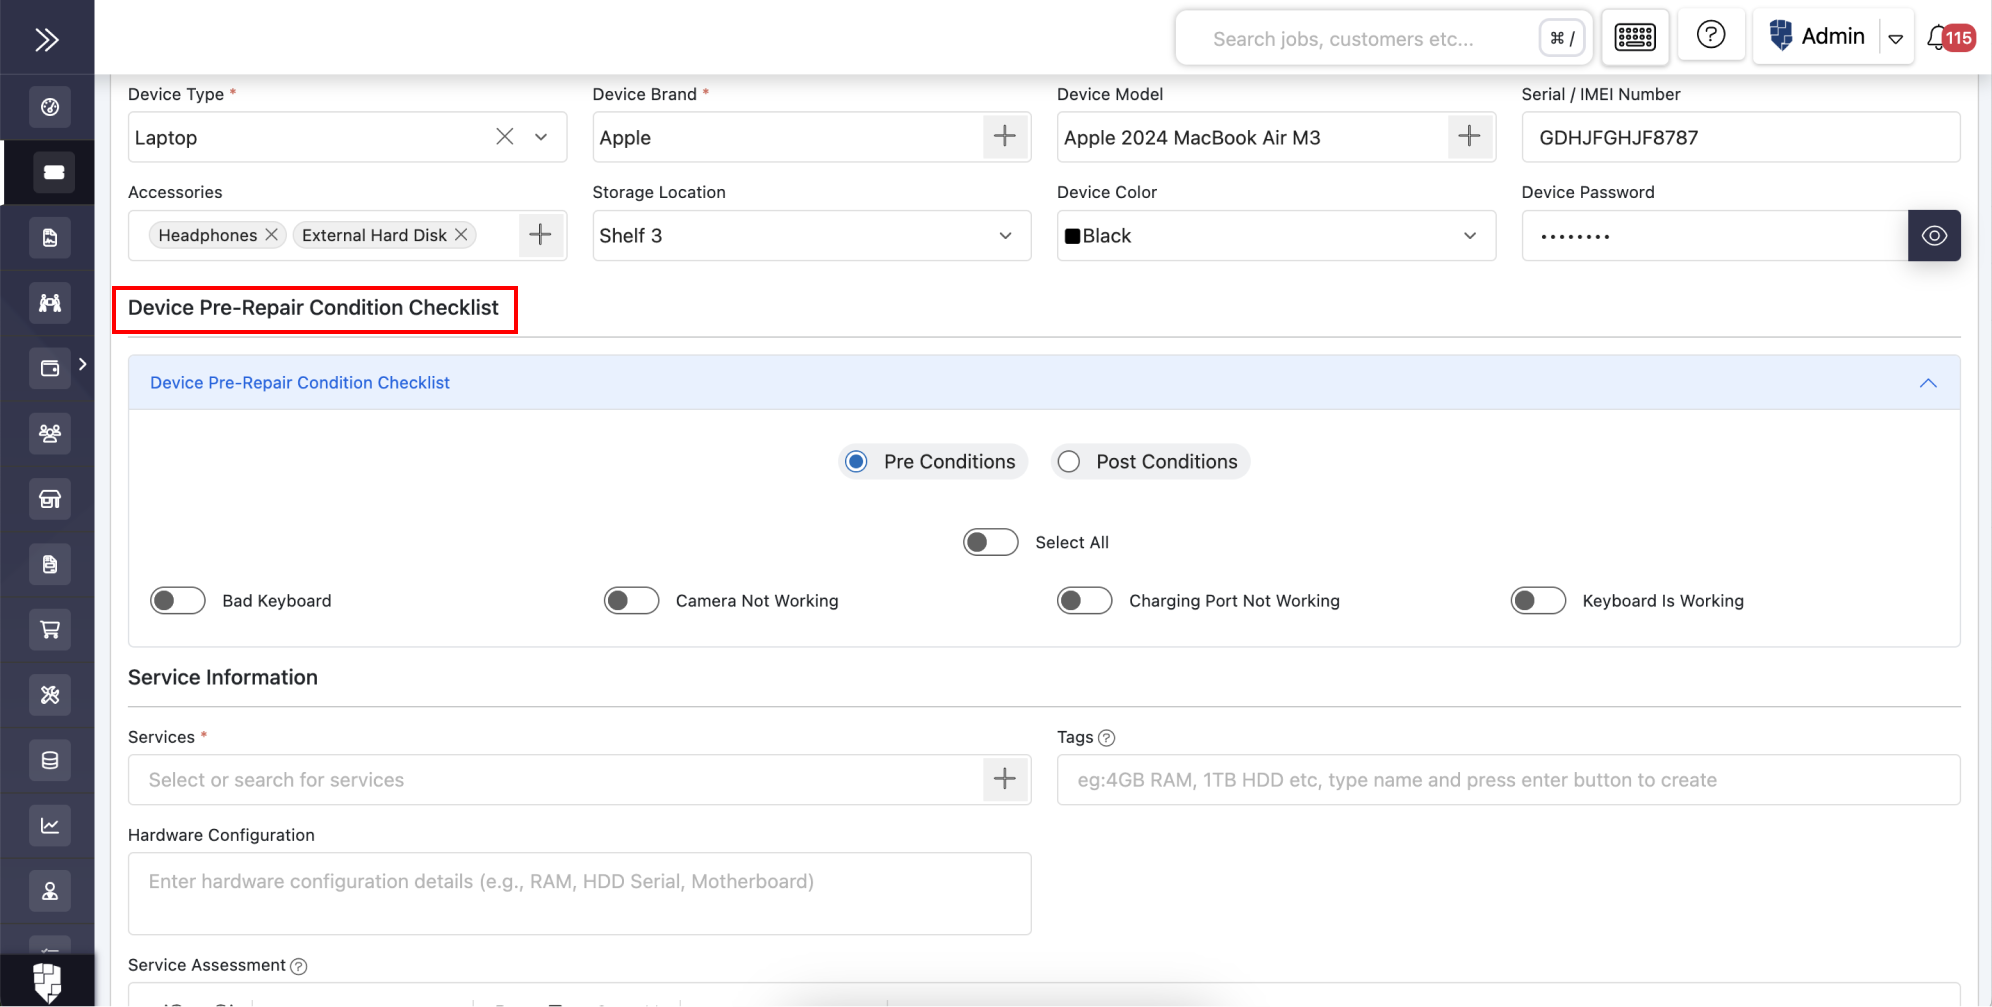
Step 5: Complete the Pre-Repair Condition Checklist in BytePhase CRM
Check the device’s physical and functional condition before proceeding to avoid disputes and ensure transparency.
Step 6: Add Service Information
Provide detailed information about the service request, including:
- Device Issues/Problems (screen damage, overheating, slow performance)
- Hardware Configuration (RAM, storage, processor details)
- Service Assessment (initial diagnosis of the issue)
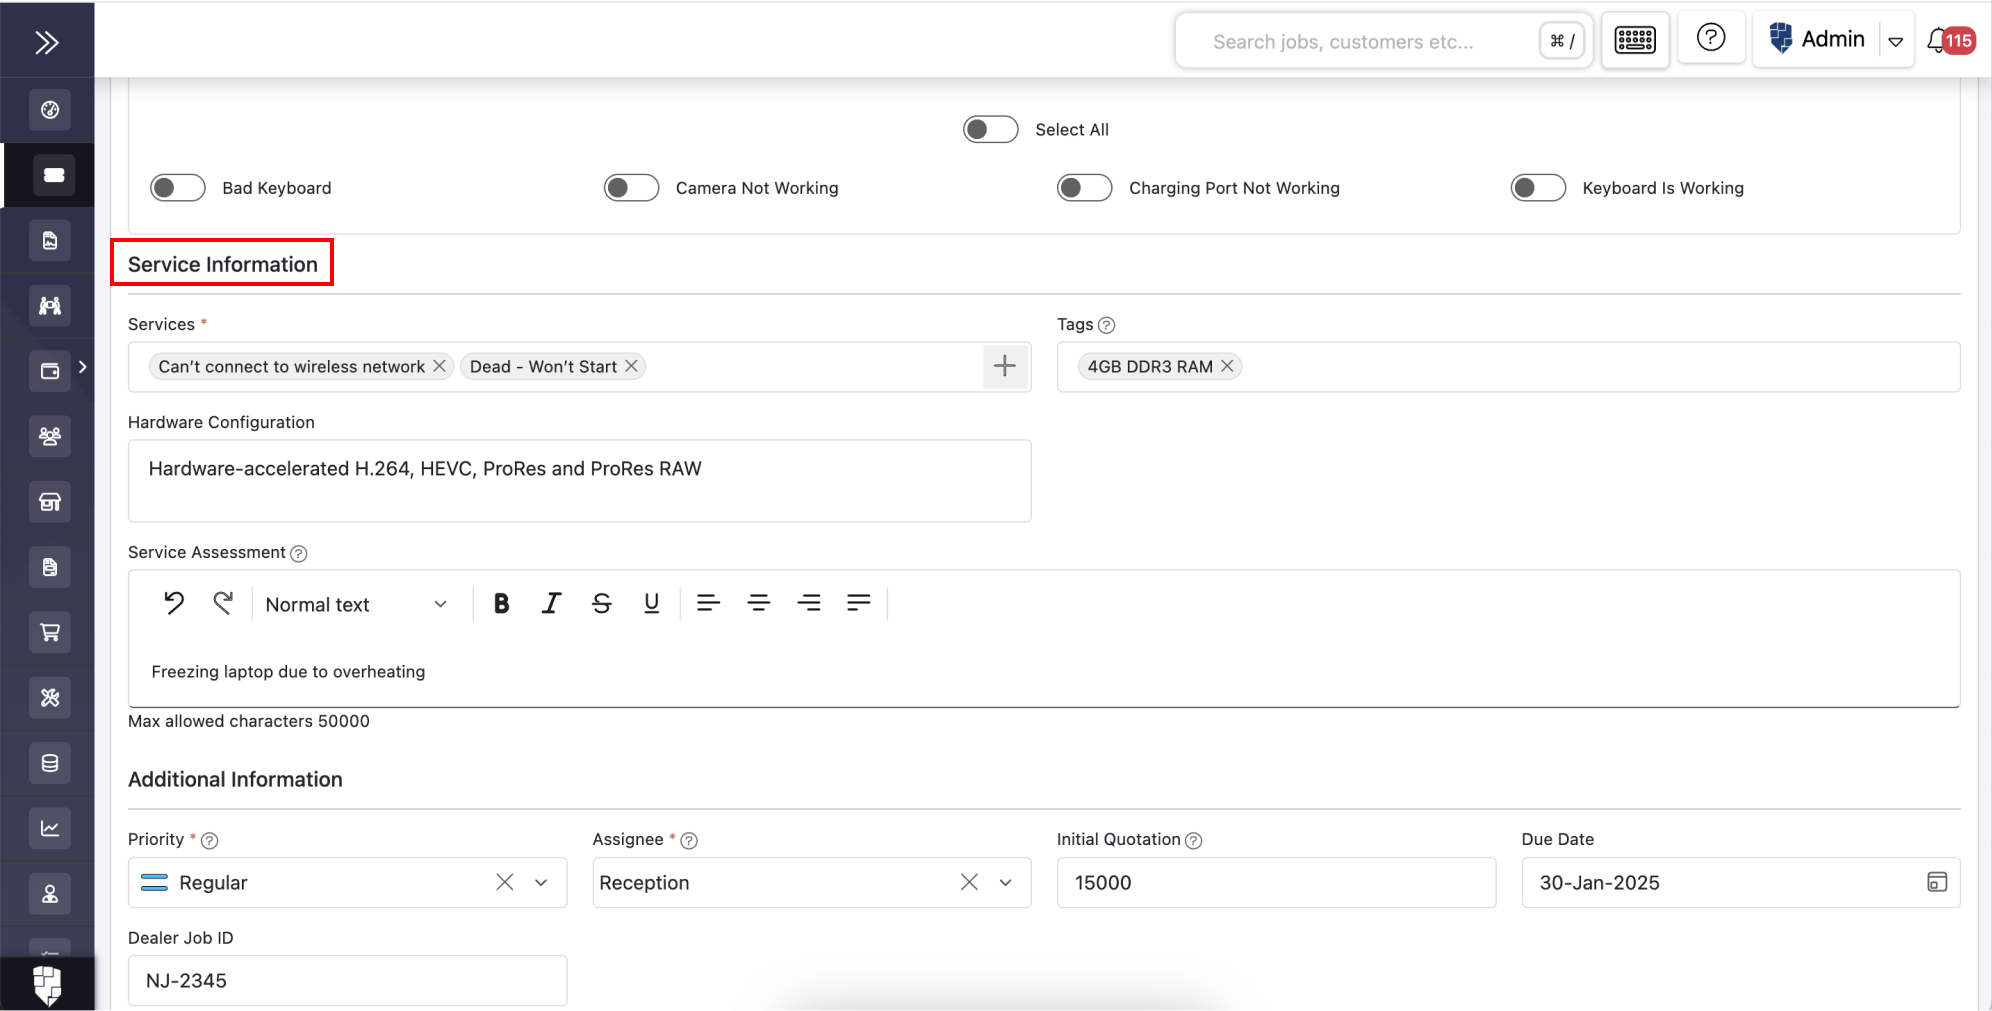
Step 7: Include Additional To Repair Ticket Details for Better Tracking
Enhance the repair ticket with additional information such as:
- Job Priority (urgent, standard, low priority)
- Assignee (technician handling the job)
- Initial Quotation (estimated repair cost)
- Due Date (expected completion date)
- Dealer Job ID (if applicable)
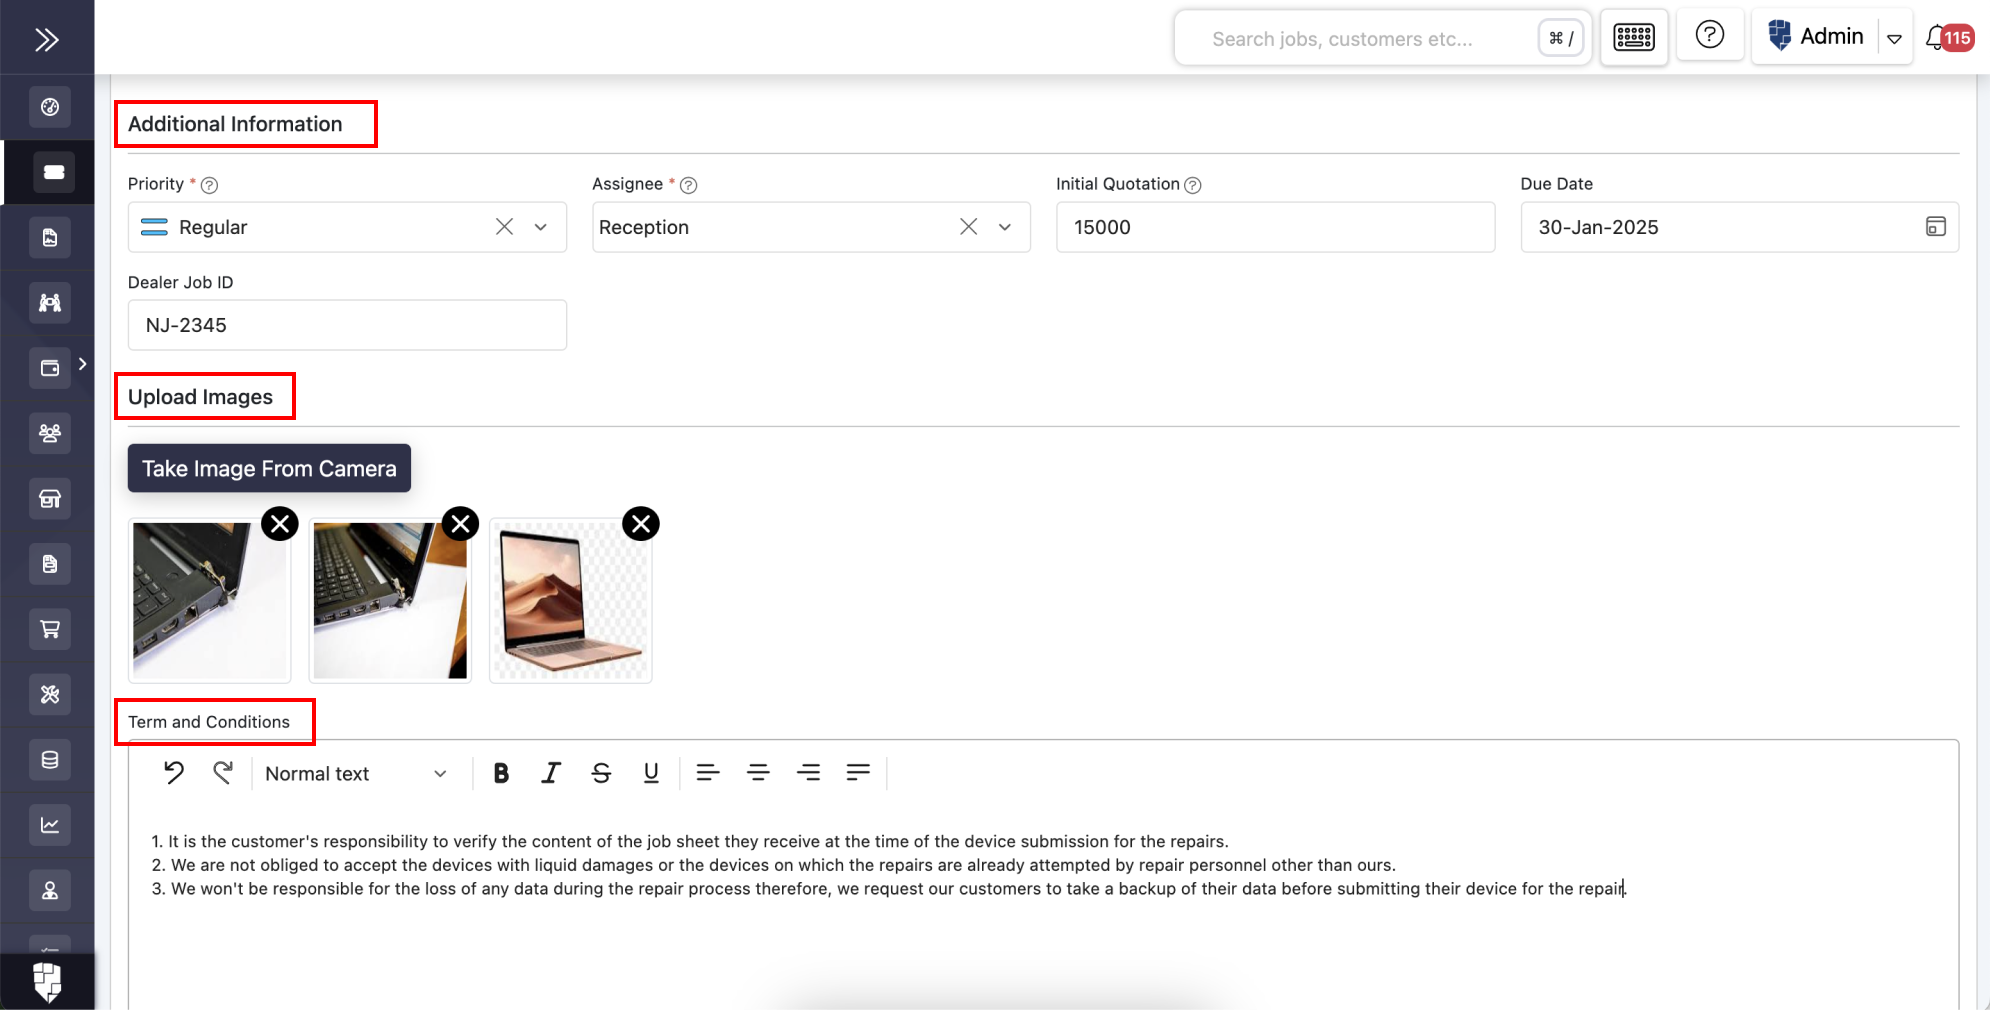
Step 8: Upload Device Images to the Repair Ticket
Attach relevant images of the device to document its condition before and after the repair process.
Step 9: Add Terms and Conditions to Finalize the Repair Ticket
Ensure clear communication by including specific terms and conditions related to the repair job.
Once all details are filled in, click on Save to create the repair ticket successfully.
Conclusion
Creating a repair ticket in BytePhase Laptop Repair Management CRM is simple and efficient. By following the steps outlined above, you can optimize your repair process, improve customer satisfaction, and manage jobs seamlessly. As dedicated laptop repair software, BytePhase keeps every ticket tied to accurate device, warranty, and service records from the first step.
Ready to streamline your repair operations? Start your 15-day free trial on BytePhase Laptop Repair Management CRM and experience hassle-free ticket management!
Watch video here
 Sign up now and simplify your repair workflow!