
How to Create a Repair Ticket in BytePhase
Table of contents
Share Post

How to Create a Repair Ticket: Step-by-Step Guide
Step 1: Log in and start a new ticket
- Log in to your BytePhase account.
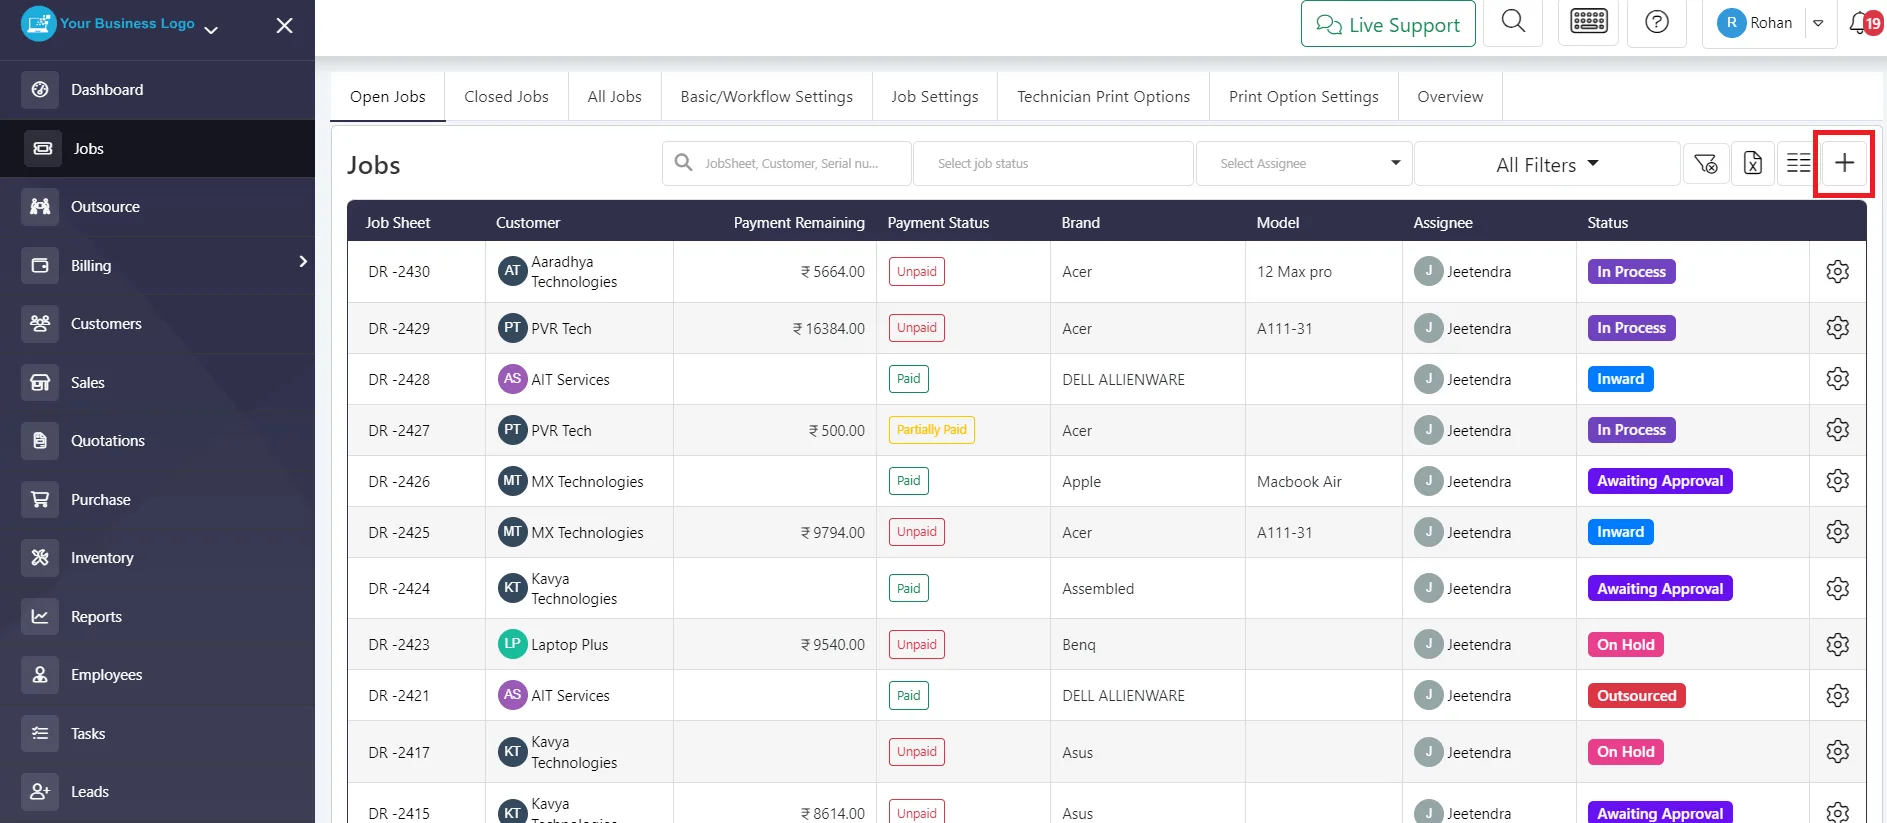
- Go to the Jobs list and click the + (plus) button.
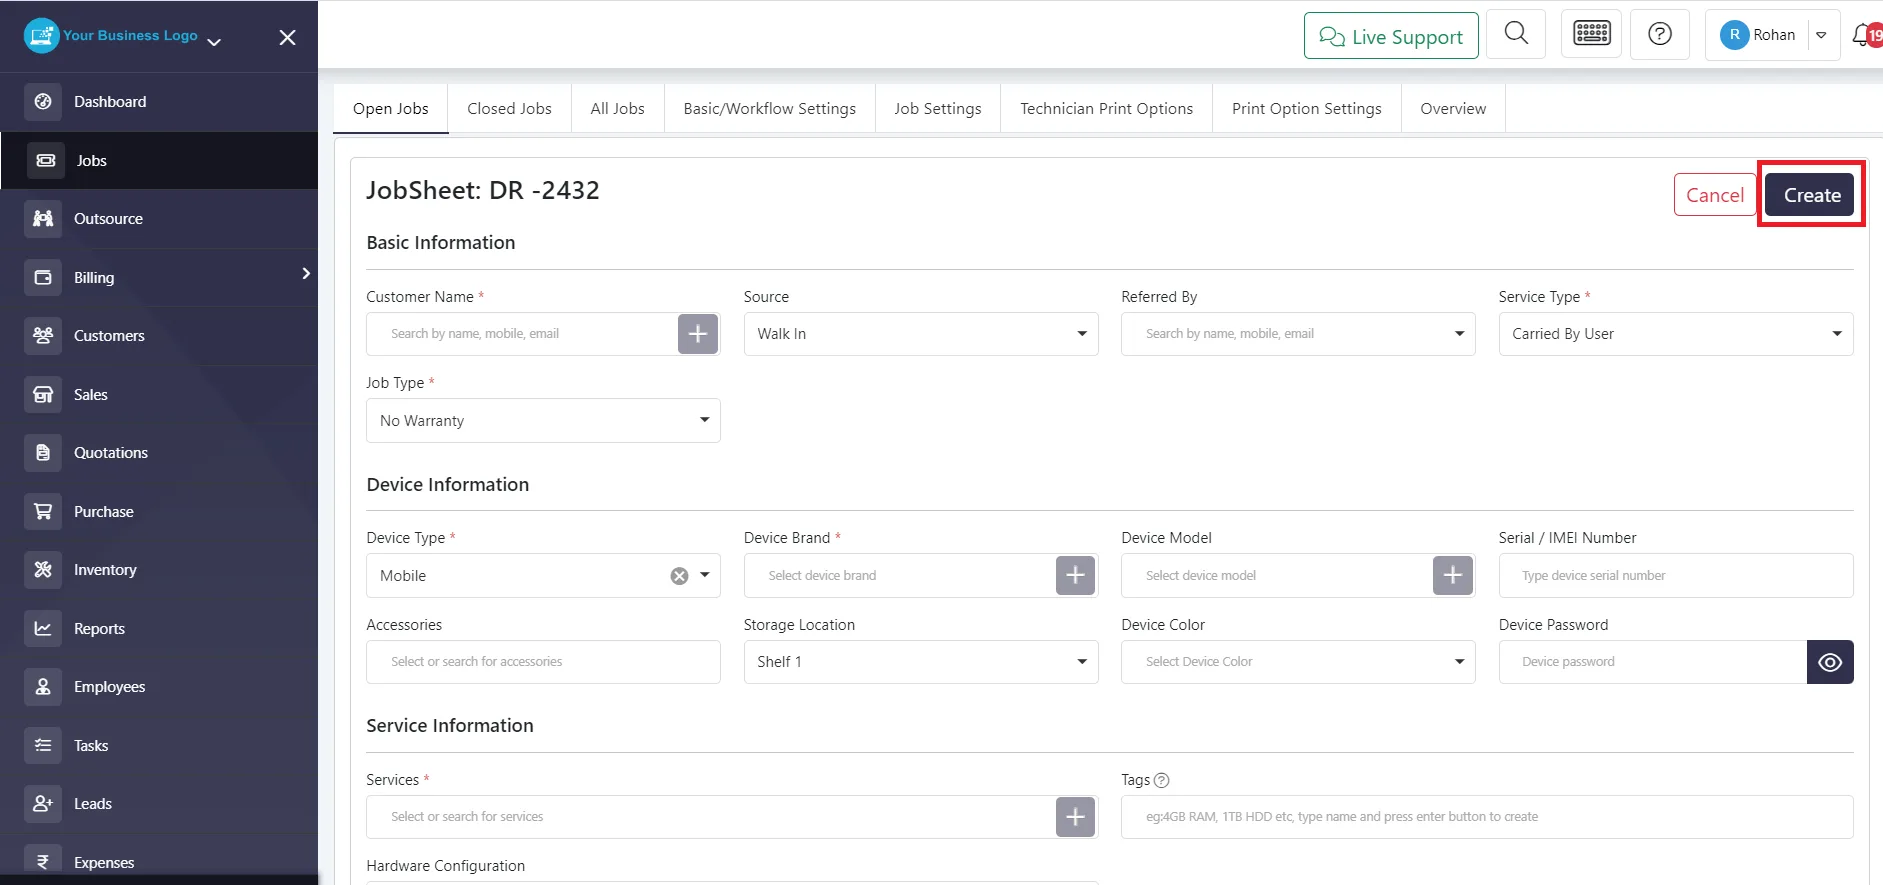
- Step 2: Fill in the required fields — Customer Name, Service Type, Job Type, Device Type, Device Brand, Services, Priority, and Assignee.
- Click the Create button to save the ticket.
Step 3: Send the job sheet to your customer
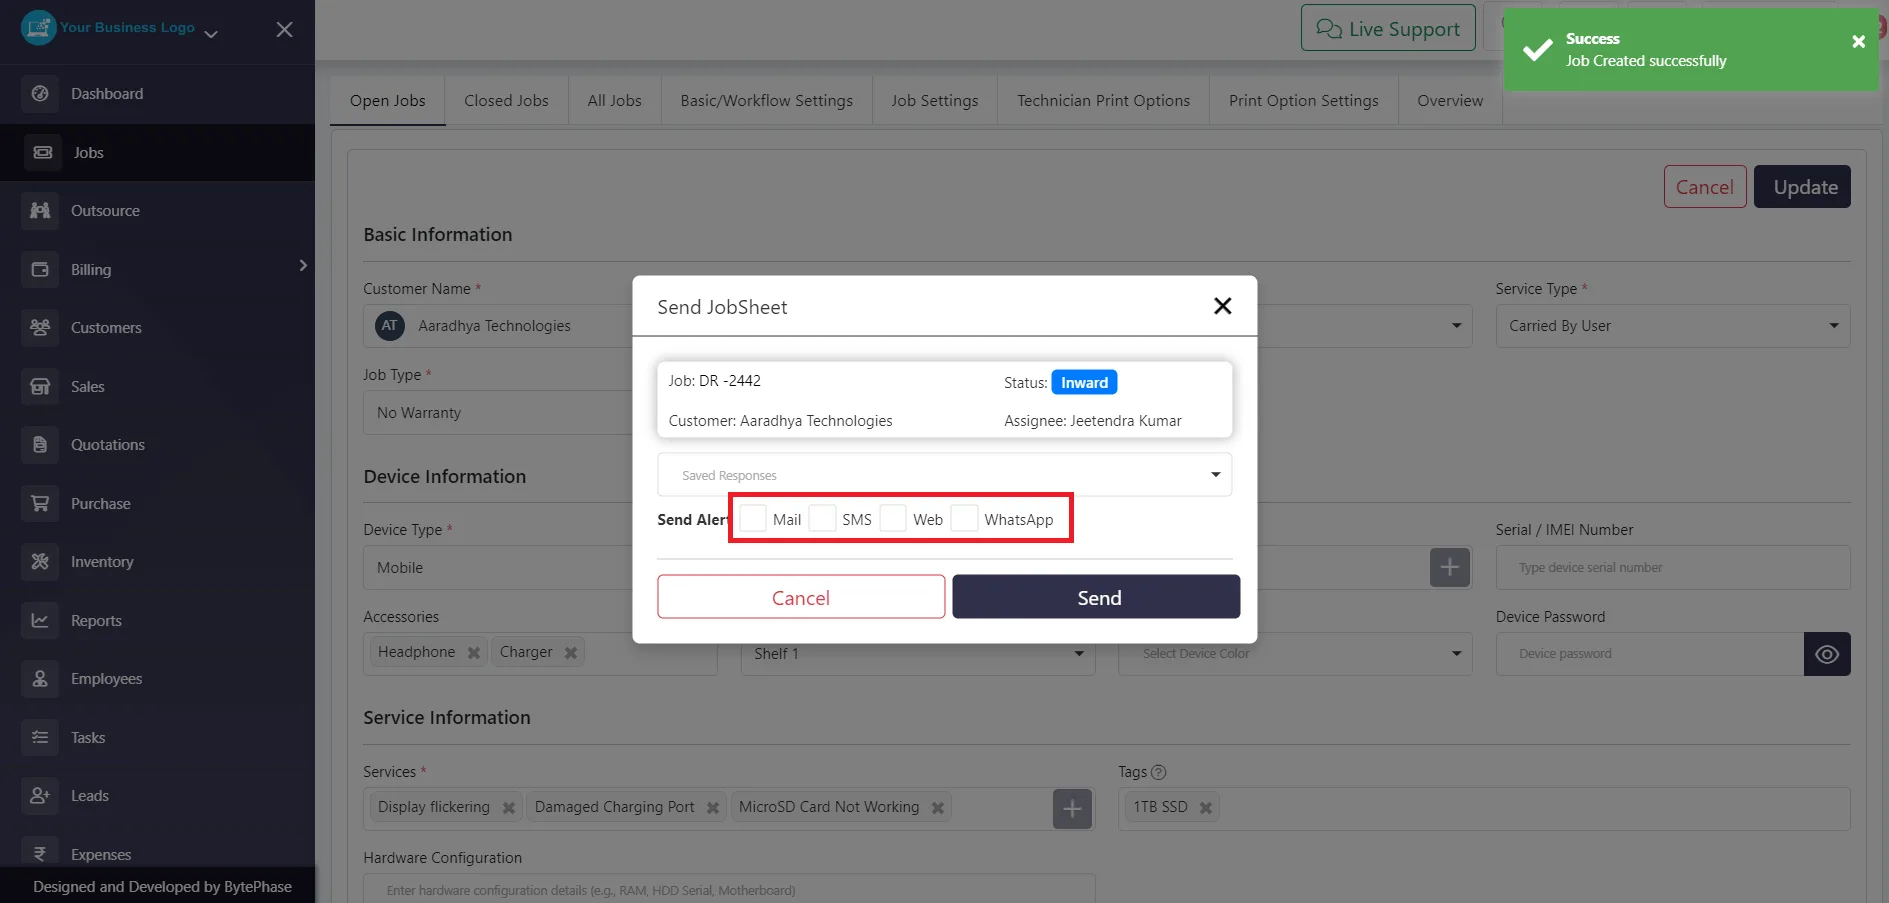
Once the ticket is created, a popup appears asking whether to send the job sheet to the customer by Email, SMS, Web, or WhatsApp.
Great job! 🎉
That’s it — you’ve successfully created a repair ticket. Check your notifications regularly to stay updated on customer responses.
Watch the short video below for a complete walkthrough.
For privacy reasons YouTube needs your permission to be loaded. For more details, please see our Privacy Policy — BytePhase Repair Shop Software.
BytePhase makes this simple.
That covers the complete repair ticket management flow in BytePhase — from opening a new ticket to notifying the customer. Following these steps keeps every repair job organized, trackable, and easy to follow up on, right from creation to closure.
Share Post