
How to Add General Settings in the BytePhase Portal

Introduction
Managing your repair shop management software efficiently starts with configuring the right general settings for your business. Whether you want to automate invoices, enable GDPR compliance, or customize invoice numbering, BytePhase makes it easy to tailor the system to your specific operational needs. Setting up General Settings correctly ensures smoother workflows, better compliance, and a more professional customer experience from day one.
This guide walks you through how to add general settings in the BytePhase portal, what each option does, and a few tips for getting the most out of them.
Why Are General Settings Important in BytePhase?
First and foremost, General Settings allow you to customize your CRM system to suit your business’s unique requirements. Second, they help automate routine tasks like rounding off bills and generating invoices, saving you time and effort. Third, by enabling GDPR compliance and other regulatory settings, you ensure that your business operations are secure and legally compliant. Most importantly, these settings enhance the customer experience by streamlining processes and avoiding manual errors.
Step-by-Step Guide to Adding General Settings in BytePhase Portal
Step 1: Log in to BytePhase Portal
- Head over to the official BytePhase Portal.
- Enter your username and password to access your account securely.
Step 2: Go to Business Settings
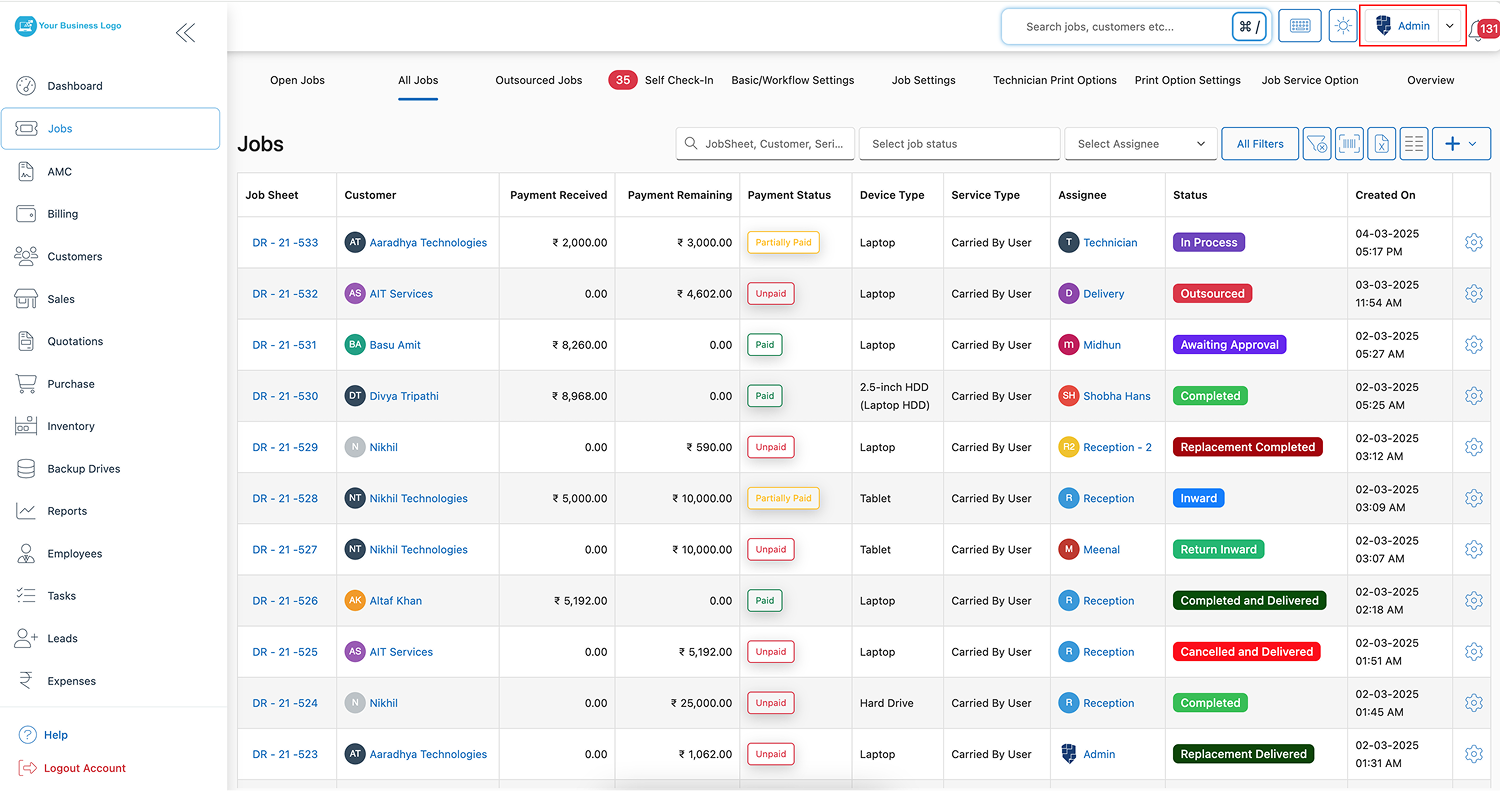
- Click on your profile icon in the top-right corner of the portal.
- From the dropdown, select “Business Settings” to open customization options.
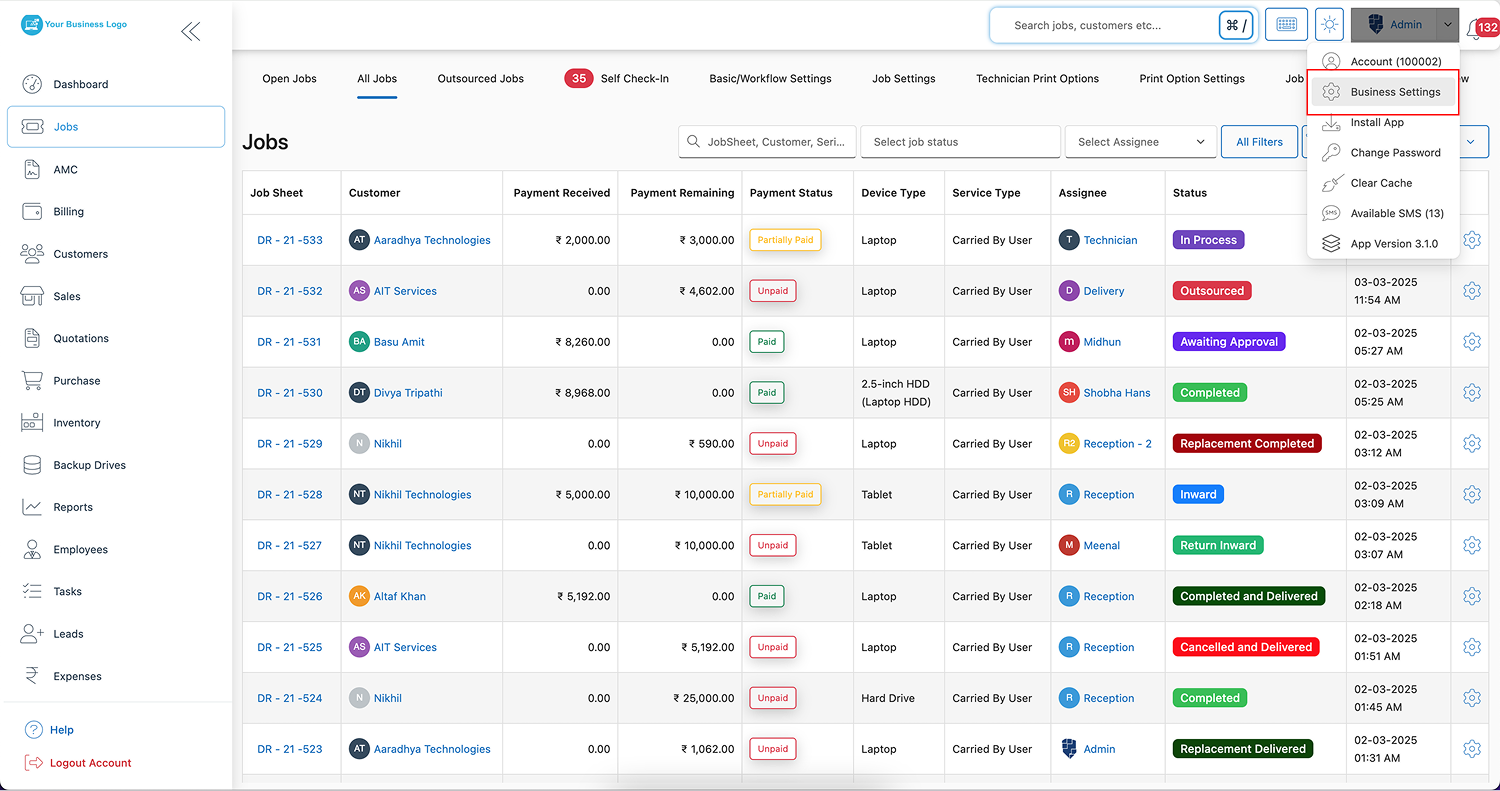
Step 3: Select ‘General Setting’ Tab
- Inside Settings, click on the “General Setting” tab to configure essential system preferences.
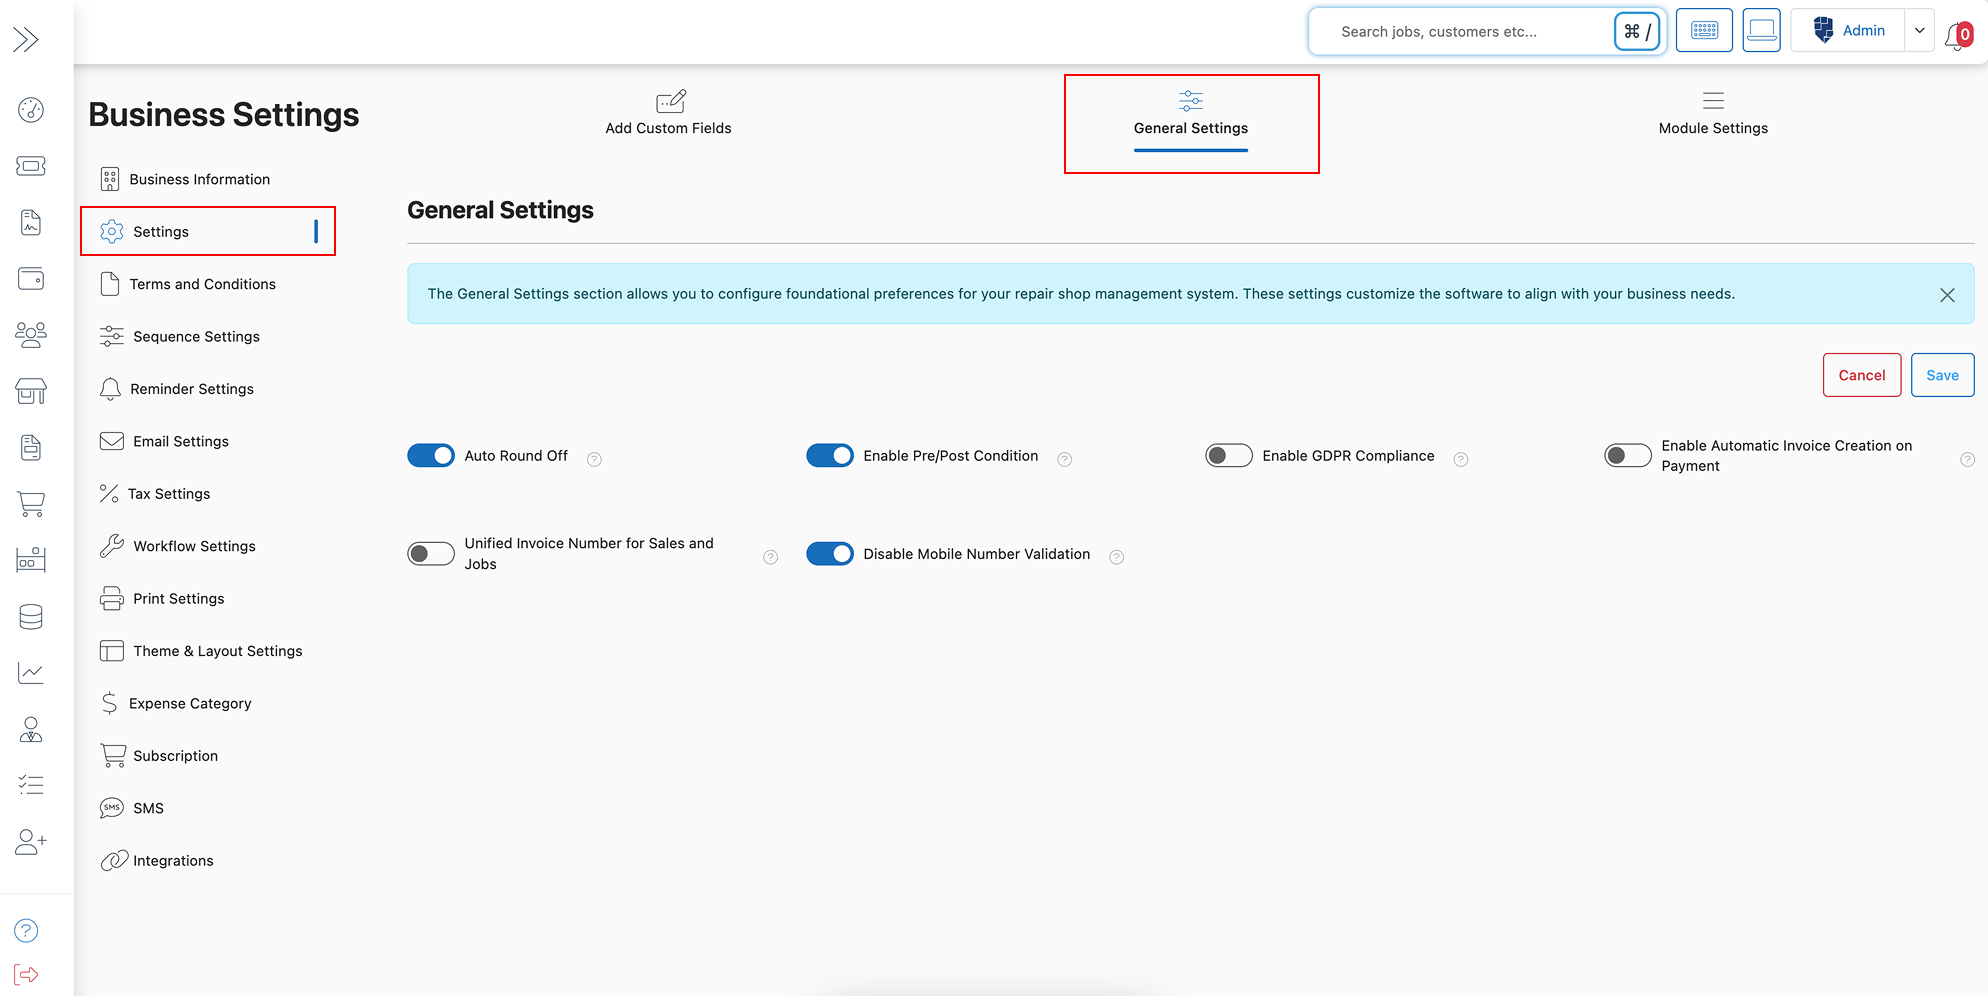
Step 4: Configure Essential General Settings
Here’s a breakdown of each important option you can enable or disable:
✅ Auto Round-Off
- Purpose: Automatically round off billing amounts across the system for smoother and error-free invoicing.
- Benefit: Saves manual effort in adjusting small decimal values, ensuring neat billing totals.
✅ Enable Pre/Post Condition
- Purpose: Activate Pre/Post Repair Condition fields on Job Forms to record job-specific information.
- Benefit: Adds professionalism and thoroughness to job management and client communication.
✅ Enable GDPR Compliance
- Purpose: Ensure your business collects, processes, and stores customer data lawfully, adhering to GDPR standards.
- Benefit: Builds trust with customers by demonstrating commitment to data privacy.
✅ Enable Automatic Invoice Creation on Payment
- Purpose: Auto-generate invoices when payments are received for jobs.
- Benefit: Speeds up billing processes and reduces manual work, ensuring timely invoicing.
✅ Unified Invoice Number for Sales and Jobs
- Purpose: Use a single sequence for both sales and job invoices (e.g., IN_1, IN_2).
- Benefit: Keeps invoice numbering organized and easy to track. You can disable it if you prefer separate numbering for sales and jobs (e.g., Job: IN_1, Sale: SAL_1).
✅ Disable Mobile Number Validation
- Purpose: Turn off mobile number validation during user registration or updates.
- Benefit: Adds flexibility in handling customer contact details, especially useful when dealing with international clients or varying formats.
Step 5: Save and Apply Your Settings
- After selecting the settings you want, click “Save” to apply them across the portal.
- Once done, your BytePhase CRM will start functioning based on these configurations.
Key Features and Benefits of BytePhase General Settings
✨ Customizable Workflows – Adjust BytePhase to fit your unique business needs effortlessly.
✨ Automation-Ready – Automate essential tasks like invoice generation and rounding off for greater efficiency.
✨ Compliance-Friendly – Ensure GDPR compliance to manage customer data securely and legally.
✨ Professional Job Handling – Add Pre/Post Repair Conditions to jobs for a more organized approach.
✨ Simplified Invoice Management – Maintain a unified invoice numbering system for easier tracking and reduced errors.
✨ User-Friendly Configuration – No technical expertise required; easily manage settings through the intuitive dashboard.
Additional Tips for Optimizing General Settings in BytePhase
- ✅ Review general settings regularly to align with changing business needs.
- ✅ Enable GDPR compliance if you handle customer data from the EU or privacy-conscious regions.
- ✅ Use unified invoice numbering to simplify accounting and reporting processes.
- ✅ Enable Pre/Post Conditions for better service transparency in job management.
- ✅ Test the settings after saving to ensure they are applied correctly across all relevant modules.
Conclusion: Simplify and Optimize Your CRM Operations with BytePhase General Settings
Setting up general settings in the BytePhase portal is a critical step to optimizing your workflow, enhancing professionalism, and ensuring compliance. With a few clicks, you can automate key tasks, improve data handling, and customize your CRM to fit your unique business requirements.
🎯 Ready to configure your BytePhase portal the right way?
👉 Log in to BytePhase today and set up your general settings in minutes, or start a 15-day free trial to explore the full portal.
Need assistance? Check our Help Center or contact BytePhase Support for expert help.