
How to Configure List Table Settings in BytePhase Portal

What Are List Table Settings in BytePhase?
A well-organized and structured list table view is essential for improving data visibility and user experience. With BytePhase’s List Table Settings, you can customize how data is displayed on listing pages, making it easier to track jobs, invoices, customers, and transactions.
By configuring table settings, businesses can enhance readability, streamline workflow, and personalize the appearance of data tables to fit their operational needs. This is one of the smaller customization options inside BytePhase’s repair shop management software — in this guide, we’ll walk you through how to configure List Table Settings in BytePhase, their key benefits, and best practices for an optimized user experience.
Why Are List Table Settings Important in BytePhase?
- ✅ Enhanced Readability – Improves visibility and distinction between rows and columns.
- ✅ Better Data Organization – Helps users navigate large datasets more efficiently.
- ✅ User-Friendly Layout – Customizes the display for a more comfortable and structured viewing experience.
- ✅ Increased Productivity – Speeds up data retrieval and decision-making.
- ✅ Consistent UI/UX – Ensures a professional and uniform data presentation across the platform.
Step-by-Step Guide: How to Configure List Table Settings in BytePhase
Step 1: Log in to BytePhase Portal
- Head over to the official BytePhase Portal.
- Enter your username and password to log in securely.
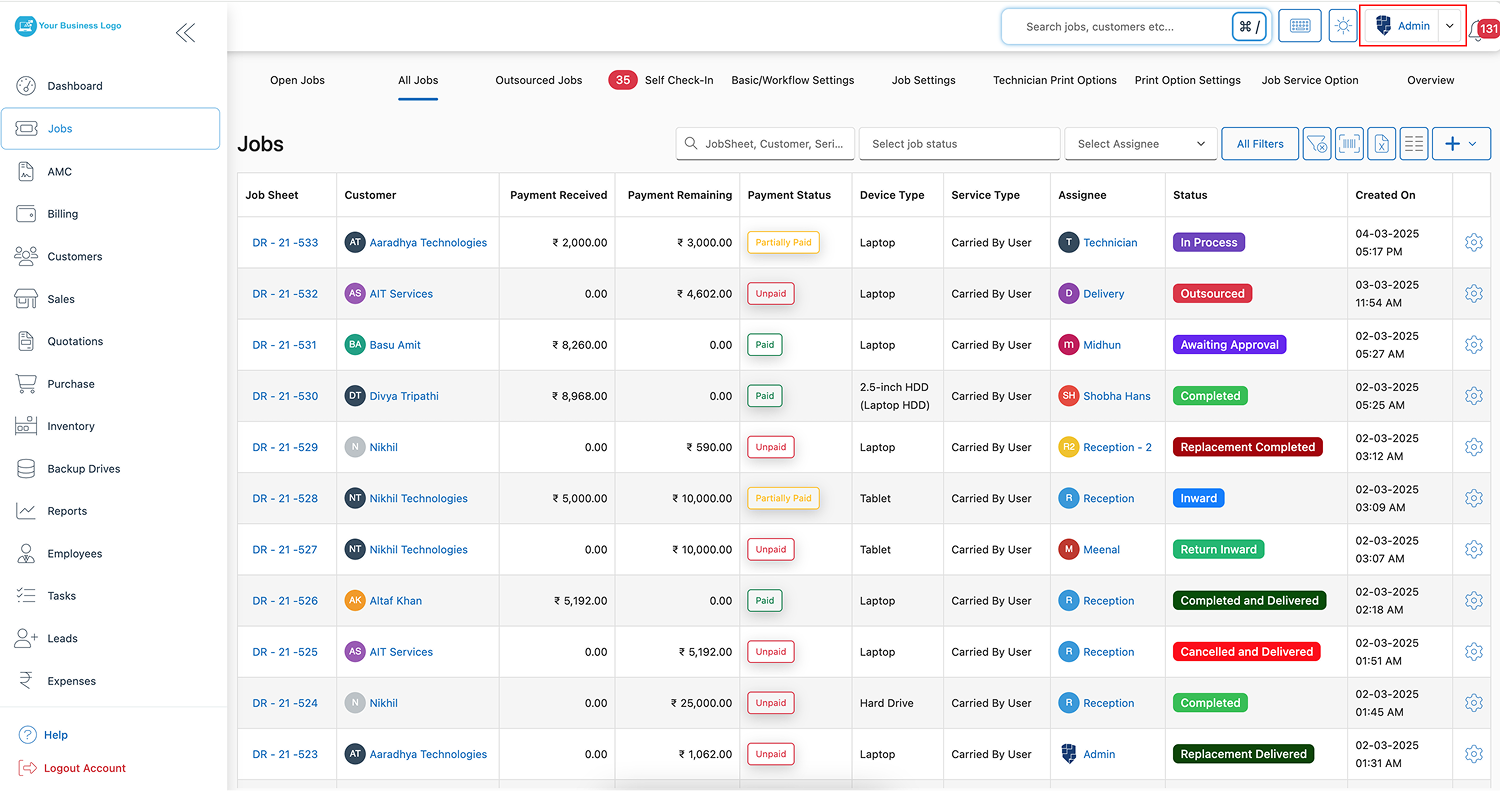
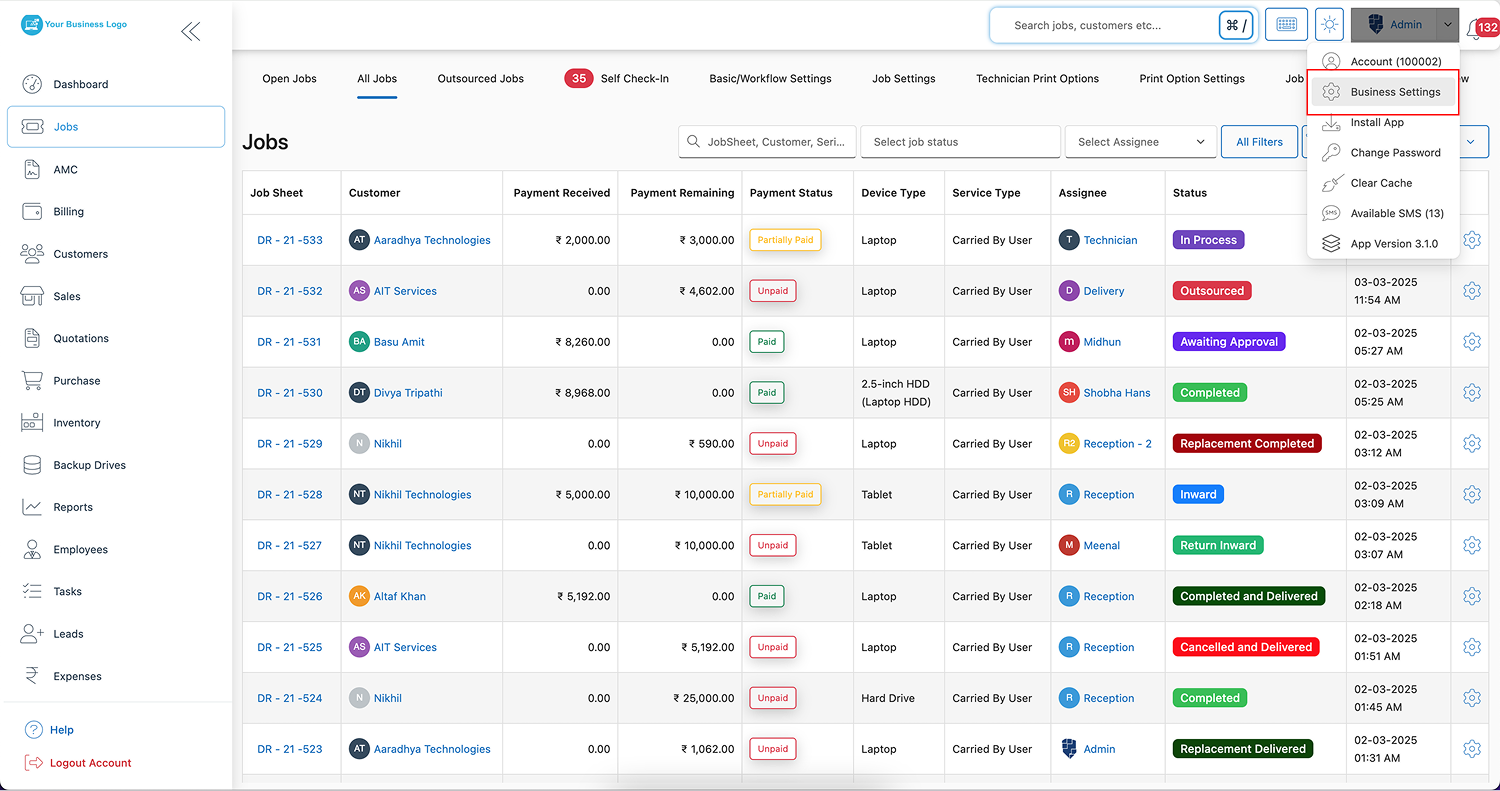
Step 2: Go to Business Settings
- Click on your profile icon in the top-right corner of the portal.
- From the dropdown, select “Business Settings” to open customization options.
Step 3: Open the Theme and Layout Settings Tab
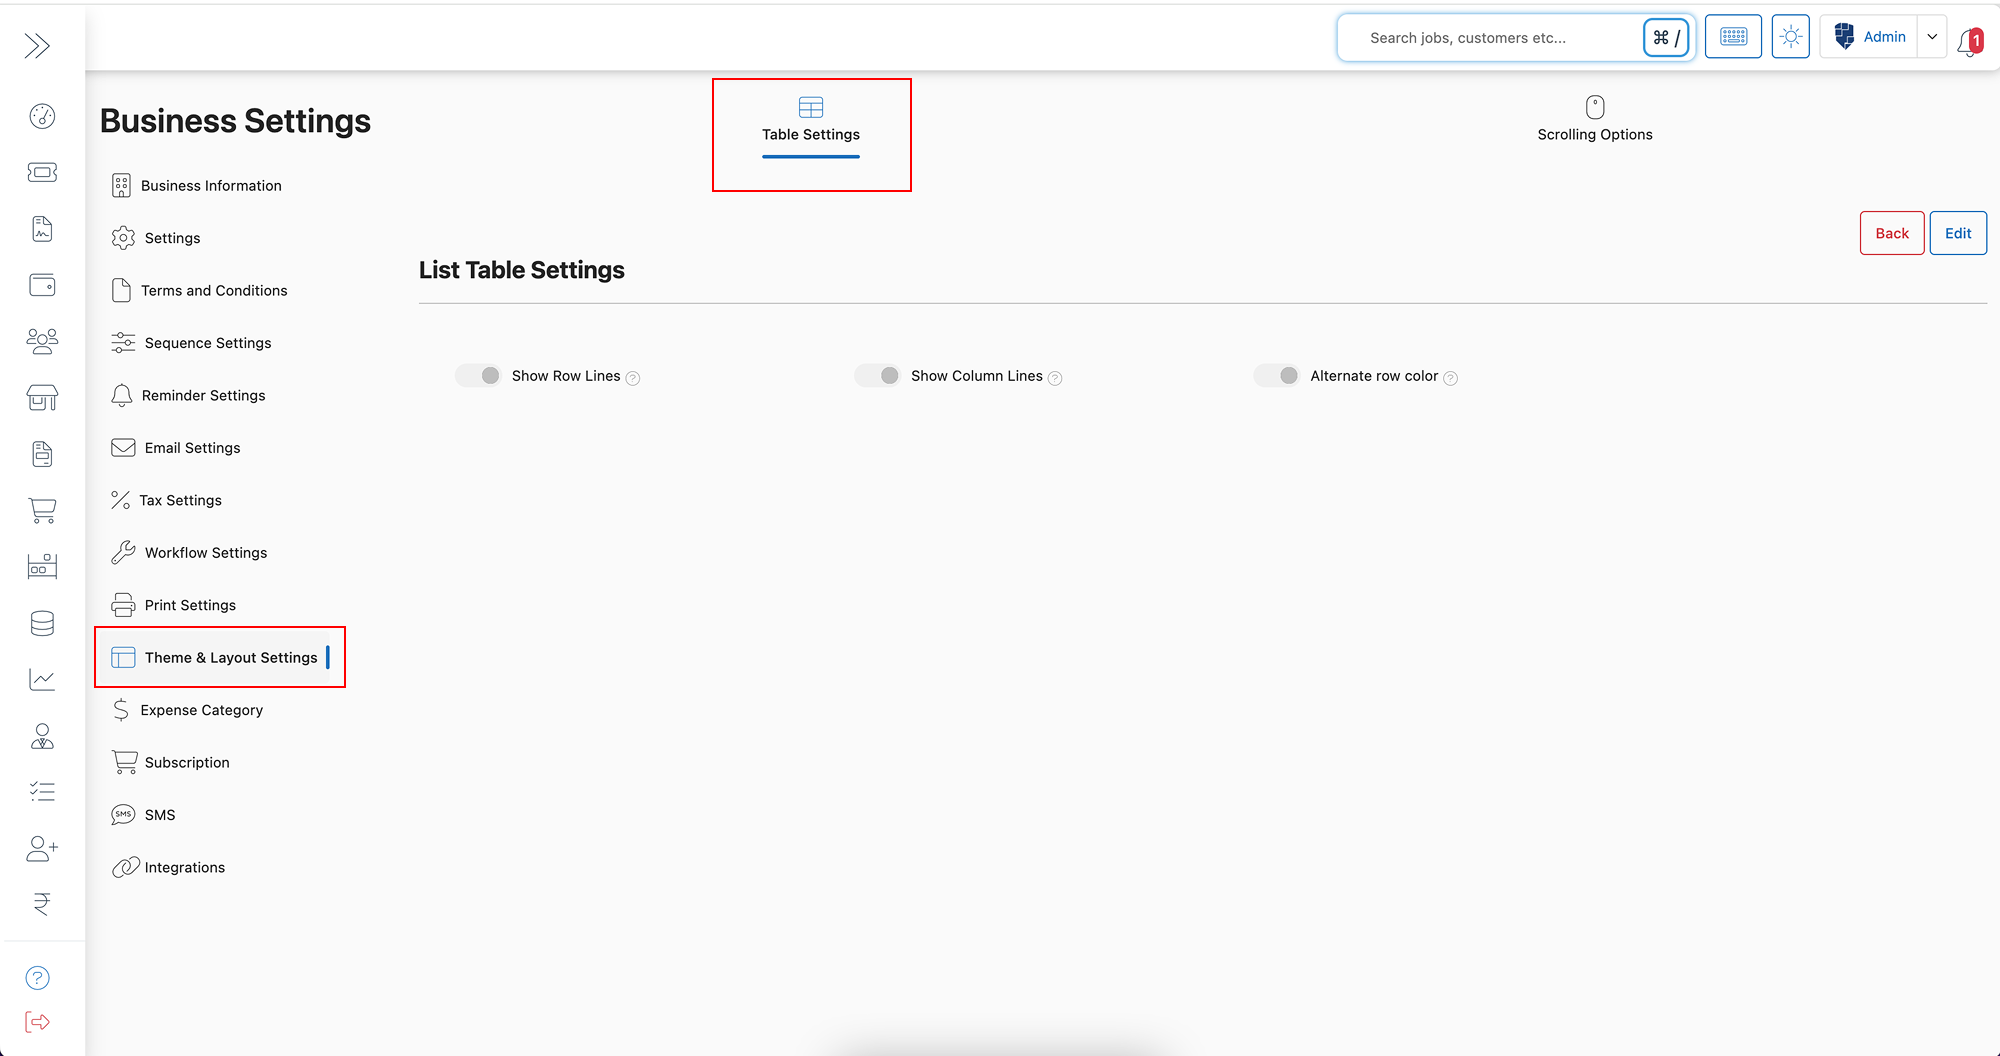
- Inside Business Settings, click on “Theme and Layout Settings” to access customization options.
Step 4: Select Table Settings Options
- Click on “Table Settings” to configure how tables appear on listing pages.
Step 5: Enable or Disable Required Table Display Options
Customize your list table by enabling the following options:
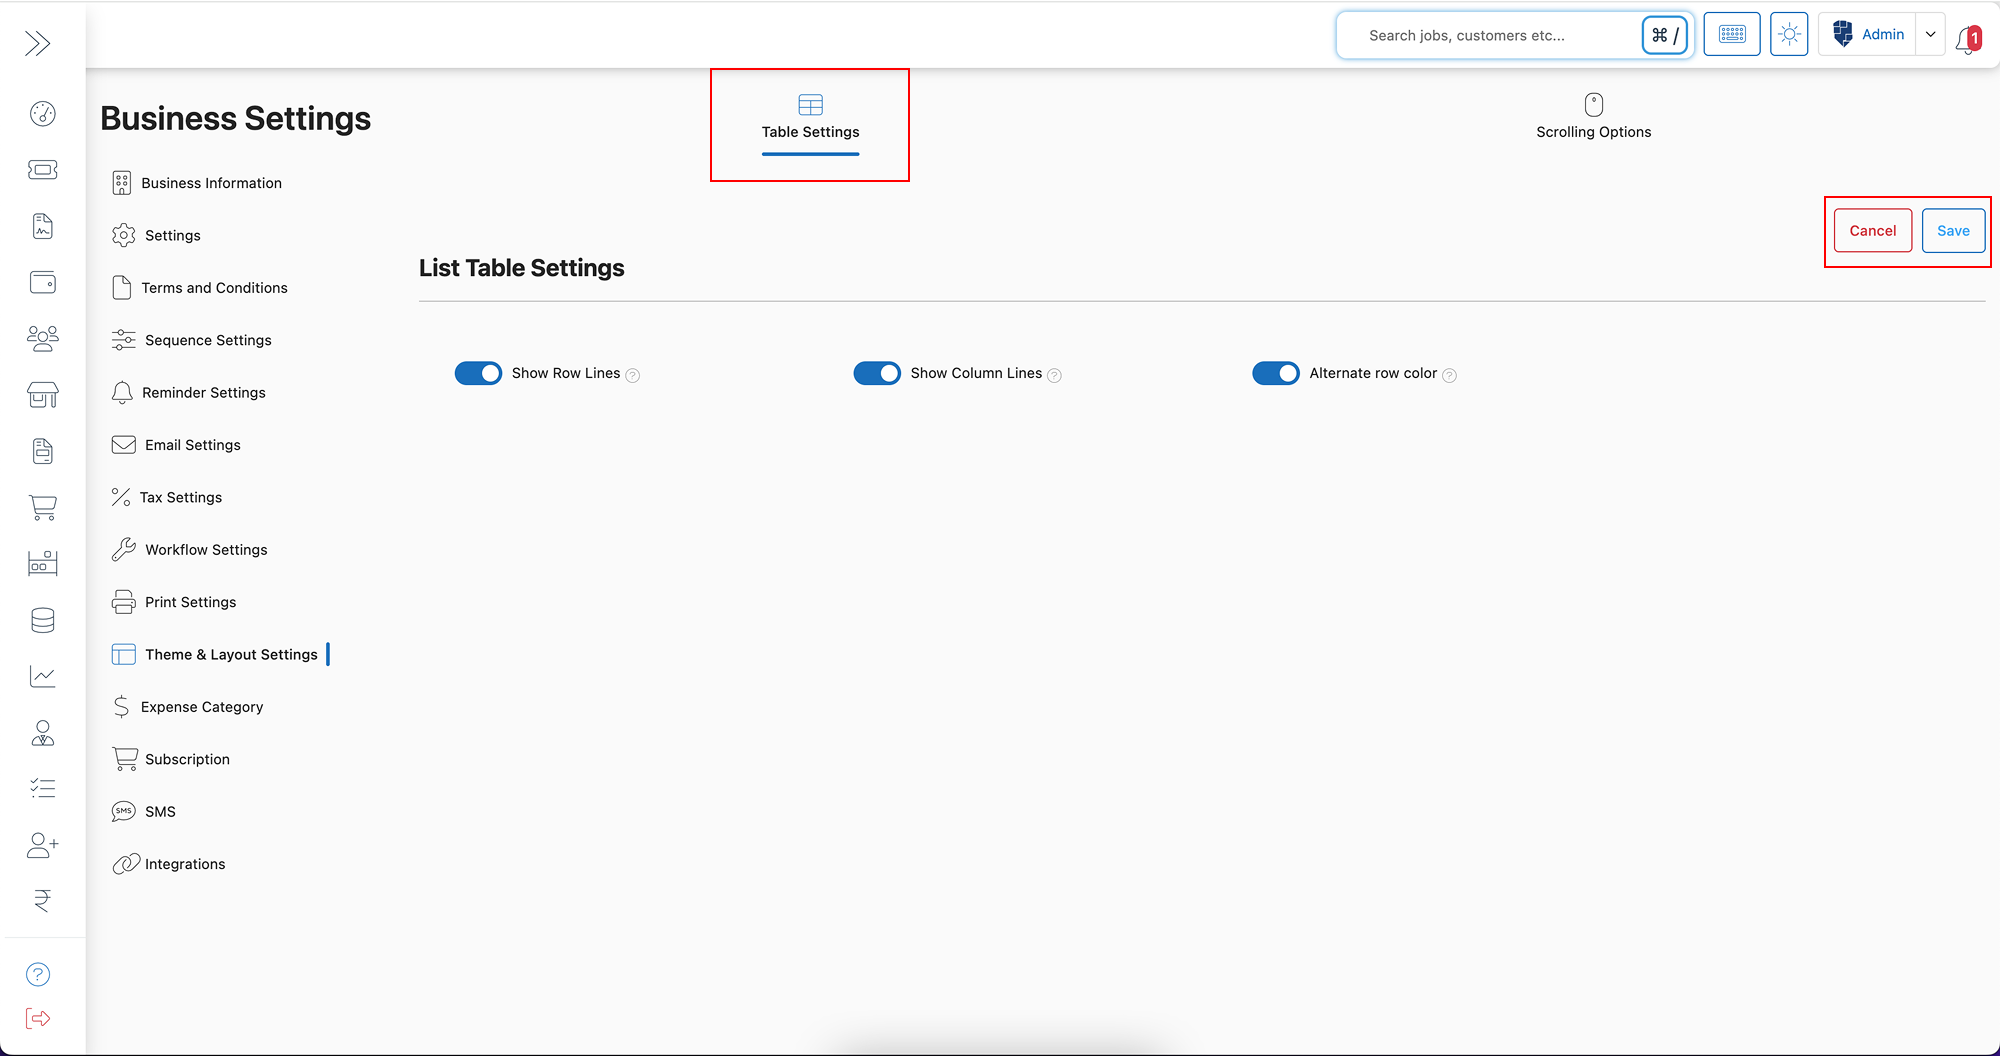
- ✔ Show Row Lines – Displays horizontal row dividers for better readability.
- ✔ Show Column Lines – Adds vertical column dividers to separate data fields clearly.
- ✔ Alternate Row Color – Applies a different background color to every alternate row, making it easier to differentiate data entries.
Step 6: Save Your Settings
- After selecting your desired settings, click “Save” to apply changes.
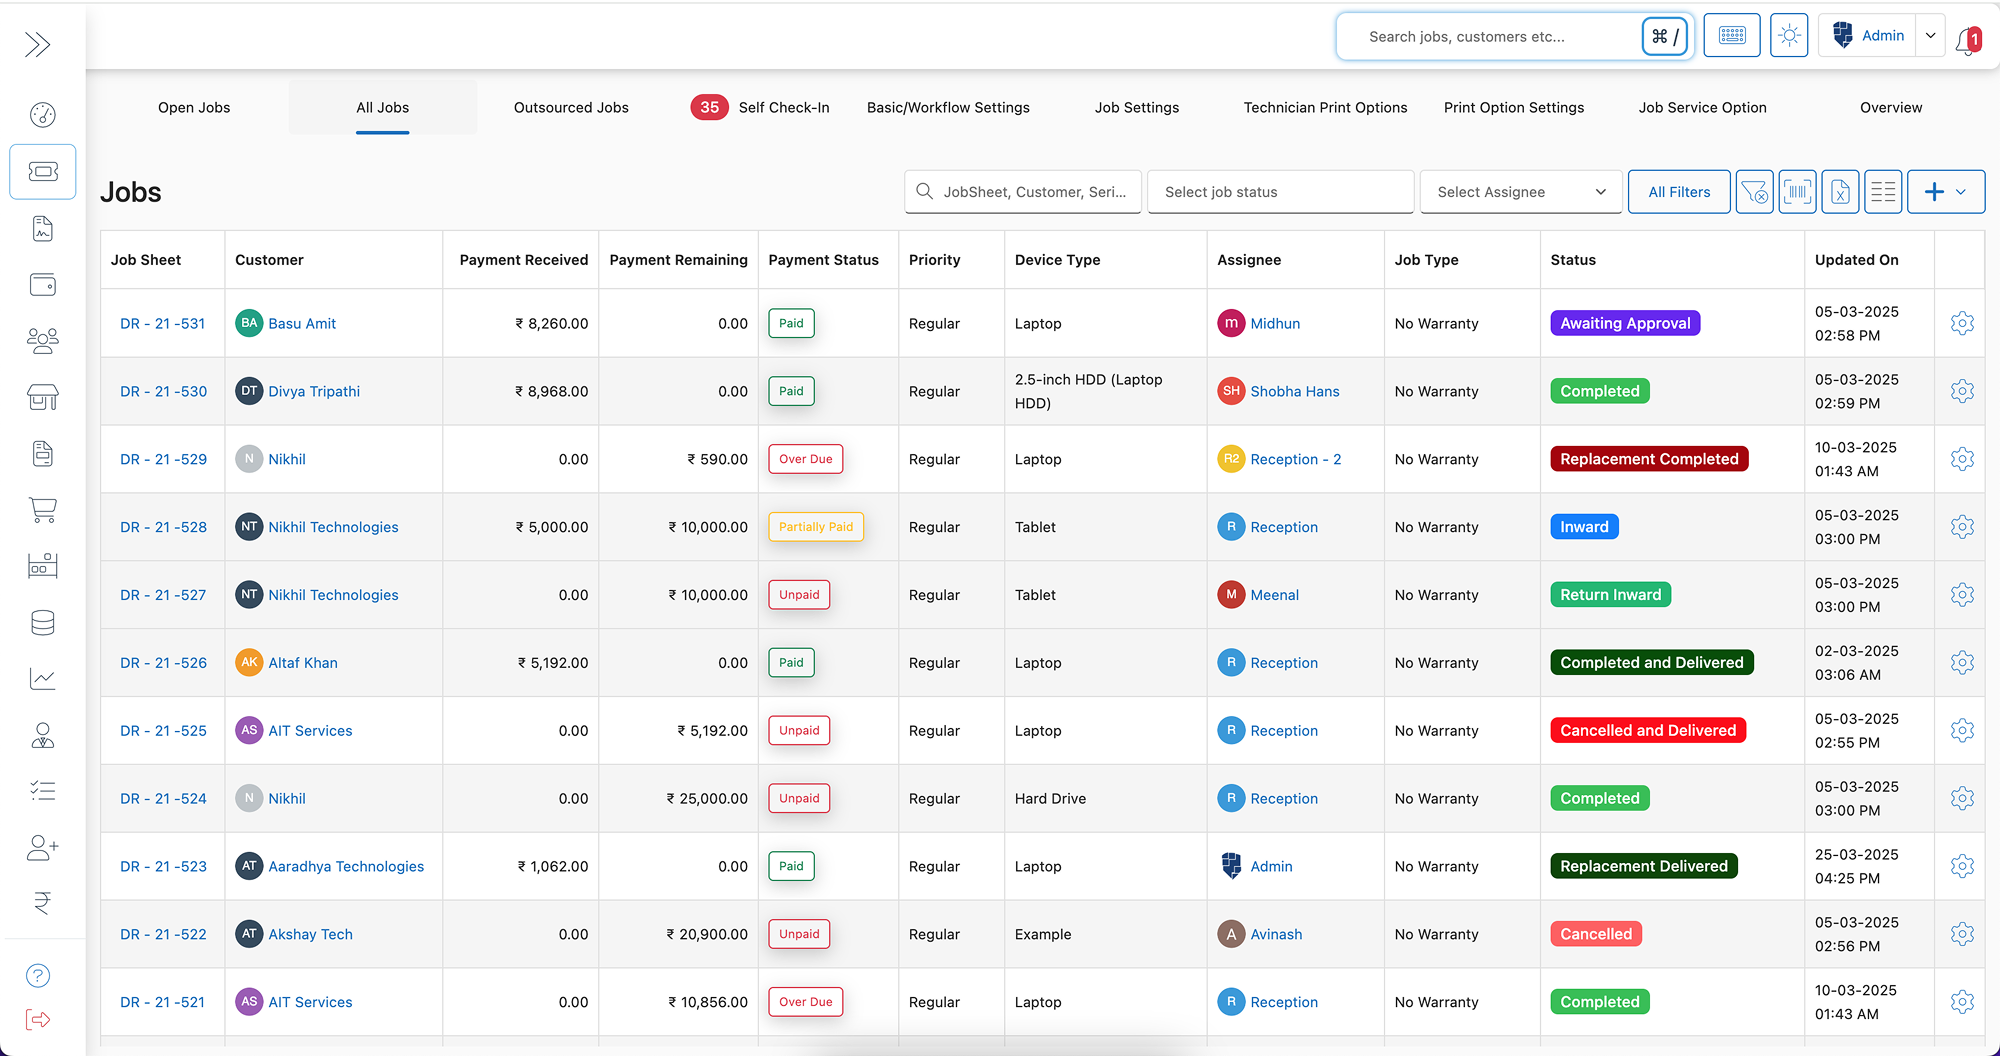
✅ Now, all listing tables will automatically reflect the updated settings!
Key Features & Benefits of Customizing List Table Settings in BytePhase
- ✨ Improved Data Visualization – Clear row and column lines enhance structure.
- ✨ Customizable Appearance – Adjust colors and layouts to fit user preferences.
- ✨ Reduced Eye Strain – Alternating row colors improve readability, especially for large datasets.
- ✨ Effortless Data Sorting – Helps businesses manage jobs, invoices, and customer records efficiently.
- ✨ Consistent & Professional Look – Ensures a clean and structured user interface across all modules.
Practical Example: Why Businesses Need List Table Customization in BytePhase
Imagine a service business managing hundreds of job sheets, invoices, and customer records daily. If tables lack clear separation between rows and columns, users may struggle to differentiate data, leading to errors and inefficiencies.
By customizing List Table Settings in BytePhase, businesses can:
- ✅ Clearly distinguish between different records for faster data retrieval.
- ✅ Reduce visual clutter and improve decision-making.
- ✅ Save time by organizing information systematically.
- ✅ Maintain a consistent layout across all listing pages.
Best Practices for Optimizing List Table Settings in BytePhase
- ✔ Enable alternate row colors to improve readability for large datasets.
- ✔ Use column and row dividers for clear data segmentation.
- ✔ Regularly update settings to align with business needs and user preferences.
- ✔ Ensure uniform table settings across different modules for a consistent user experience.
Conclusion: Enhance Your Data Visibility with BytePhase List Table Settings
Customizing List Table Settings in BytePhase allows businesses to personalize data presentation, improve visibility, and streamline workflow. By enabling row lines, column dividers, and alternate row colors, users can enjoy a cleaner, more structured, and professional-looking interface.
🎯 Want to enhance your BytePhase table display?
👉 Log in to BytePhase, configure your table settings, and improve your data management today!
Read more about our latest Updates
Need assistance? Check our Help Center or contact BytePhase Support for expert help.