
Connect Any Web Form to BytePhase with Zapier (Google Forms, Typeform & More)
Zapier links BytePhase to thousands of other apps without code. This guide connects a Zapier trigger — a Google Form here, but the same steps work for any app Zapier supports — to BytePhase, so every submission becomes a Lead or a Self Check-in automatically.
What You’ll Need
- A BytePhase account with access to Settings → Integrations
- A Zapier account. The Webhooks by Zapier action this uses is a premium Zapier feature
- The app you want to send data from — a Google Form in this walkthrough
- About 15 minutes
What the Zapier Integration Does
Zapier posts each submission to BytePhase, which turns it into a Lead (an enquiry to chase) or a Self Check-in (a pending check-in your team converts into a job when the device arrives). It is one-way into BytePhase.
Worth knowing before you build: unlike the Typeform, JotForm and Tally.so integrations, this route has no submission-ID de-duplication. If Zapier retries a step, BytePhase has no provider ID to recognise it by — only the duplicate policy you set in Step 7 (matching on email or mobile) stops a second record being created. Keep that in mind when designing retries.
How the Zapier Integration Works
Someone submits your form
A customer fills in the Zapier form you already use — nothing changes for them.
Your Zap posts to BytePhase
A Webhooks by Zapier action sends the submission to one authenticated BytePhase endpoint, using your API key.
Your field map is applied
Each answer is matched to a BytePhase field. Anything you did not map is kept as a custom field.
The record is created
It lands as a Lead or a Self Check-in — whichever destination that form is set to — and is written to the Activity log.
Step 1: Open the Zapier Card in BytePhase
Log into BytePhase and go to Settings → Integrations. Under Website & Forms you’ll find a Zapier card. Click Connect to start the setup wizard.
Step 2: Choose Where Submissions Land
The wizard opens on Destination, and it comes first because everything after it depends on the answer. Choose Self Check-in if the submission should open a job for a device that is coming in, or Lead if it should raise an enquiry. Your Zap then sends the matching value in the destination field. You are not choosing once and for all — see running both side by side below.
Step 3: Copy Your Endpoint URL and API Key
The wizard’s Connect step shows the endpoint:
https://<tenant>.api.bytephase.com/api/<tenant-slug>/integrations/submit
and generates an API key alongside it. Copy the key now — it is shown only once. If you lose it, generate a new one from the wizard. Treat it like a password: keep it out of screenshots, emails, chat messages and Git repositories.
Step 4: Create Your Zap
Configure the Trigger
Inside Zapier:
- Click Create
- Select Zap
- Choose Start From Scratch
Trigger Settings
| Setting | Value |
|---|---|
| App | Google Forms |
| Event | New Form Response (Instant) |
Do not select
New or Updated Form Response
Editing an existing submission would create duplicate leads.
Connect your Google account.
Select your customer enquiry form.
Click:
Test Trigger
Zapier should retrieve a recent submission.
When successful, click:
Continue with selected record
No Sample Data?
If Zapier cannot find a sample:
- Submit your form yourself.
- Return to Zapier.
- Click Test Trigger again.
Step 5: Configure the Webhooks by Zapier Action
Add an action, choose Webhooks by Zapier, and select POST.
- URL — the Endpoint URL from Step 3
- Payload Type — Json
- Wrap Request In Array — No
- Unflatten — Yes
Add these headers:
X-API-Key— your BytePhase API key from Step 3Content-Type—application/jsonAccept—application/json
Then send this body shape. Your fields go inside data:
{
  "form_id": "google-enquiry-form",
  "destination": "lead",
  "data": {
    "name": "John Doe",
    "email": "john@example.com",
    "mobile_number": "+1234567890",
    "device_type": "Laptop",
    "device_brand": "Dell",
    "device_model": "XPS 15",
    "serial_number": "ABC123",
    "comment": "Screen not working",
    "custom_fields": { "warranty_status": "Expired" }
  }
}
Set destination to lead or self_checkin to match what you chose in Step 2. Map each value on the right with Zapier’s variable picker rather than typing it.
Already running an older Zap? The previous
/zapier/self-checkinendpoint with a flat body still works, so existing Zaps keep running. New ones should use the endpoint above.
Step 6: Send a Test and Map Your Fields
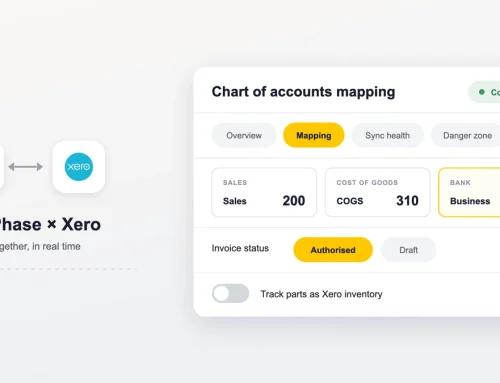
Run Zapier’s Test step once. Back in the BytePhase wizard the submission appears and every field you sent is listed. Because you are sending BytePhase’s own field names inside data, most rows match themselves — review them and point anything left over at the right field. Whatever you do not map is kept as a custom field rather than dropped.
Step 7: Set the Duplicate Policy and Activate
Choose how repeat submissions are handled. Lead defaults to skip a repeat (matched by email OR mobile + country code); Self Check-in defaults to create even for a returning customer (matched by mobile against any check-in still open). Given there is no submission-ID de-duplication on this route, this policy is your main protection against duplicates. Review the summary and click Activate integration.
Step 8: Add a Filter So Spam Never Reaches Your Team
Adding a filter prevents spam and incomplete submissions from reaching your Reception team.
Insert:
Filter by Zapier
Create these conditions:
- Full Name exists
AND
- Email Address exists
OR
- Mobile Number exists
Publish the filter.
Step 9: Publish Your Zap and Go Live
Click:
Publish
Submit a real form entry.
Within a few seconds you should see the lead automatically appear inside BytePhase.
Your automation is now live.
Run Self Check-in and Lead Side by Side
You do not have to pick one for the whole account. A single integration can serve several forms at once, each with its own destination and field map. BytePhase keys every entry by form and destination together, so one Zap can open Self Check-ins while another raises Leads, running in parallel.
Add the second form in the wizard, choose the other destination, and send the matching form_id and destination from that Zap. The Activity log records which destination each submission was routed to.
Field Mapping Reference
Lead and Self Check-in are two different record types, so they accept two different sets of fields. Map as many as your Zapier form collects — anything left over is kept as a custom field, not discarded. Pick the table that matches the destination you chose in Step 2.
Lead fields
Use this table when the destination is Lead — an enquiry to follow up, before any device is handed over.
| BytePhase Field | Required? | Notes |
|---|---|---|
name |
Yes | Max 60 characters |
email |
One of email or mobile | Max 255 characters |
mobile_number |
One of email or mobile | Max 20 characters |
mobile_country_code |
No | Max 10 characters; paired with mobile_number for duplicate matching |
phone_number |
No | Secondary phone number, max 20 characters |
contact_person_name |
No | Max 60 characters — for enquiries raised on behalf of a business |
source |
No | Max 100 characters; matched to an existing lead source by name |
role_id |
No | One of 7, 8 or 9; defaults to End User when omitted |
next_follow_up |
No | Date — schedules the first follow-up |
comment |
No | Free text |
device_type |
No | Max 100 characters; matched to an existing device type by name |
device_brand |
No | Max 100 characters; an unmatched value is kept as a custom brand name |
device_model |
No | Max 100 characters; an unmatched value is kept as a custom model name |
address.address_line |
No | Max 200 characters |
address.city |
No | Max 100 characters |
address.state |
No | Max 100 characters |
address.zip_code |
No | Max 20 characters |
Duplicate handling: Leads default to Skip. BytePhase looks for an existing lead with the same mobile_number and mobile_country_code, or the same email, and reuses it instead of creating a second one.
Self Check-in fields
Use this table when the destination is Self Check-in — a customer handing in a device, so the record carries serial numbers, accessories and pickup details a Lead has no place for.
| BytePhase Field | Required? | Notes |
|---|---|---|
name |
Yes | Max 255 characters |
email |
One of email or mobile | Max 255 characters |
mobile_number |
One of email or mobile | Max 20 characters |
mobile_country_code |
No | Max 10 characters |
device_type |
No | Max 255 characters; matched to an existing device type by name |
device_brand |
No | Max 255 characters; an unmatched value is kept as a custom brand name |
device_model |
No | Max 255 characters; an unmatched value is kept as a custom model name |
serial_number |
No | Max 255 characters |
serial_number_2 |
No | Max 191 characters — a second serial or IMEI |
device_password |
No | Max 191 characters — unlock code or device password |
accessories |
No | A list, or a comma-separated string — split into individual items |
comment |
No | Free text — the reported fault |
is_recovery |
No | Boolean — flags the job as a data-recovery case |
is_pickup_booked |
No | Boolean — marks that a pickup was requested |
scheduled_on |
No | Date — the requested pickup or drop-off date |
custom_fields |
No | Object; each value max 1,000 characters |
address.address_line |
No | Max 255 characters |
address.city |
No | Max 255 characters |
address.state |
No | Max 255 characters |
address.zip_code |
No | Max 20 characters |
Duplicate handling: Self Check-ins default to Create, so every submission becomes its own check-in — the right behaviour when the same customer brings in a second device. Only if you change the policy to Skip does BytePhase look for a match, and it then matches on mobile_number against open check-ins only.
Troubleshooting
- 401 / rejected. Check the
X-API-Keyheader has no stray spaces and matches the key from Step 3. - Fields arrive empty. They must sit inside the
dataobject — a flat body will not populate the new endpoint. - Wrong record type. Check
destinationmatches what you chose in Step 2. - Duplicates after a retry. Expected on this route — there is no submission-ID check. Tighten the duplicate policy from Step 7.
- 429 Too Many Requests. The endpoint allows 60 requests per minute per integration.
Security & API Limits
- API keys are shown only once.
- Rotate keys immediately if exposed.
- Delete and recreate the integration to generate a new key.
- Rate limit: 60 requests per minute.
- Every successful submission automatically notifies your Reception user.
- API keys are tenant-specific and cannot be shared between BytePhase accounts.
Put Your Lead Capture on Autopilot
Once the Zap is live, every submission becomes a Lead or a Self Check-in in BytePhase automatically, with the device details attached. Open Settings → Integrations → Website & Forms and connect the Zapier card to get started.