
How to Show or Hide Modules in the BytePhase Portal

Introduction
Not every user in your business needs access to every part of the CRM. Cluttered dashboards full of unused modules slow people down and increase the chance of mistakes. As a repair shop management software, BytePhase solves this with a Module Settings feature that lets you show or hide individual modules for each user role, so everyone only sees what they actually need.
This guide walks you through how to show or hide modules in the BytePhase portal, step by step, along with the key benefits of a focused, clutter-free dashboard.
Why Show/Hide Module Settings Matter
First, not every user or business function requires access to every module — customizing what’s visible keeps the workspace organized and clutter-free. Second, hiding unused modules reduces confusion for employees and customers, making the system easier to navigate. Third, enabling only the modules that are relevant to a role helps your team stay focused on the tasks in front of them.
BytePhase lets you adjust and re-enable modules at any time without losing data, so it’s a safe way to customize your workspace as your business changes.
Step-by-Step Guide: How to Show or Hide Modules in the BytePhase Portal
Step 1: Log In to the BytePhase Portal
- Go to the official BytePhase Portal.
- Enter your username and password to log in securely.
Step 2: Go to Business Settings
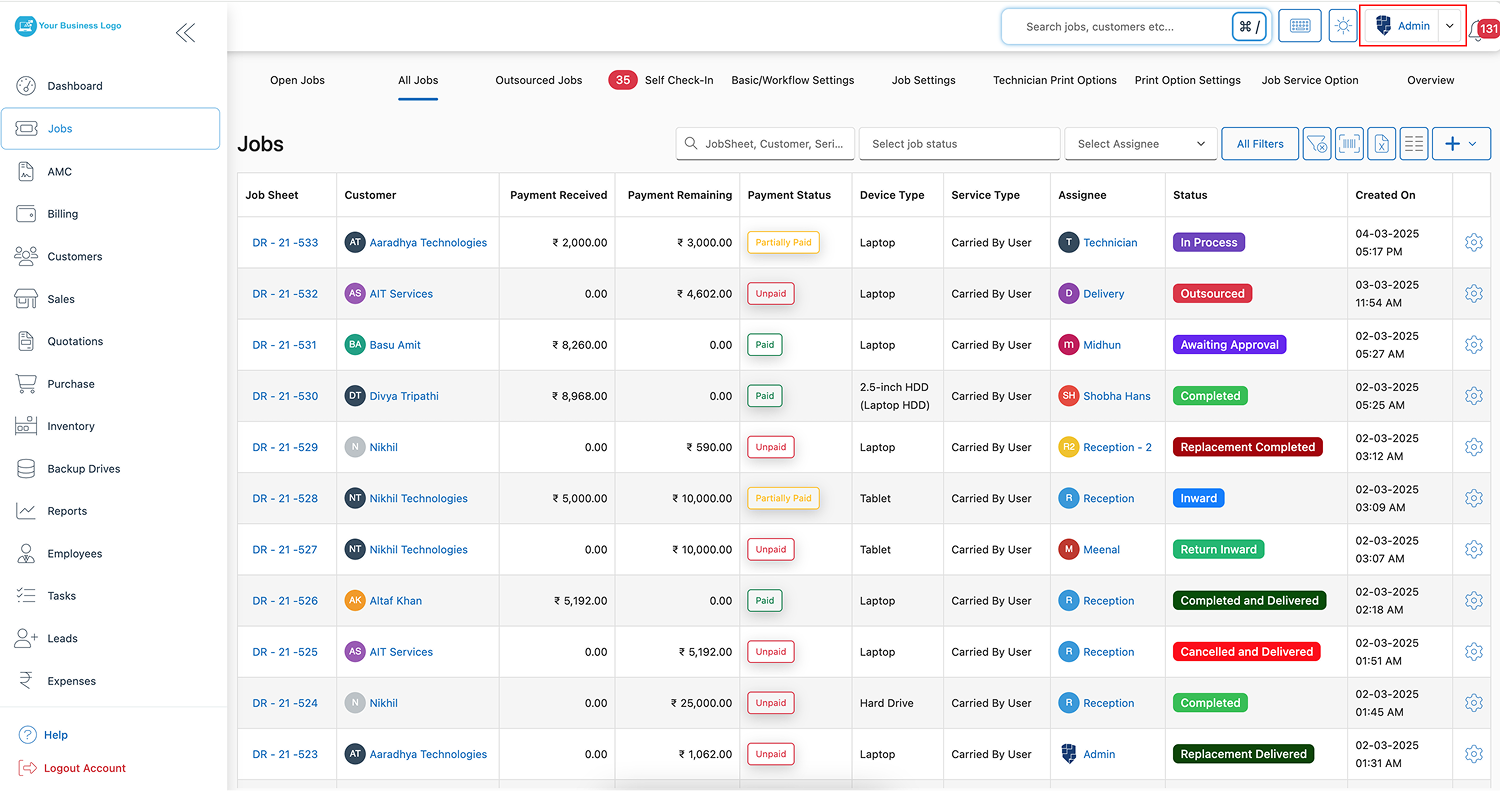
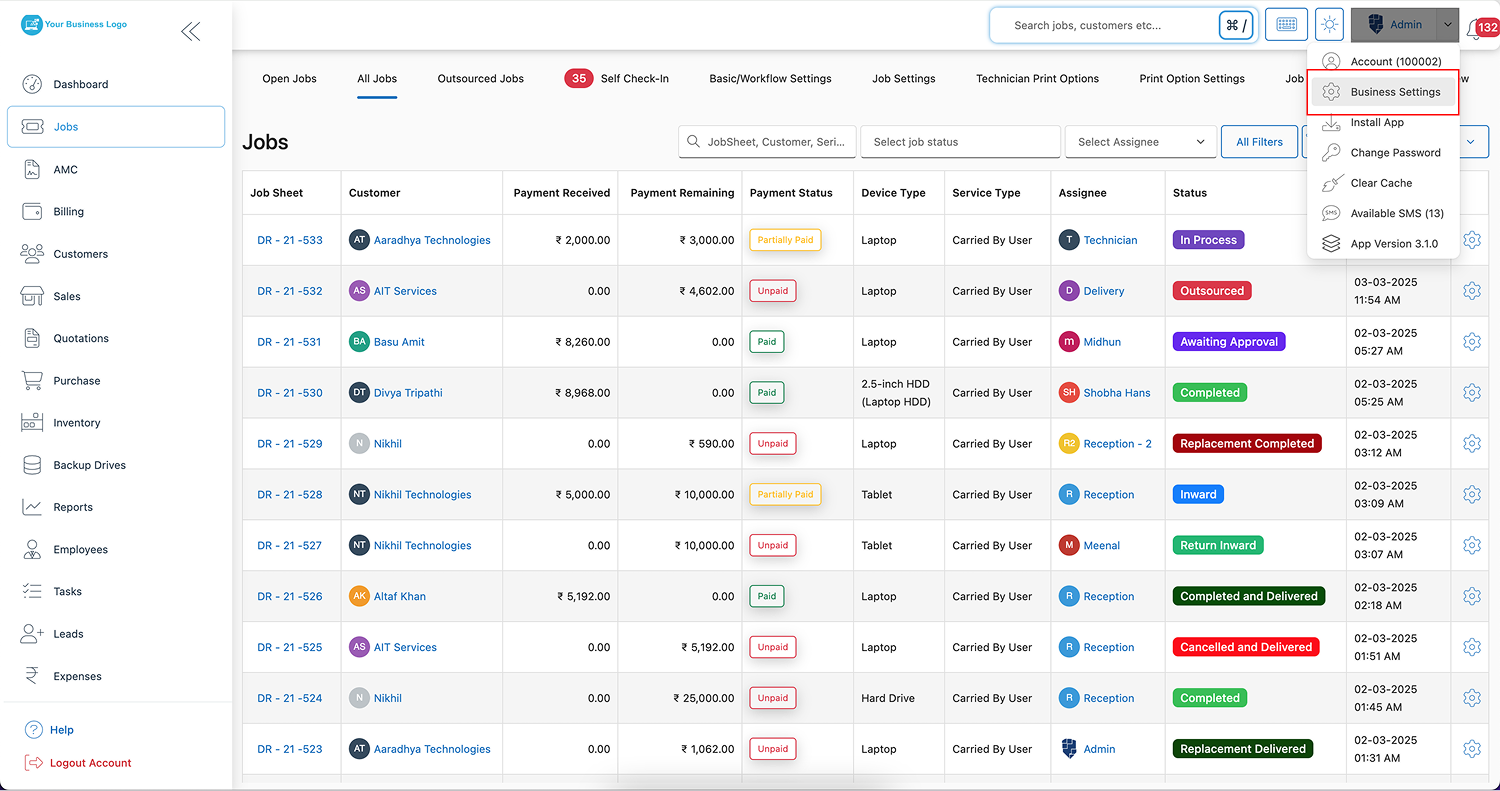
- Click your profile icon in the top-right corner of the portal.
- From the dropdown, select “Business Settings” to open the customization options.
Step 3: Select the “Module Setting” Tab
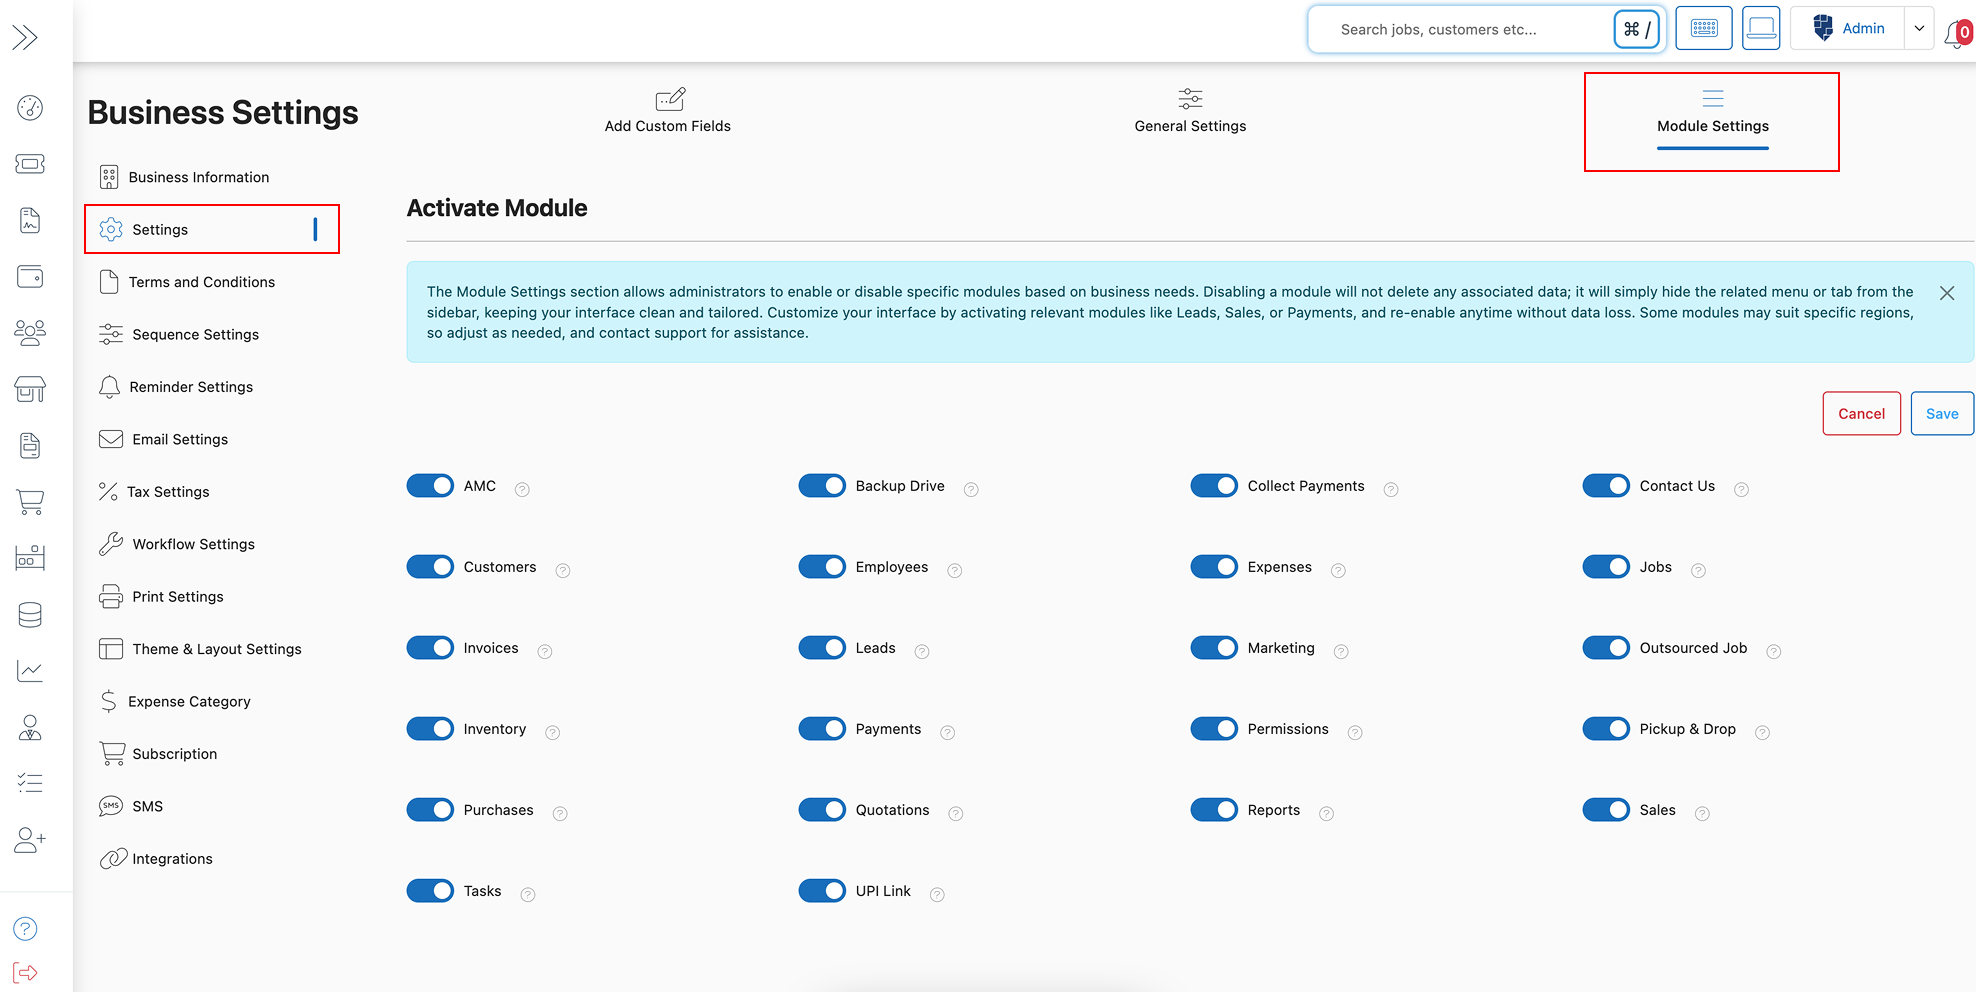
- Within Business Settings, click “Module Setting” to manage the visibility of each module.
Step 4: Click the Edit Button
- Press the “Edit” button to begin selecting which modules you want to enable or disable.
Step 5: Choose Which Modules to Hide or Disable
- Review the list of available modules and choose which ones to hide or disable from the left sidebar.
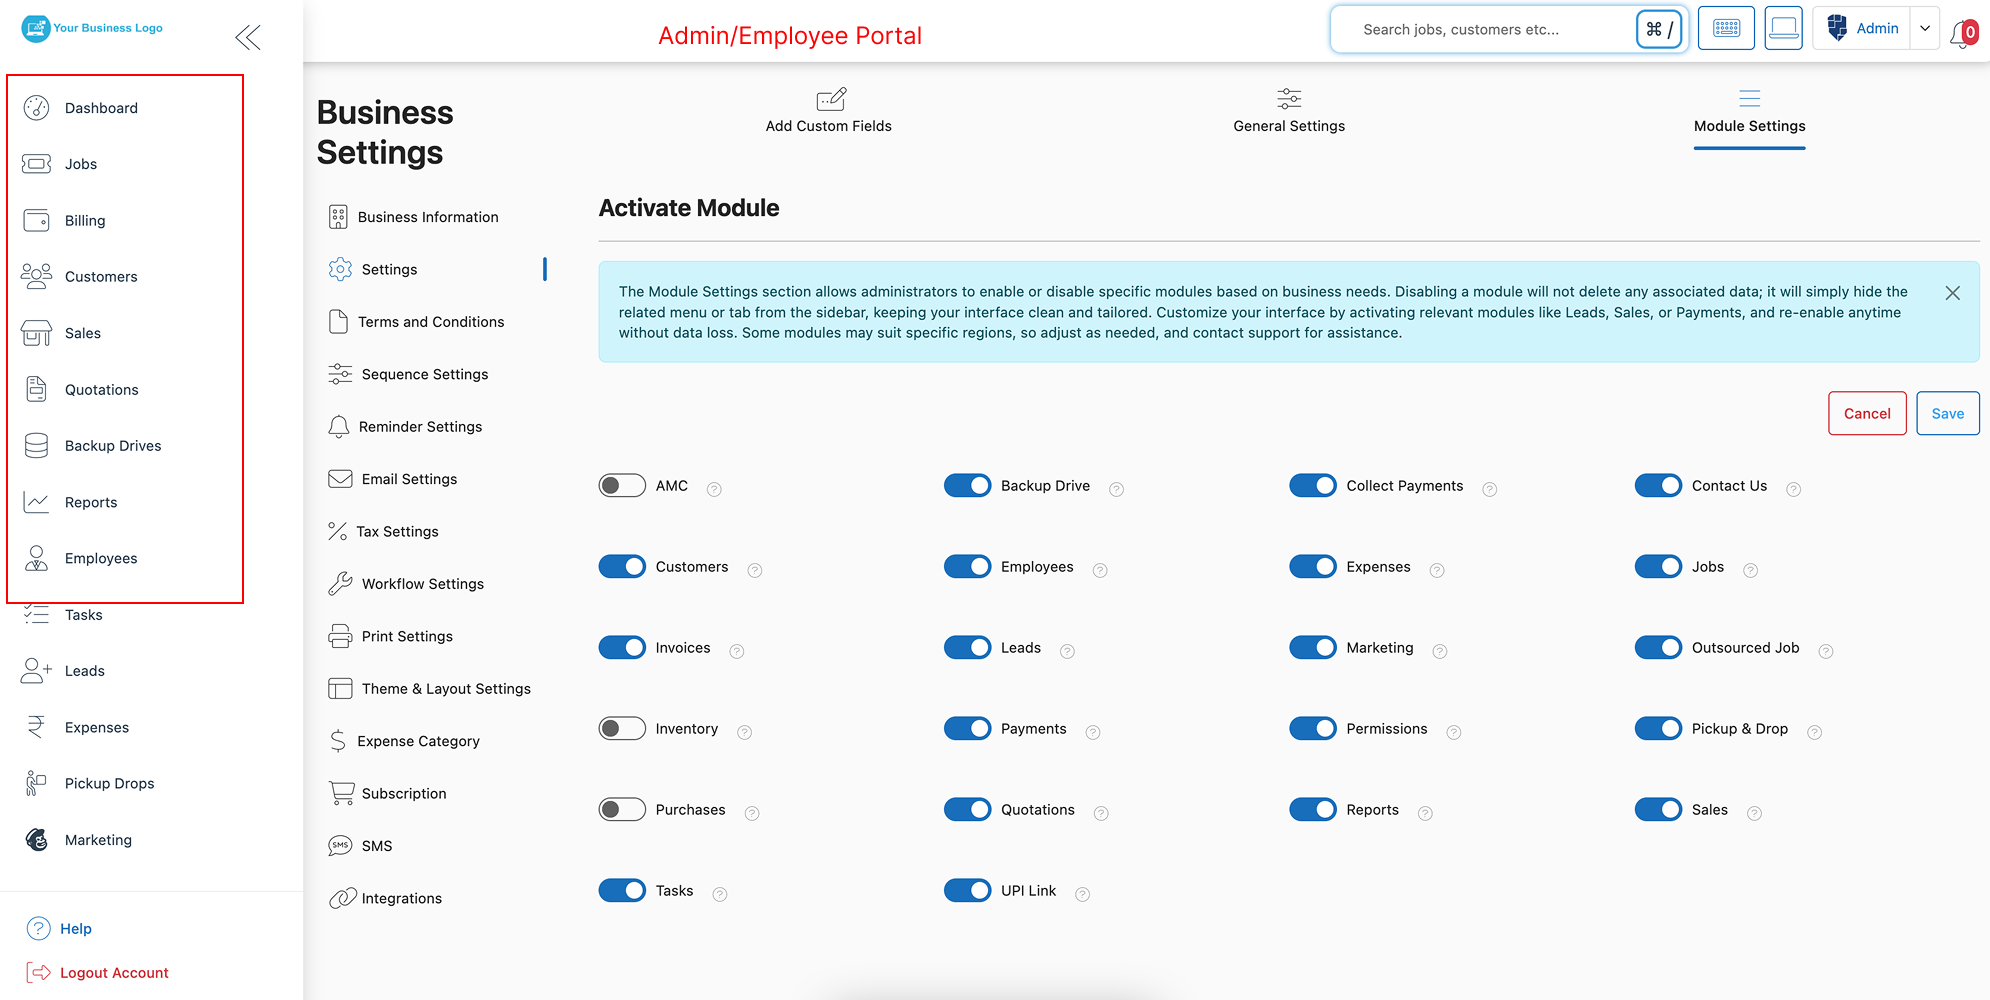
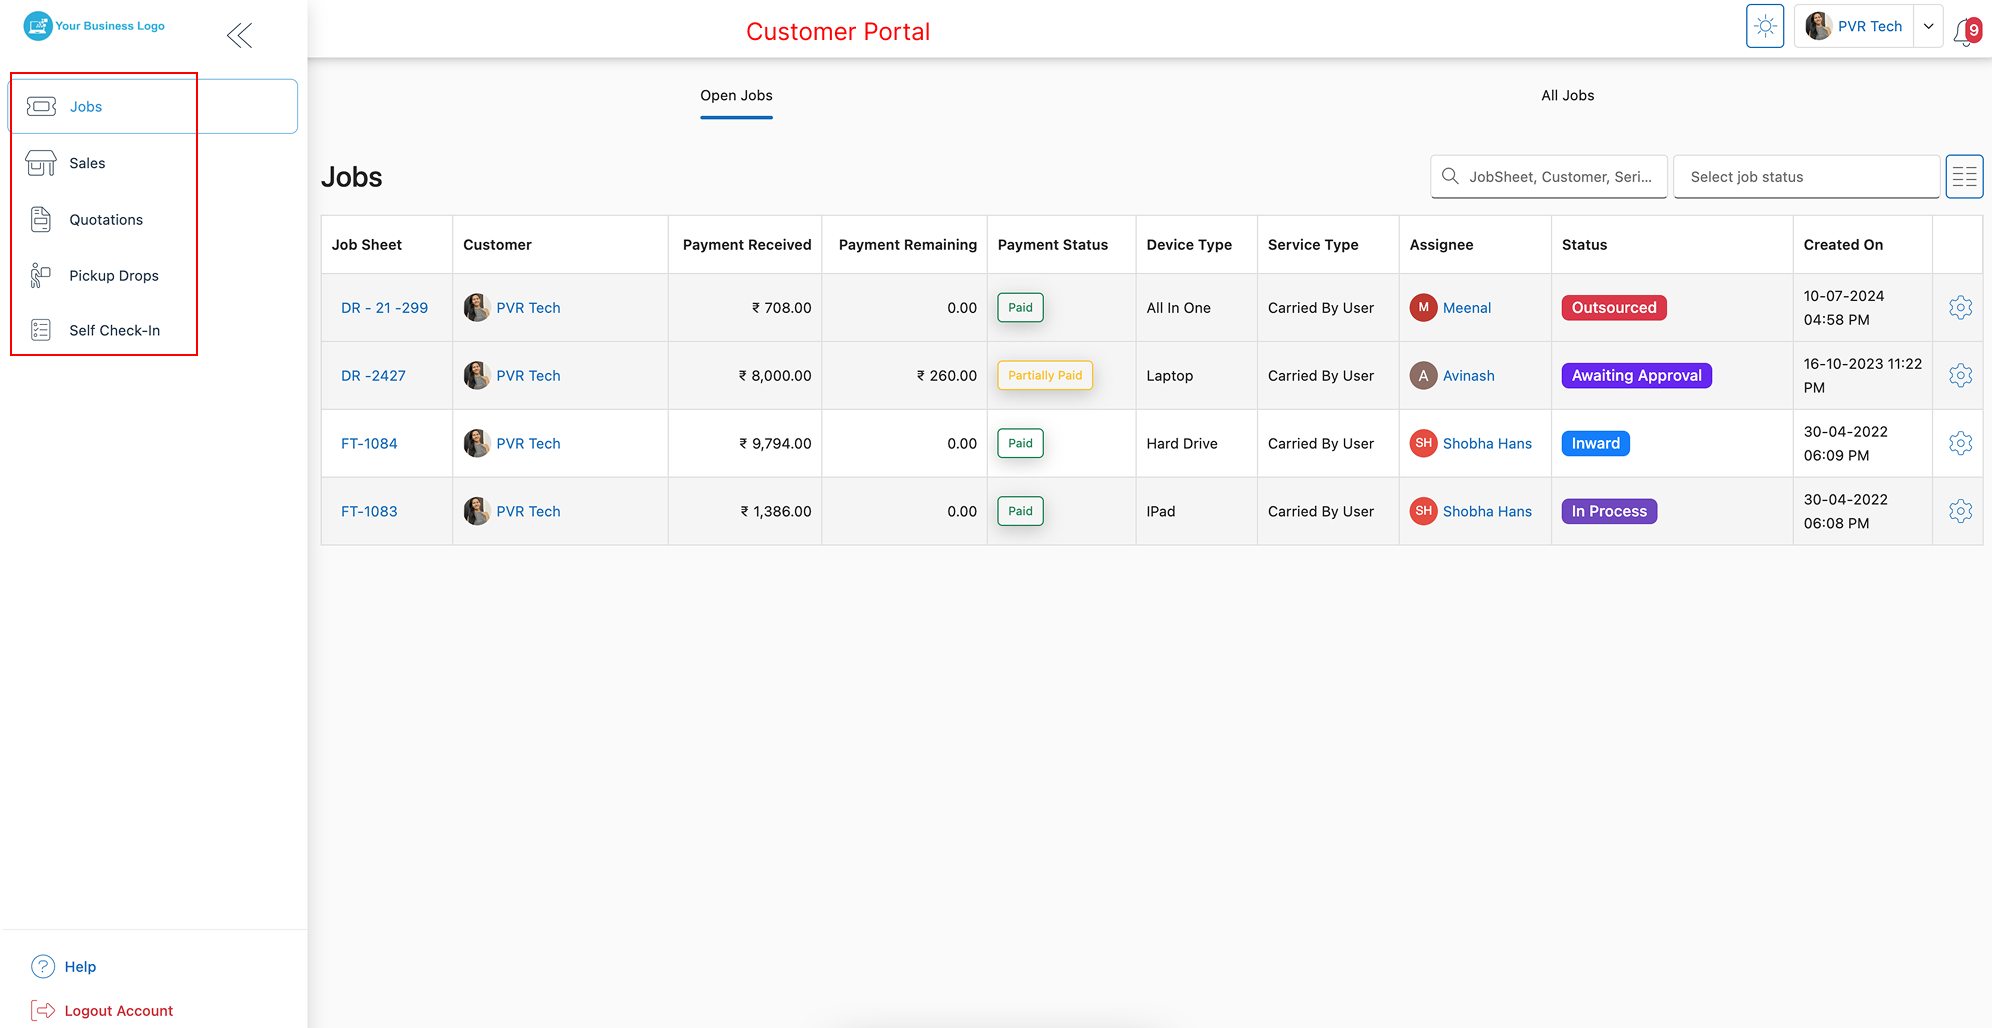
- You can disable modules separately for admins, employees, and customers, so each role sees a consistent, relevant interface.
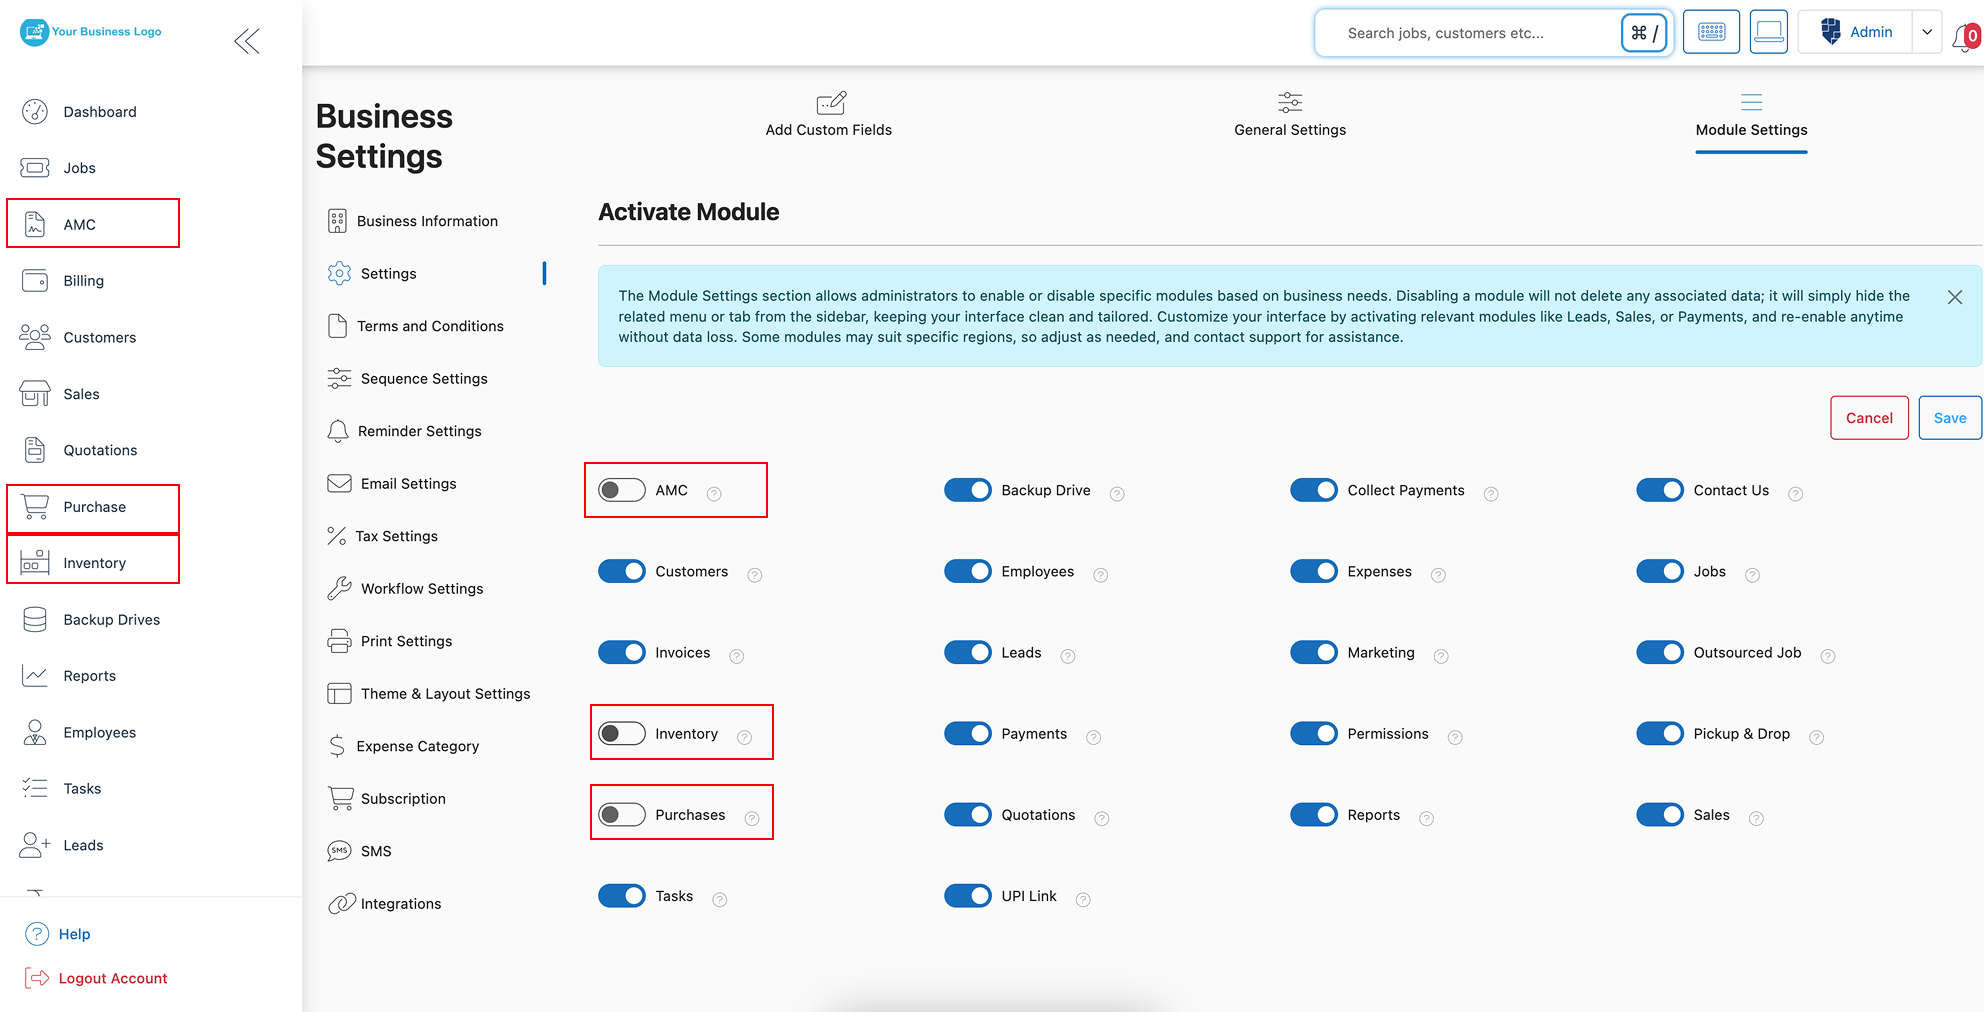
Note: Disabling a module does not delete any data — it simply hides the related tab or menu, and you can re-enable it anytime.
Step 6: Save Your Settings
- After making your selections, click “Save” to apply the changes.
- The next time you or other users log in, the hidden tabs will no longer be visible — giving everyone a cleaner, more relevant interface.
Key Features and Benefits of BytePhase Module Settings
- Customized user experience — show only relevant modules to different users for a focused, efficient workspace.
- Clutter-free dashboard — remove unnecessary tabs to simplify the interface and reduce confusion.
- Flexible adjustments — enable or disable modules anytime with no data loss.
- Enhanced employee efficiency — limit access to only what’s needed so employees stay focused on their tasks.
- Client-friendly interface — hide complex modules from customers to keep their portal simple and easy to navigate.
- Secure, controlled access — keep sensitive modules hidden from unauthorized users.
Practical Example: Using Module Settings for Business Efficiency
In a repair business, the sales team mainly needs the Leads module, while the service team focuses on Jobs and repair tickets. By customizing module settings in BytePhase, you can disable the Leads module for the service team so it doesn’t clutter their view. Likewise, if you’re not using a module like AMC Contracts yet, you can hide it to keep the dashboard organized — and reactivate it later without losing any saved data.
Best Practices for Managing Module Settings in BytePhase
- Review your enabled modules regularly to make sure they still match your current workflow.
- Keep only the modules you actually use enabled, to avoid clutter and confusion.
- Customize settings by user role — for example, keep financial modules visible only to admins.
- Test your settings before finalizing them, to confirm the right modules are visible to the right user groups.
- Let your team know which modules are active and how to reach them, so the change doesn’t disrupt their workflow.
Conclusion: Take Full Control of Your CRM Interface
Setting up module settings in the BytePhase portal is a simple way to personalize your CRM for the way your team actually works. It keeps everyone focused on what matters, improves the day-to-day user experience, and keeps your dashboard clean. Because you can adjust and re-enable modules at any time, you stay in full control without any risk to your data.
New to BytePhase? Start your 15-day free trial and set up module settings for your team in minutes.
Need assistance? Check our Help Center or contact BytePhase Support for expert help.