
How to Create a Self Check-In Form for Laptop Repair Management CRM Software?

How to Create a Self Check-In Form in Laptop Repair Management CRM Software
Learn how to create a self check-in form for device repair or data recovery, so customers can start a service request without waiting at the counter.
Whether a customer needs a quick repair or data recovery, an efficient self check-in process saves everyone time. This guide walks through setting up self check-in in laptop repair software, from opening the portal to scheduling a pickup.
Why Choose Self Check-In for Laptop Repairs?
Self check-in offers several benefits:
- Convenience: Complete the process from anywhere, at any time.
- Time-Saving: No long queues or waiting periods.
- Transparency: Keep track of your device’s repair or recovery journey effortlessly.
Step-by-Step Guide: How to Create a Self Check-In Form for Laptop Repair Management CRM Software
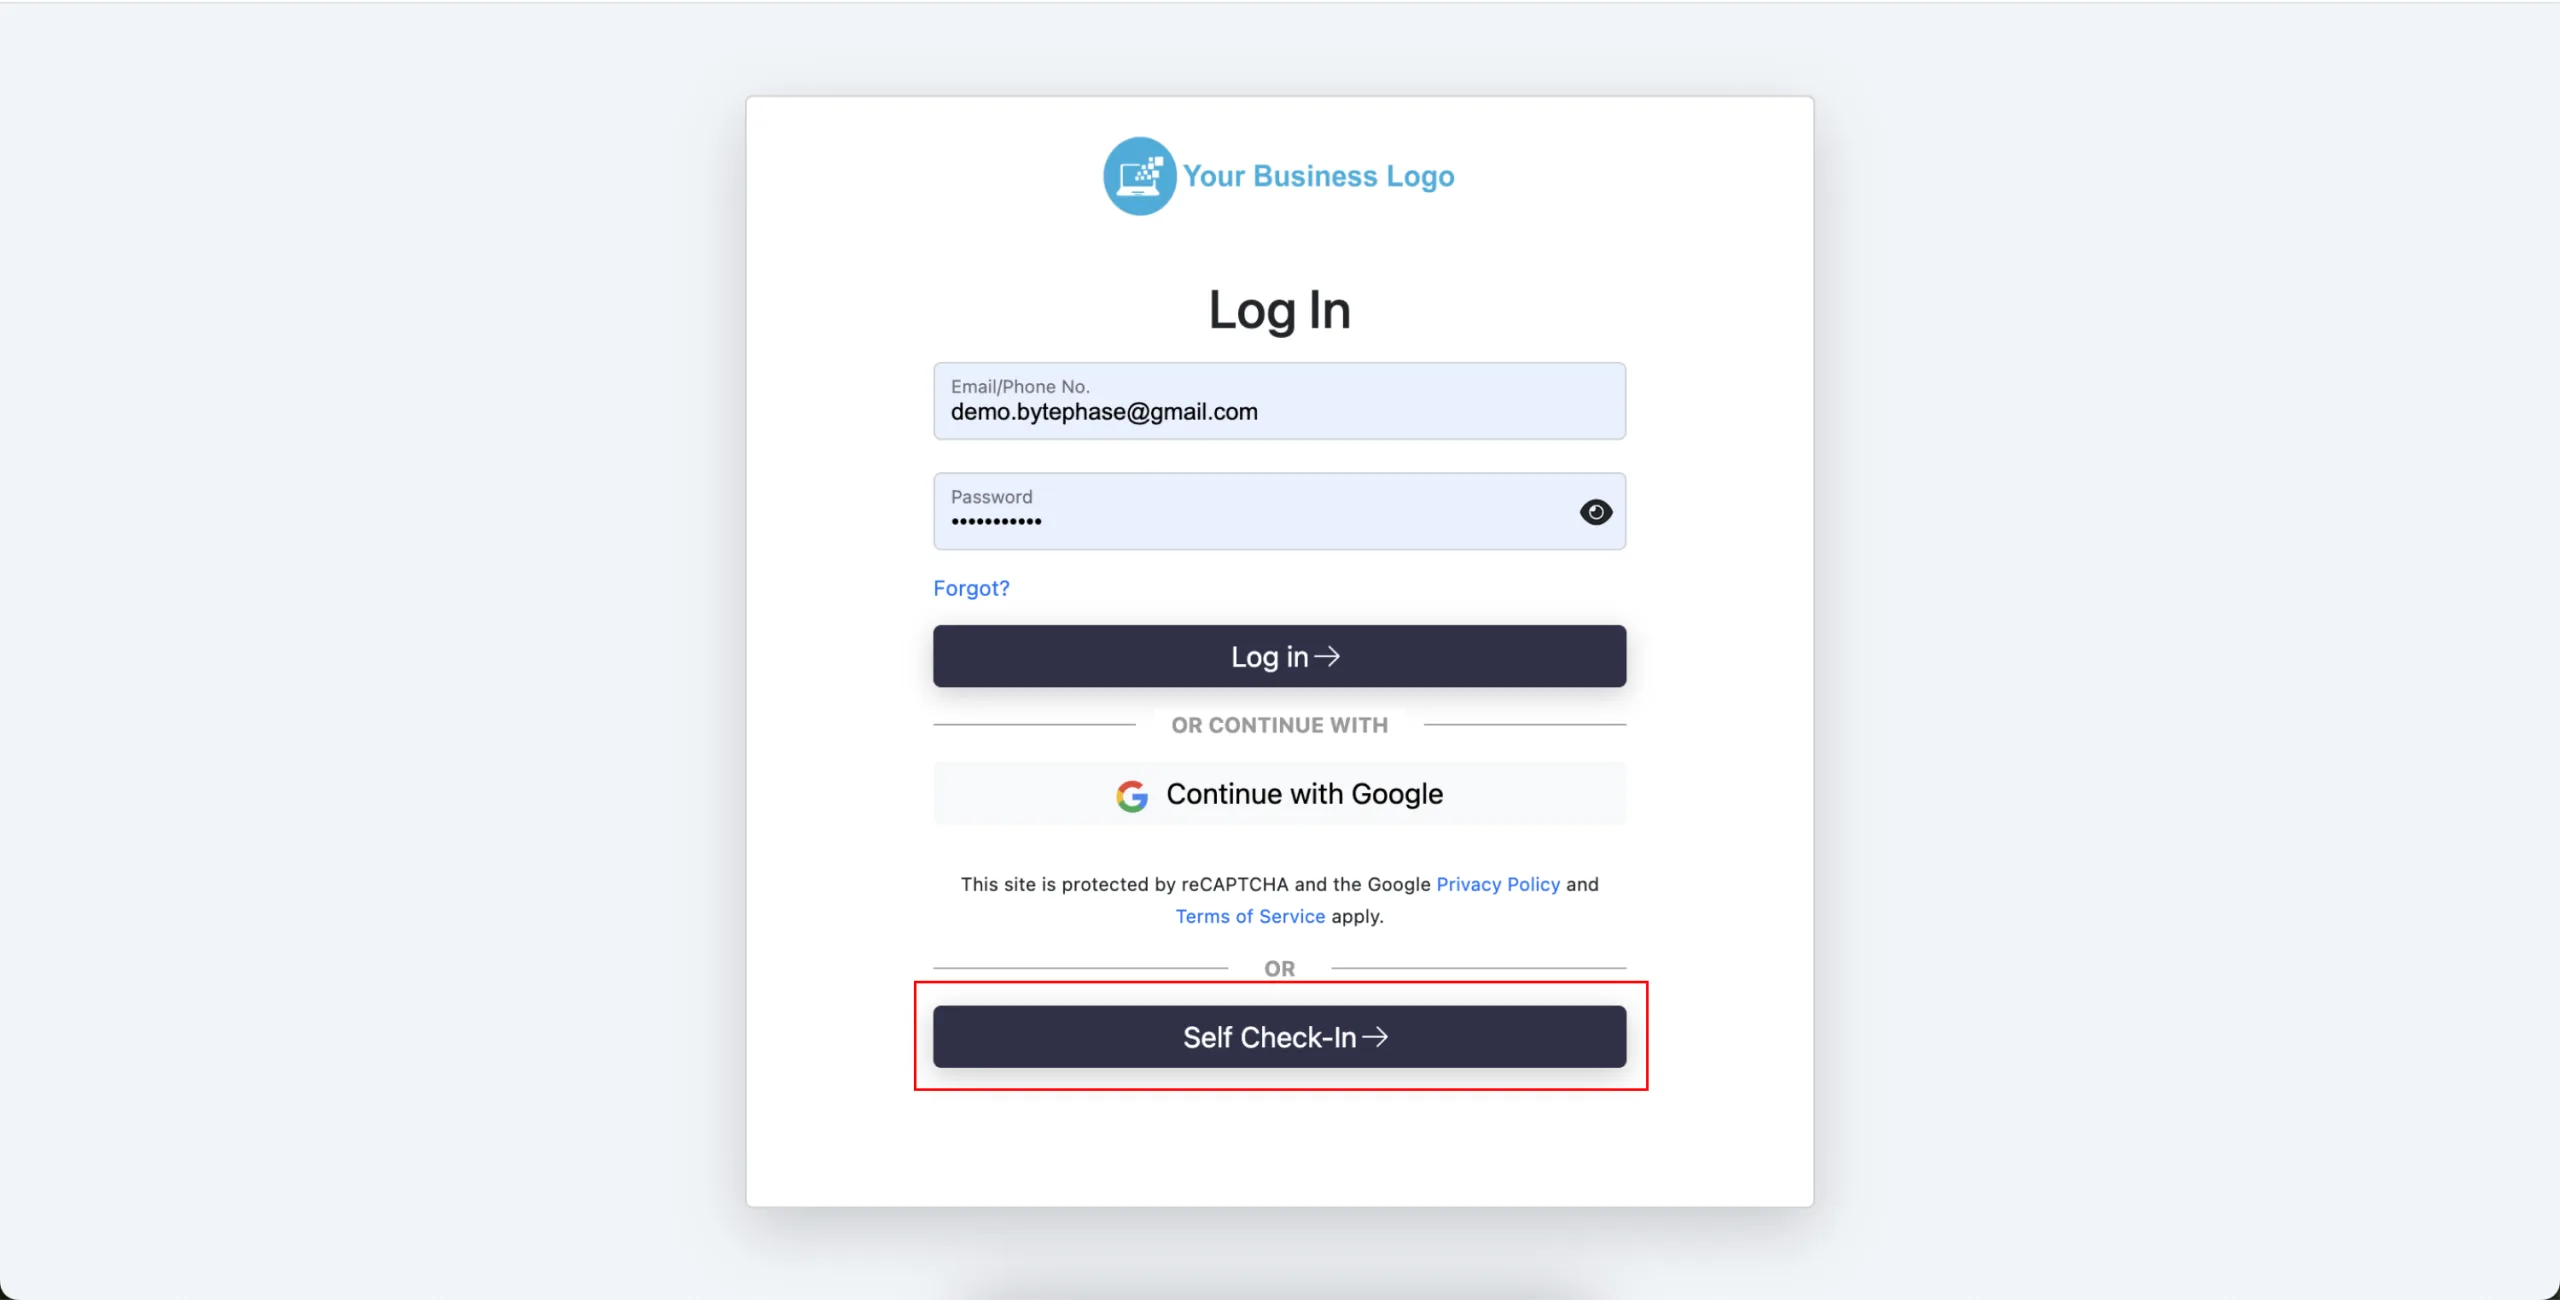
Step 1: Access the Self Check-In Portal
- Head over to the login page of your service provider’s portal.
- Click on the Self Check-In button to begin.
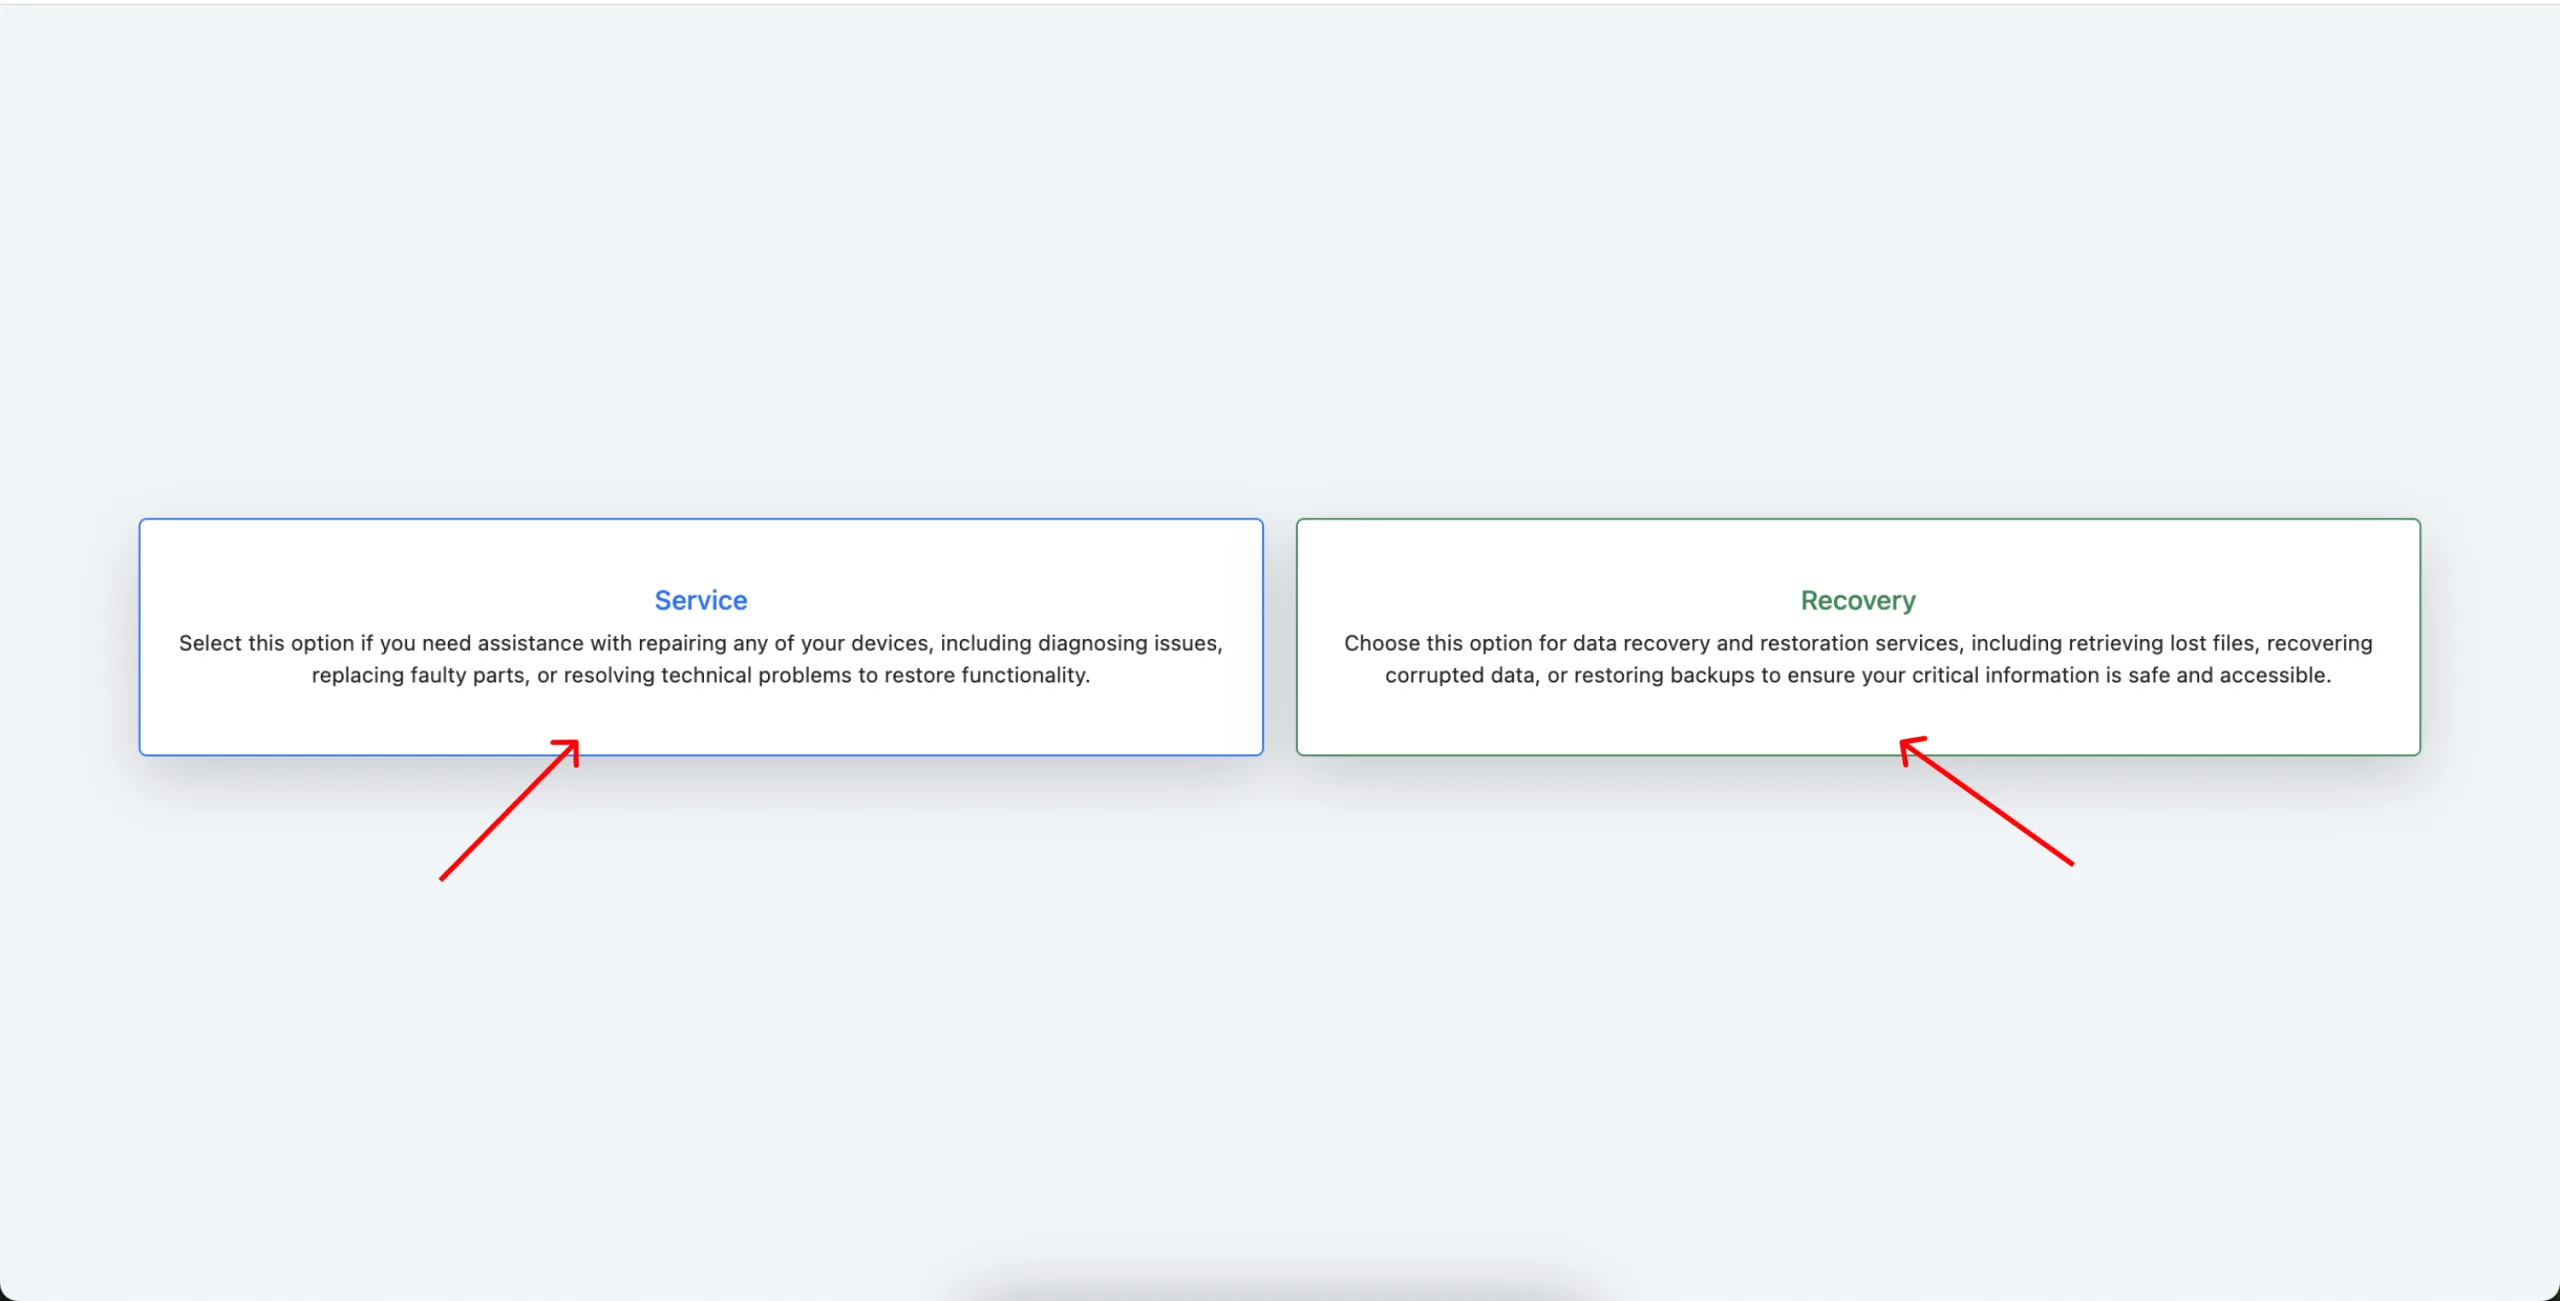
Step 2: Select your service type for laptop repair or data recovery.
- Alternatively, choose “Repair Service” if you need device repair assistance.
- Or select “Recovery Service” if you need data recovery from your device.
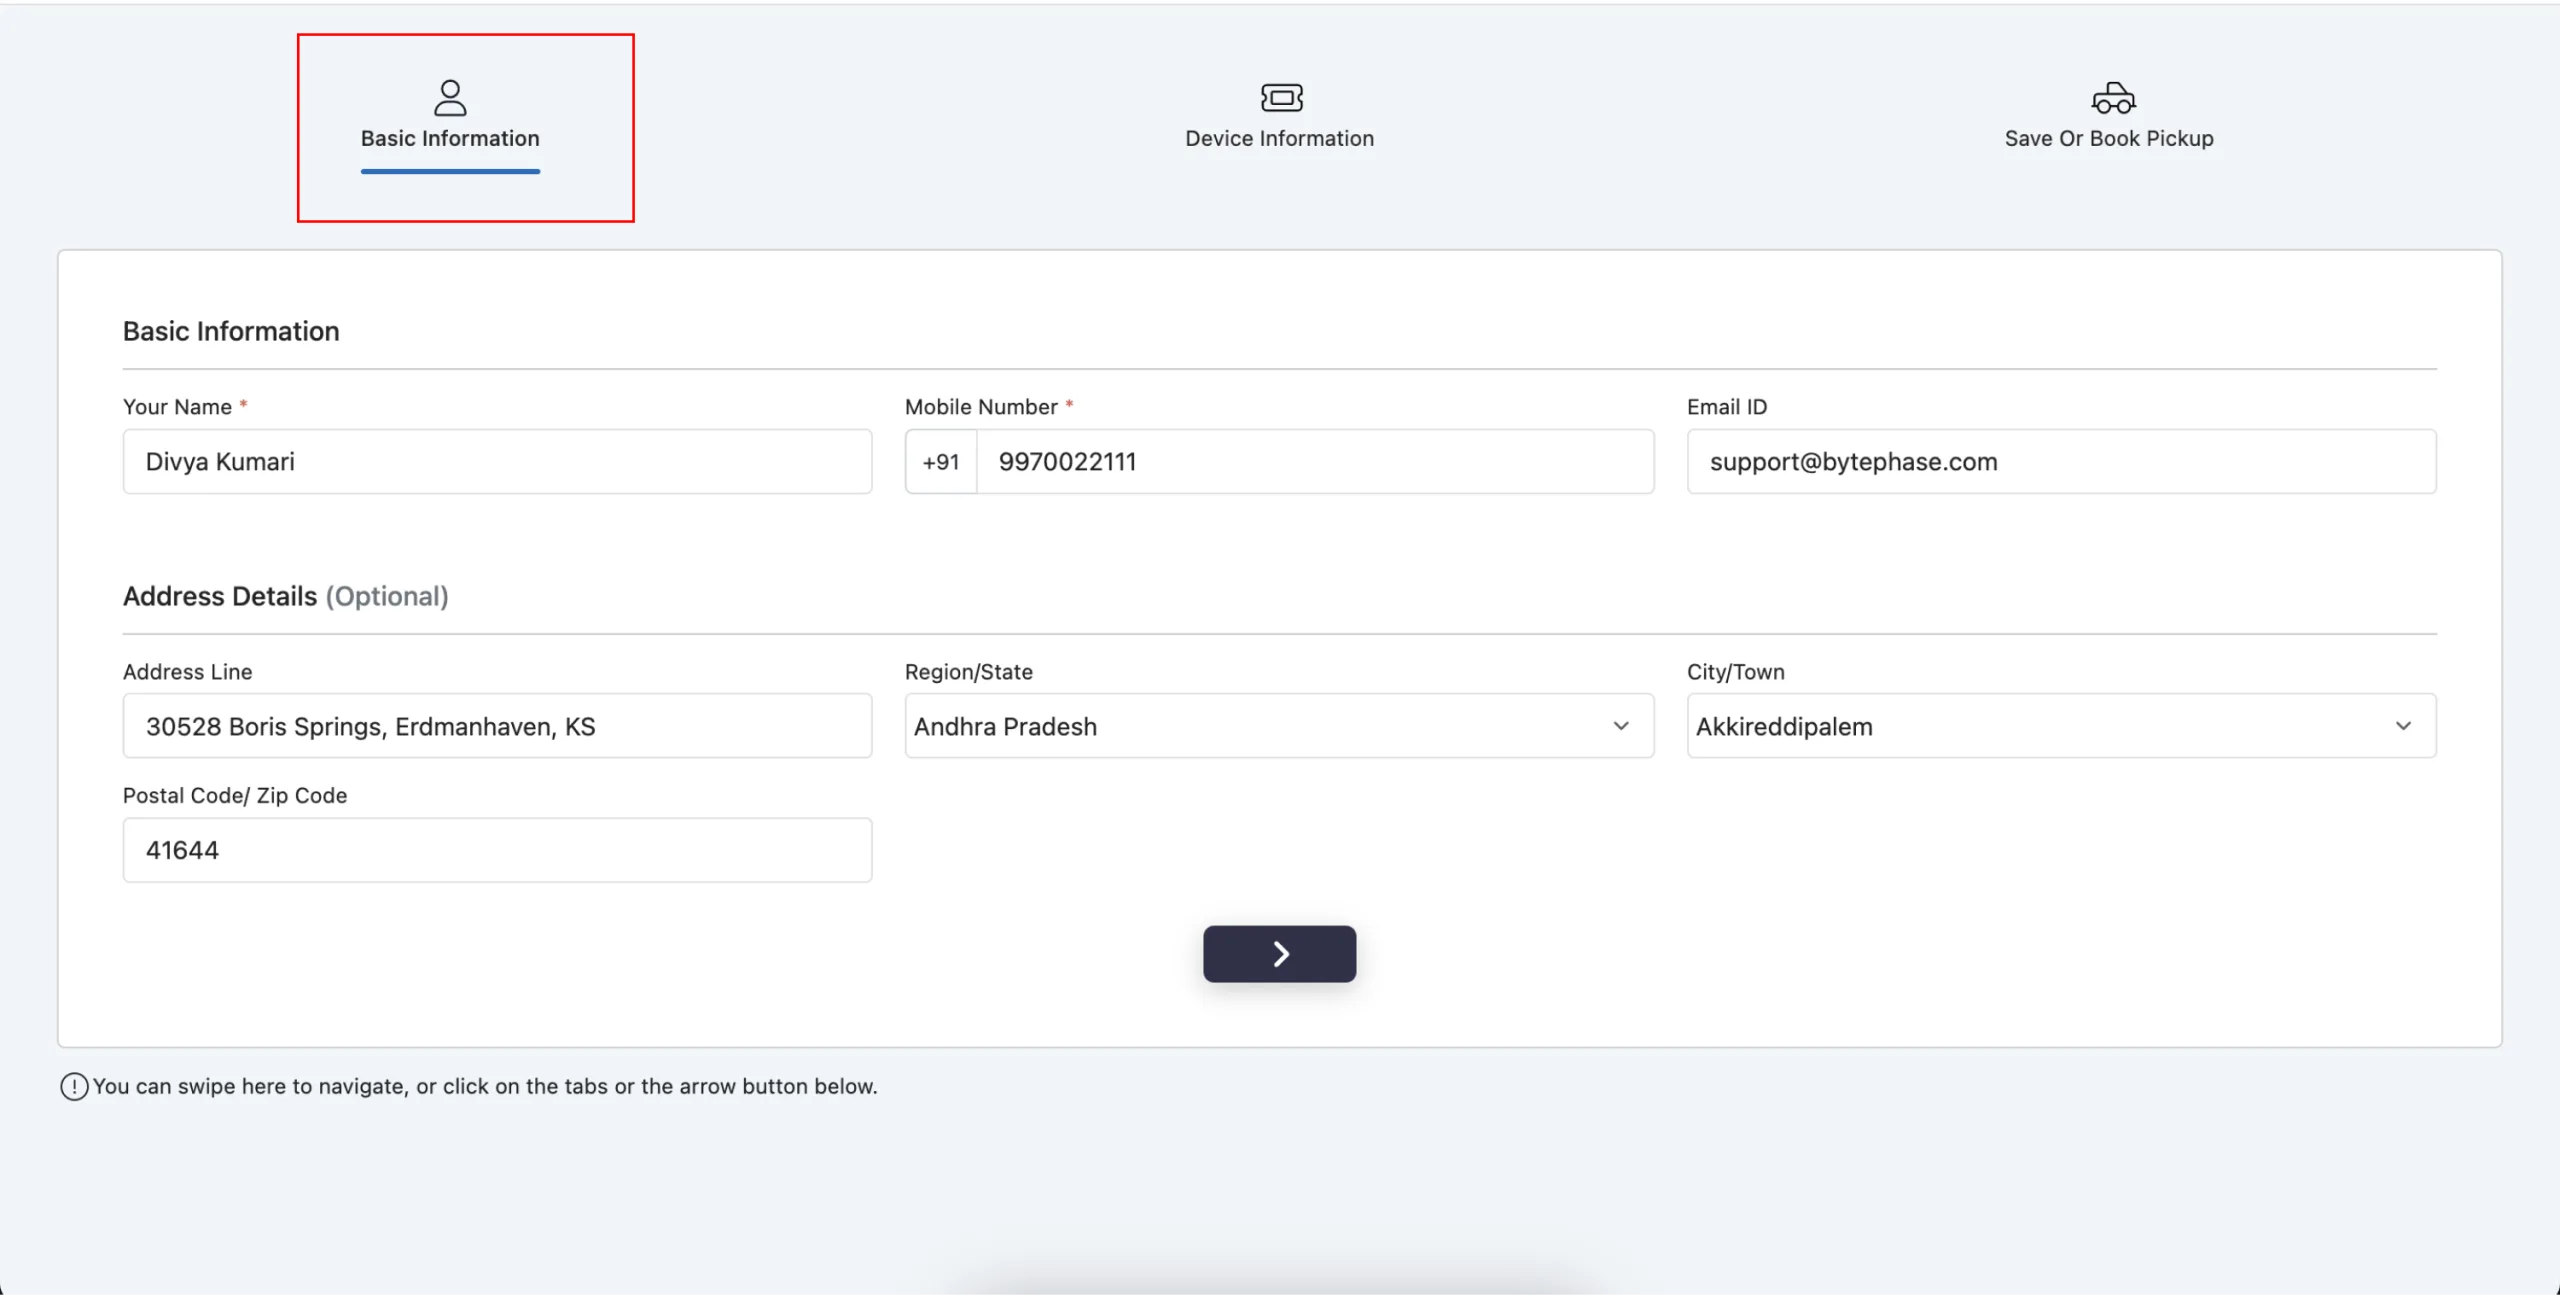
Step 3: Fill in your personal information. Then, proceed with the next step
- Provide accurate details to ensure a smooth process: Name, Mobile Number, Email ID, Address
- Once done, click on the Next arrow button.
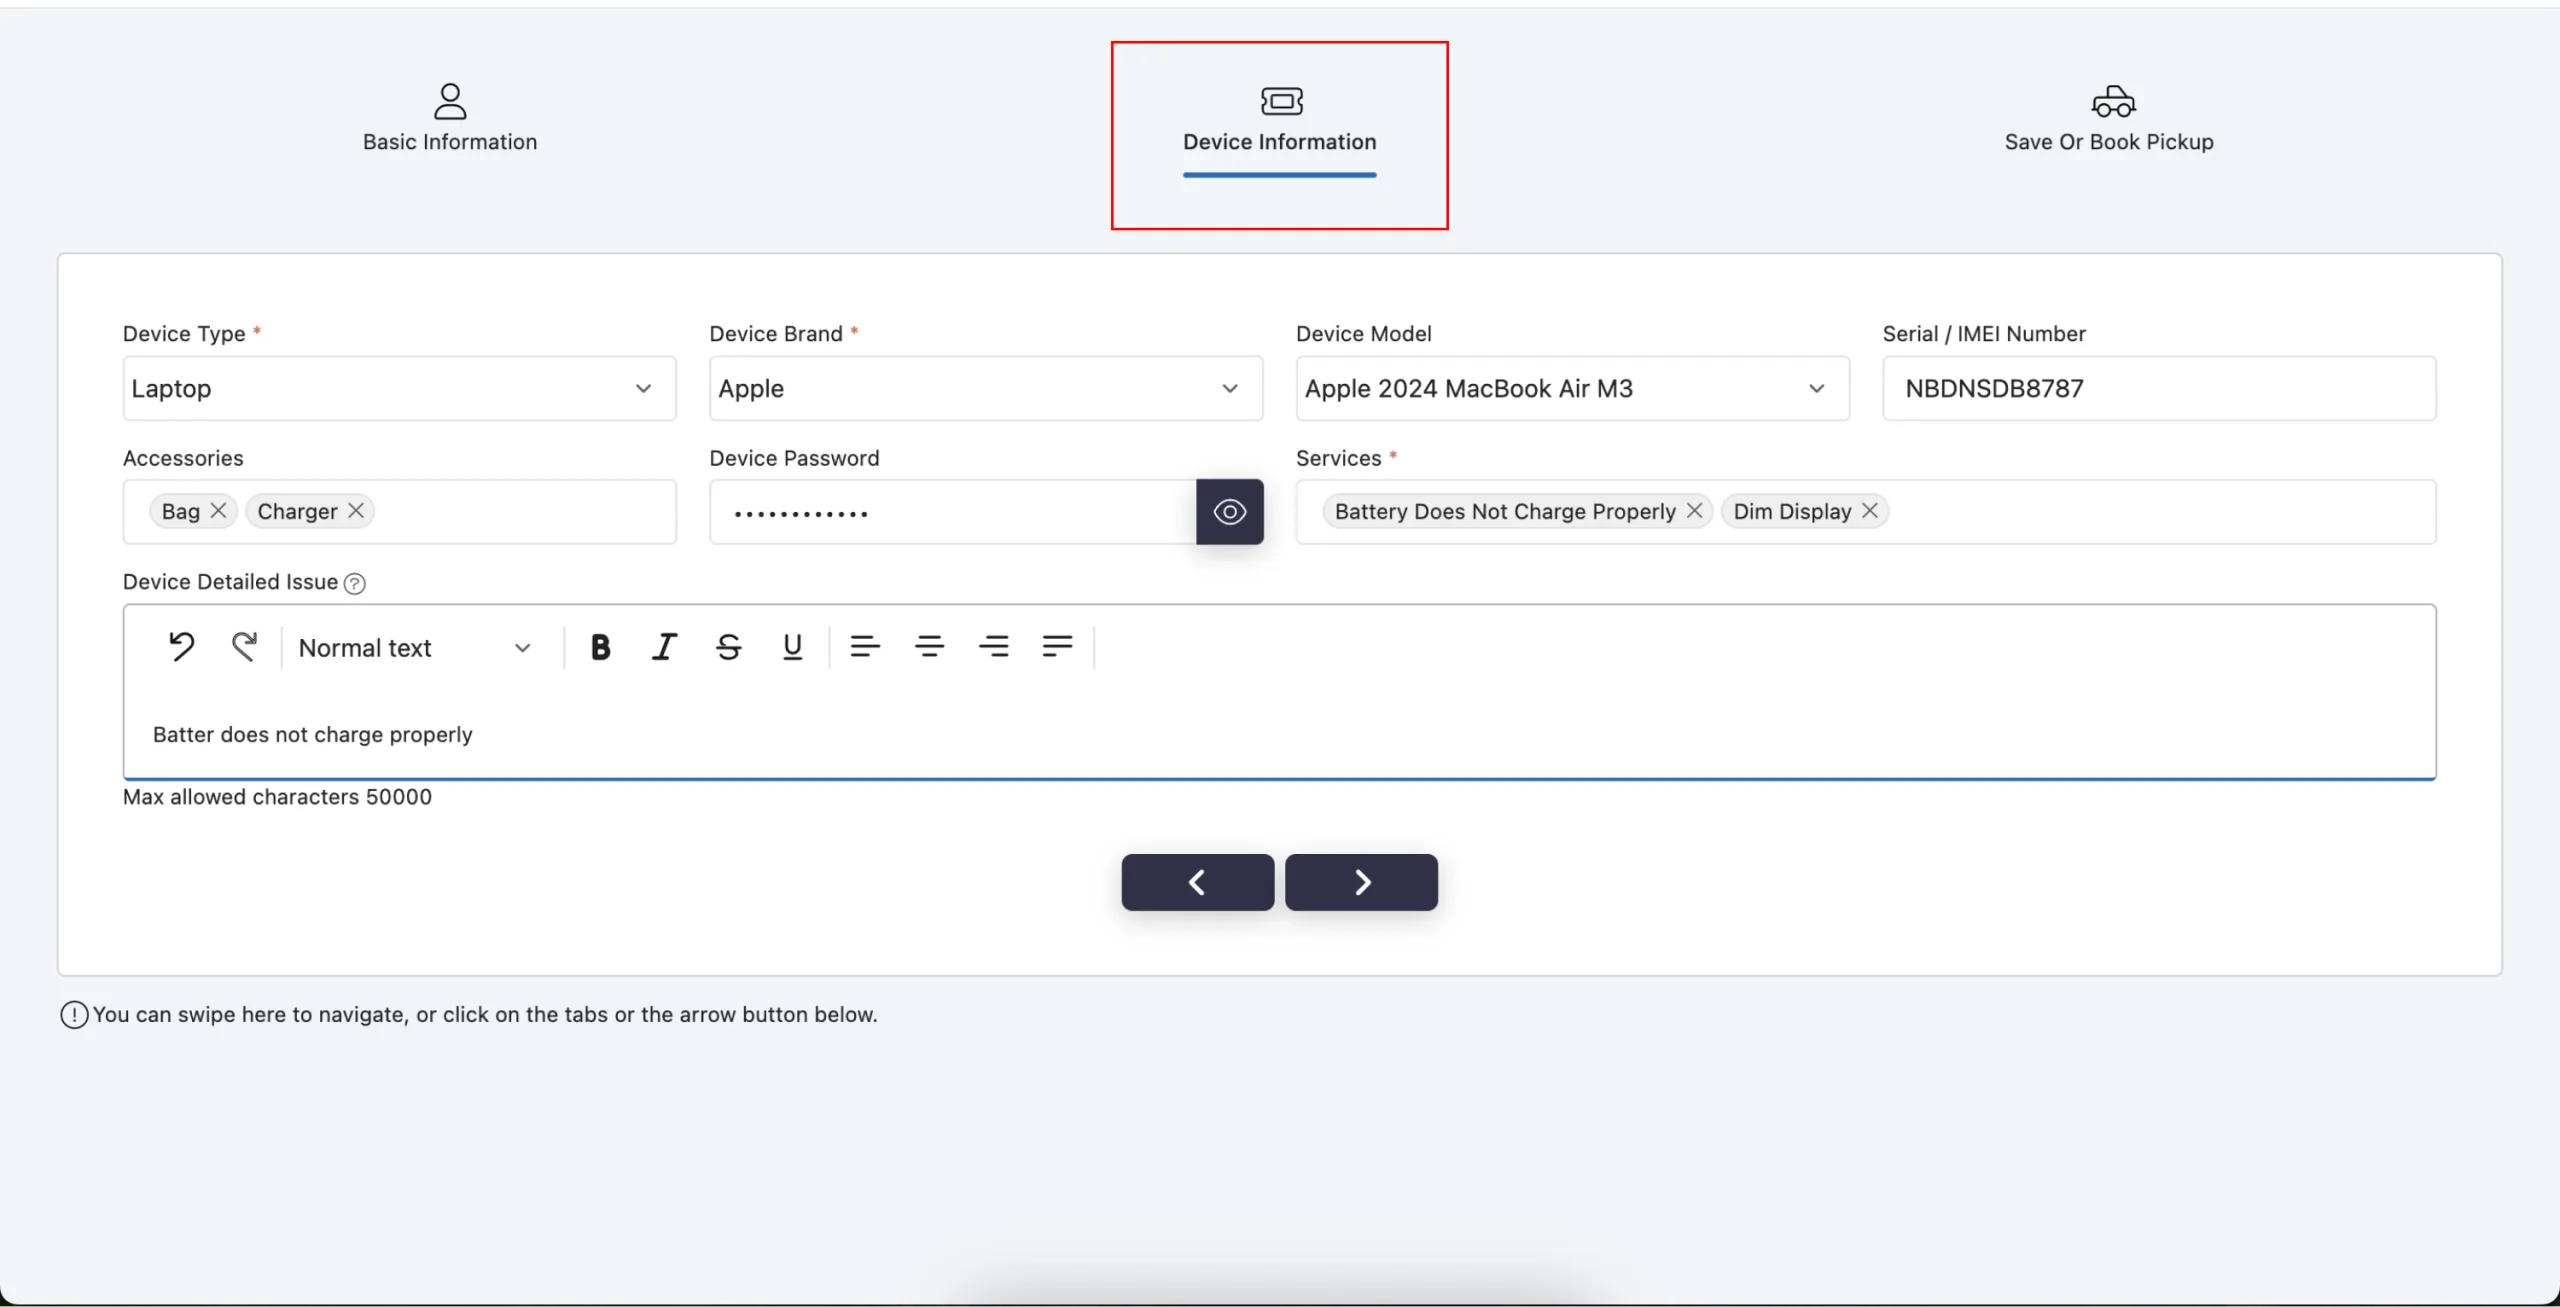
Step 4: Provide Device Information
- For instance, provide specific information about your device, such as Device Type (e.g., smartphone, tablet, laptop) and Device Brand (e.g., Apple, Samsung, Dell), along with any other relevant details to ensure a smooth check-in.
- Hit the Next arrow button once all fields are completed.
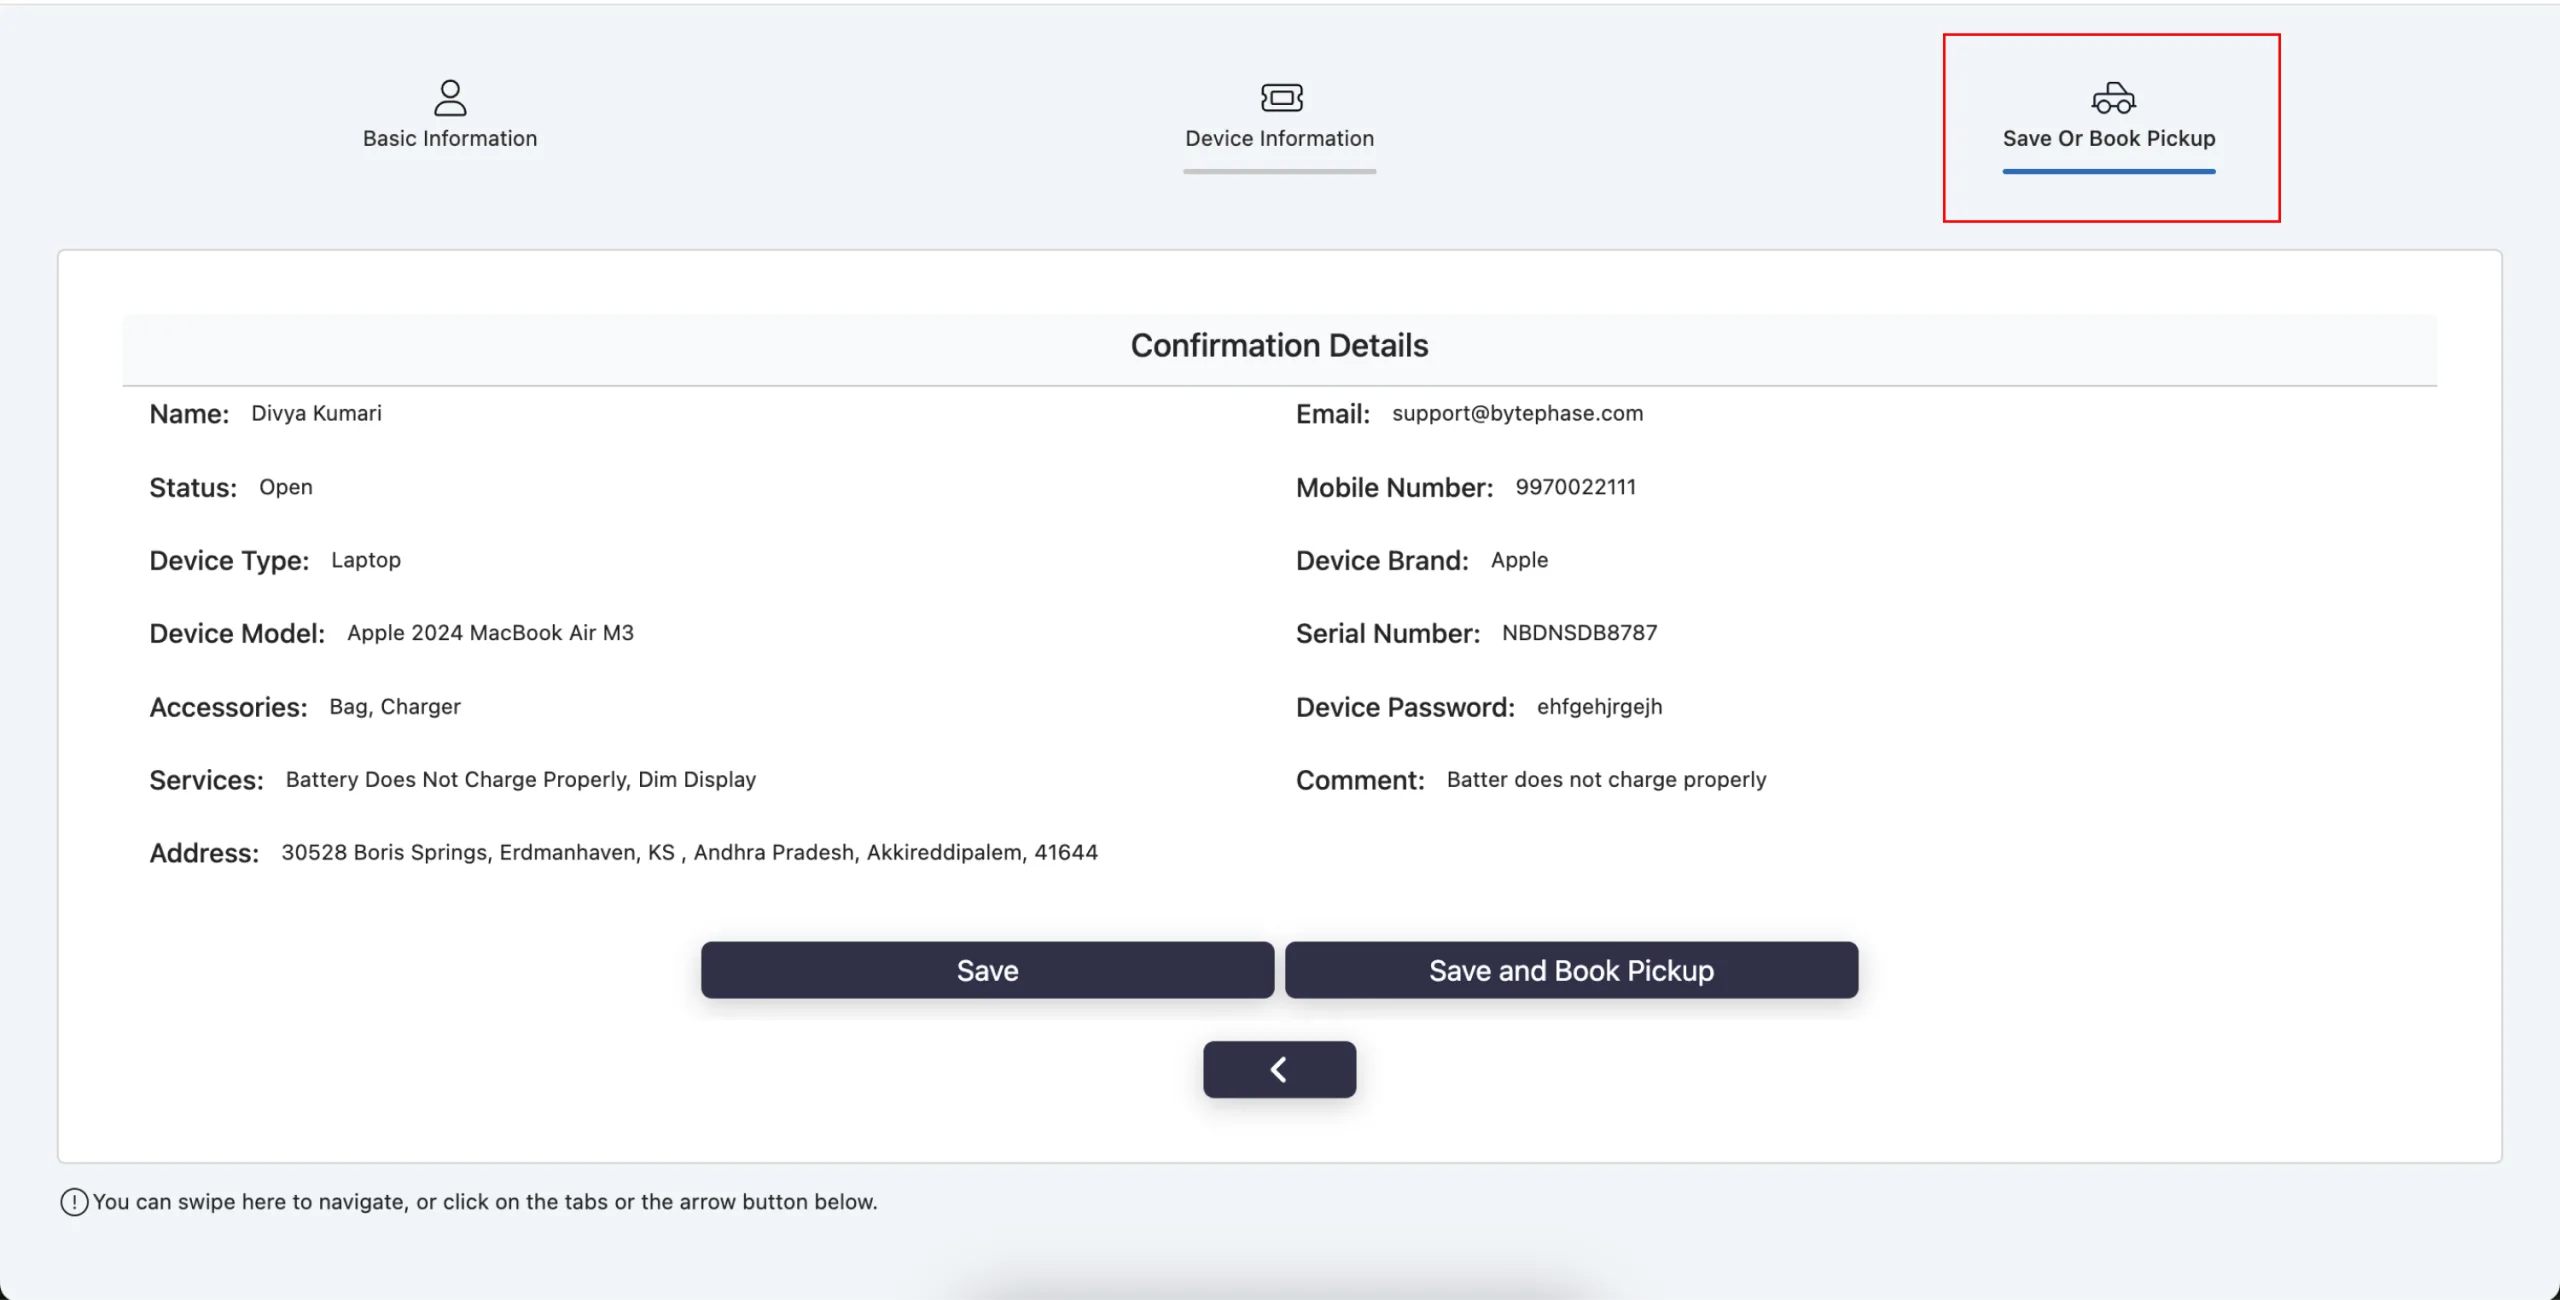
Step 5: Save your self check-in request for laptop repair. If needed, you can also book a pickup for added convenience.
- Alternatively, if you’re dropping off the device yourself, just click the Save button to finalize the check-in, saving you time and effort.
- Select Save and Book Pickup to arrange for a pickup.
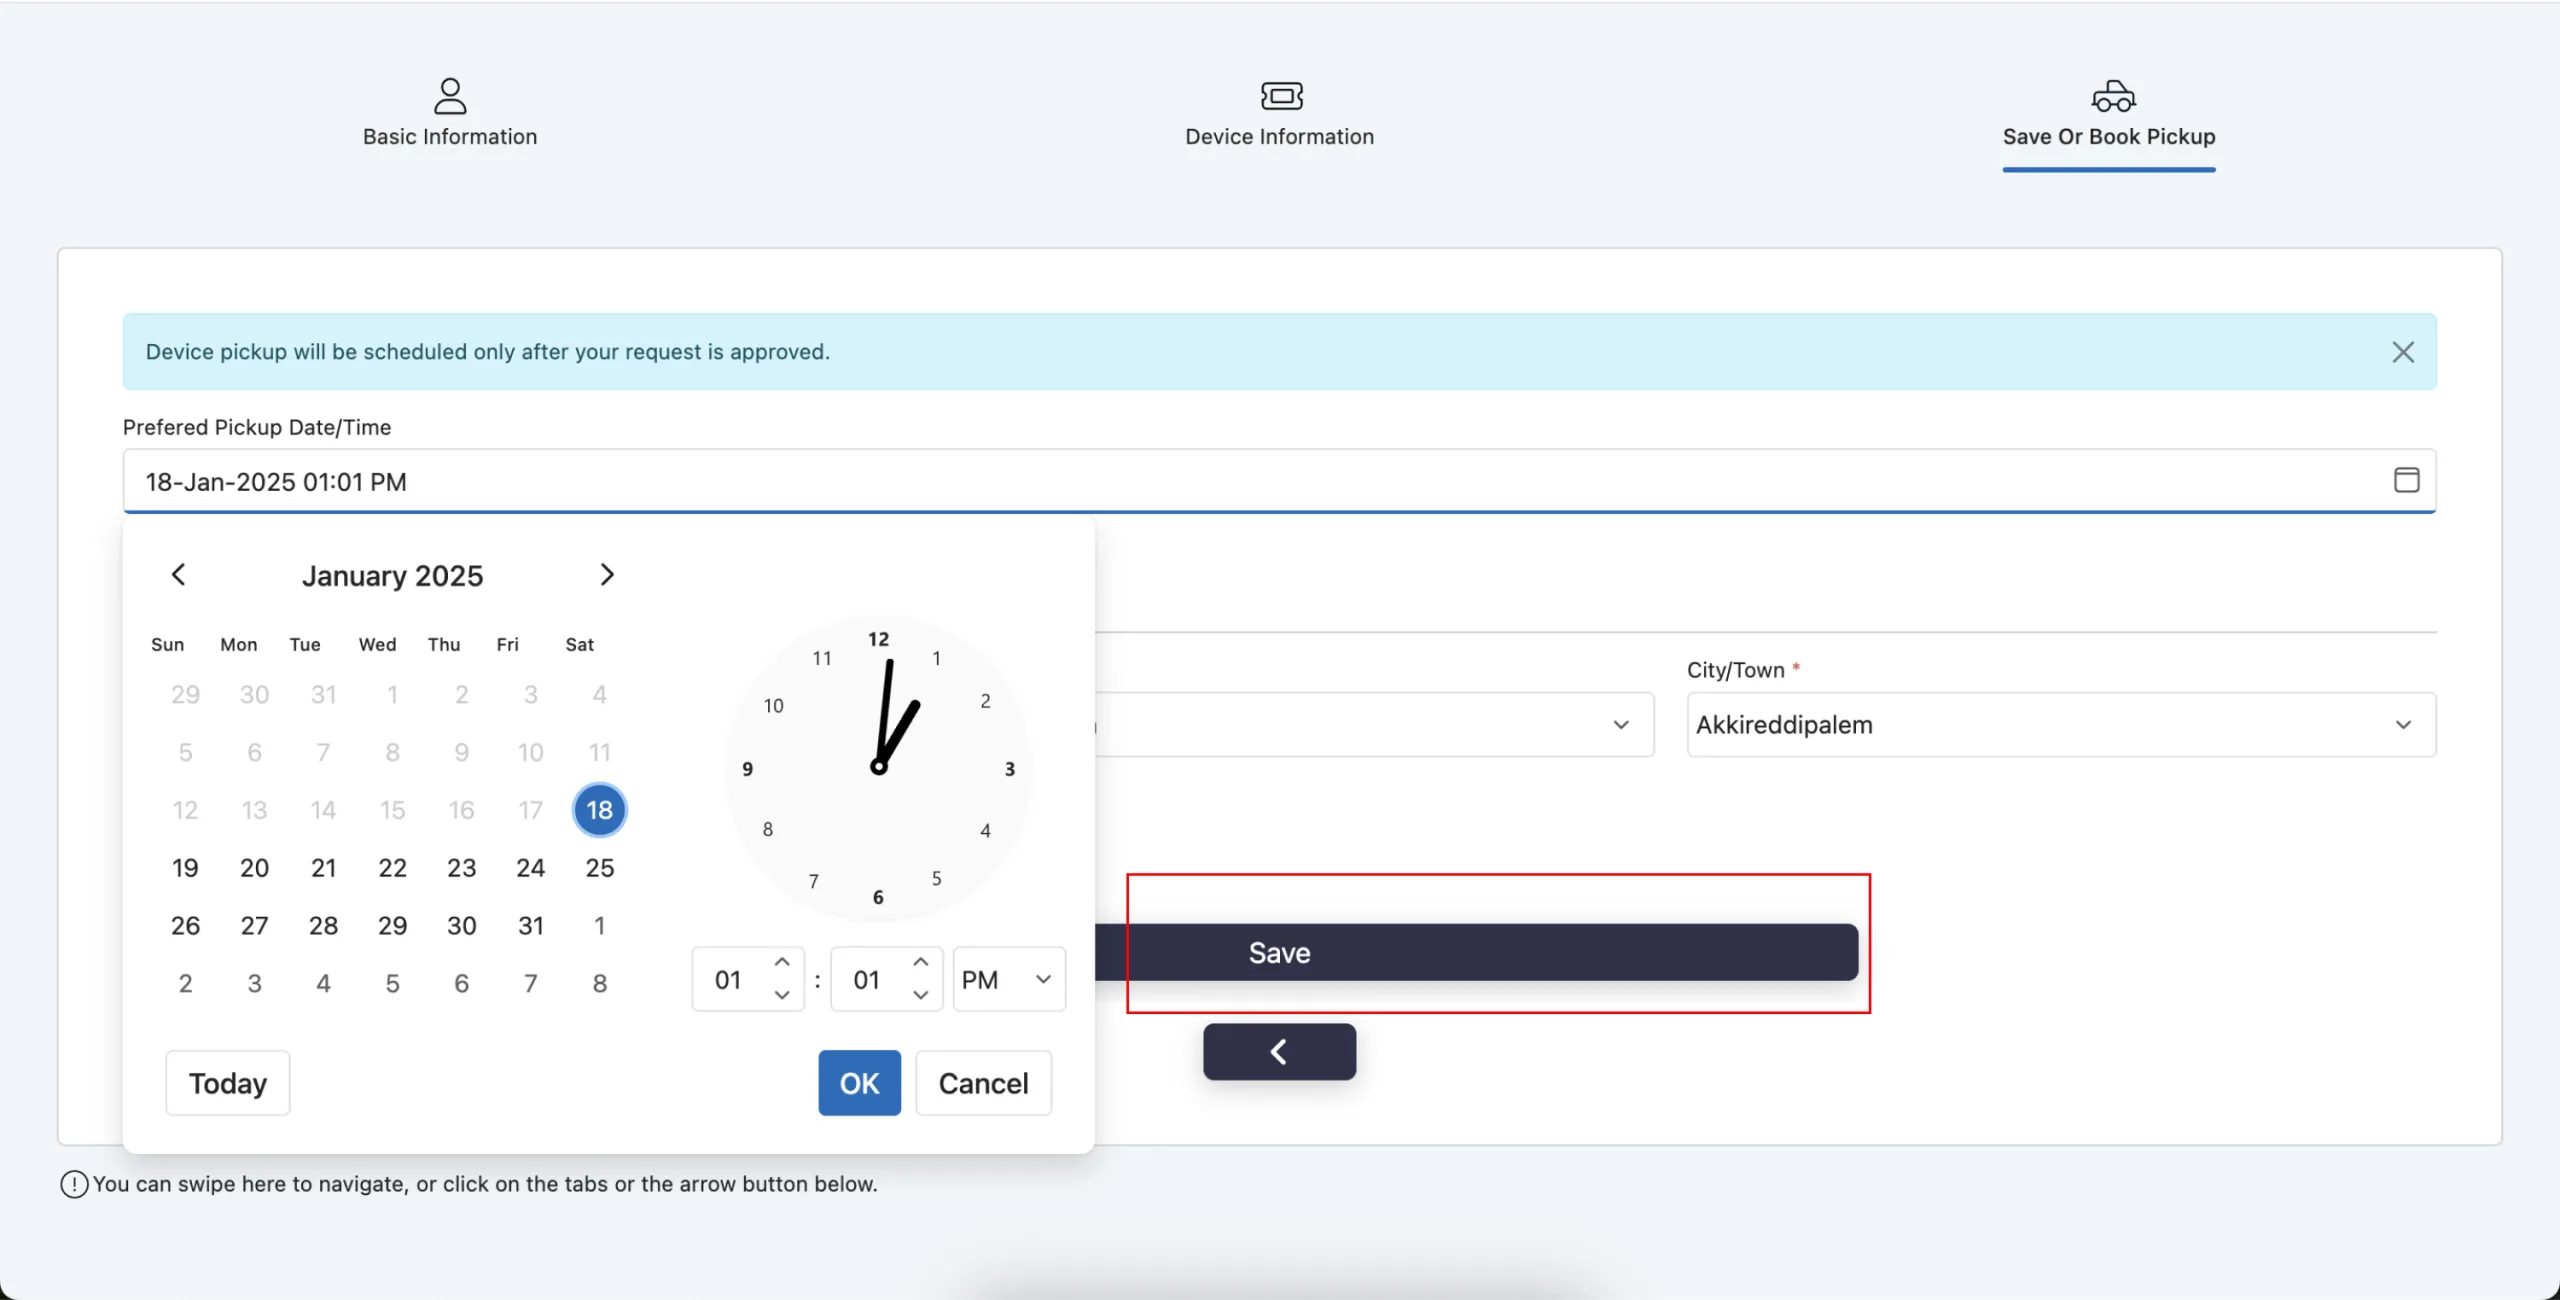
Step 6: Schedule Your Device Pickup Time
Choose your preferred pickup:
- Choose a pickup date and time that convenient for you.
- Provide the pickup address to ensure an efficient collection process.
Step 7: Repeat for another device, if needed
To check in another device, click “Submit Another Self Check-In” and repeat the steps above.
Watch a video walkthrough here.
The self check-in form gives repair customers a faster way to start a service request, and gives your front desk one less queue to manage.
Sign up now and simplify your repair workflow.